If you've edited your box content information, you'll need to transmit the updated information to Amazon. To do so, follow along with the steps below!
Note: With the Send to Amazon workflow, you can only follow the steps below prior to navigating to the shipment's page in Seller Central. Once you are on the shipment page with Send to Amazon, changes can no longer be made through their API.
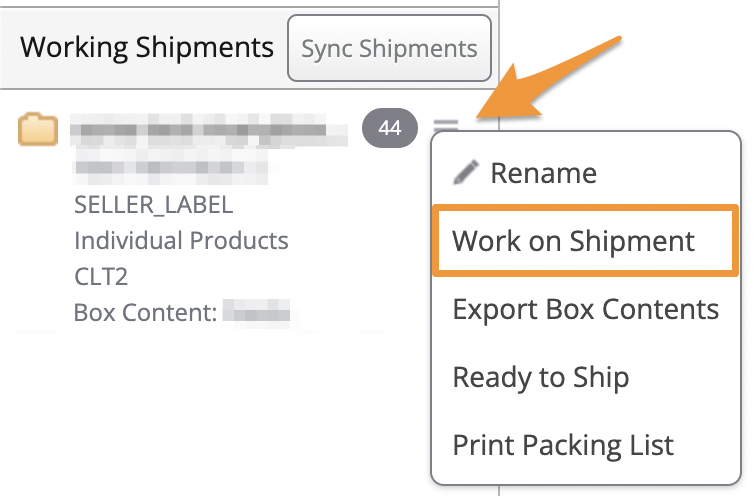
From the List>List & Prep page, locate the shipment in the Working Shipments area, click the 3 horizontal lines next to it, and select Work on Shipment.
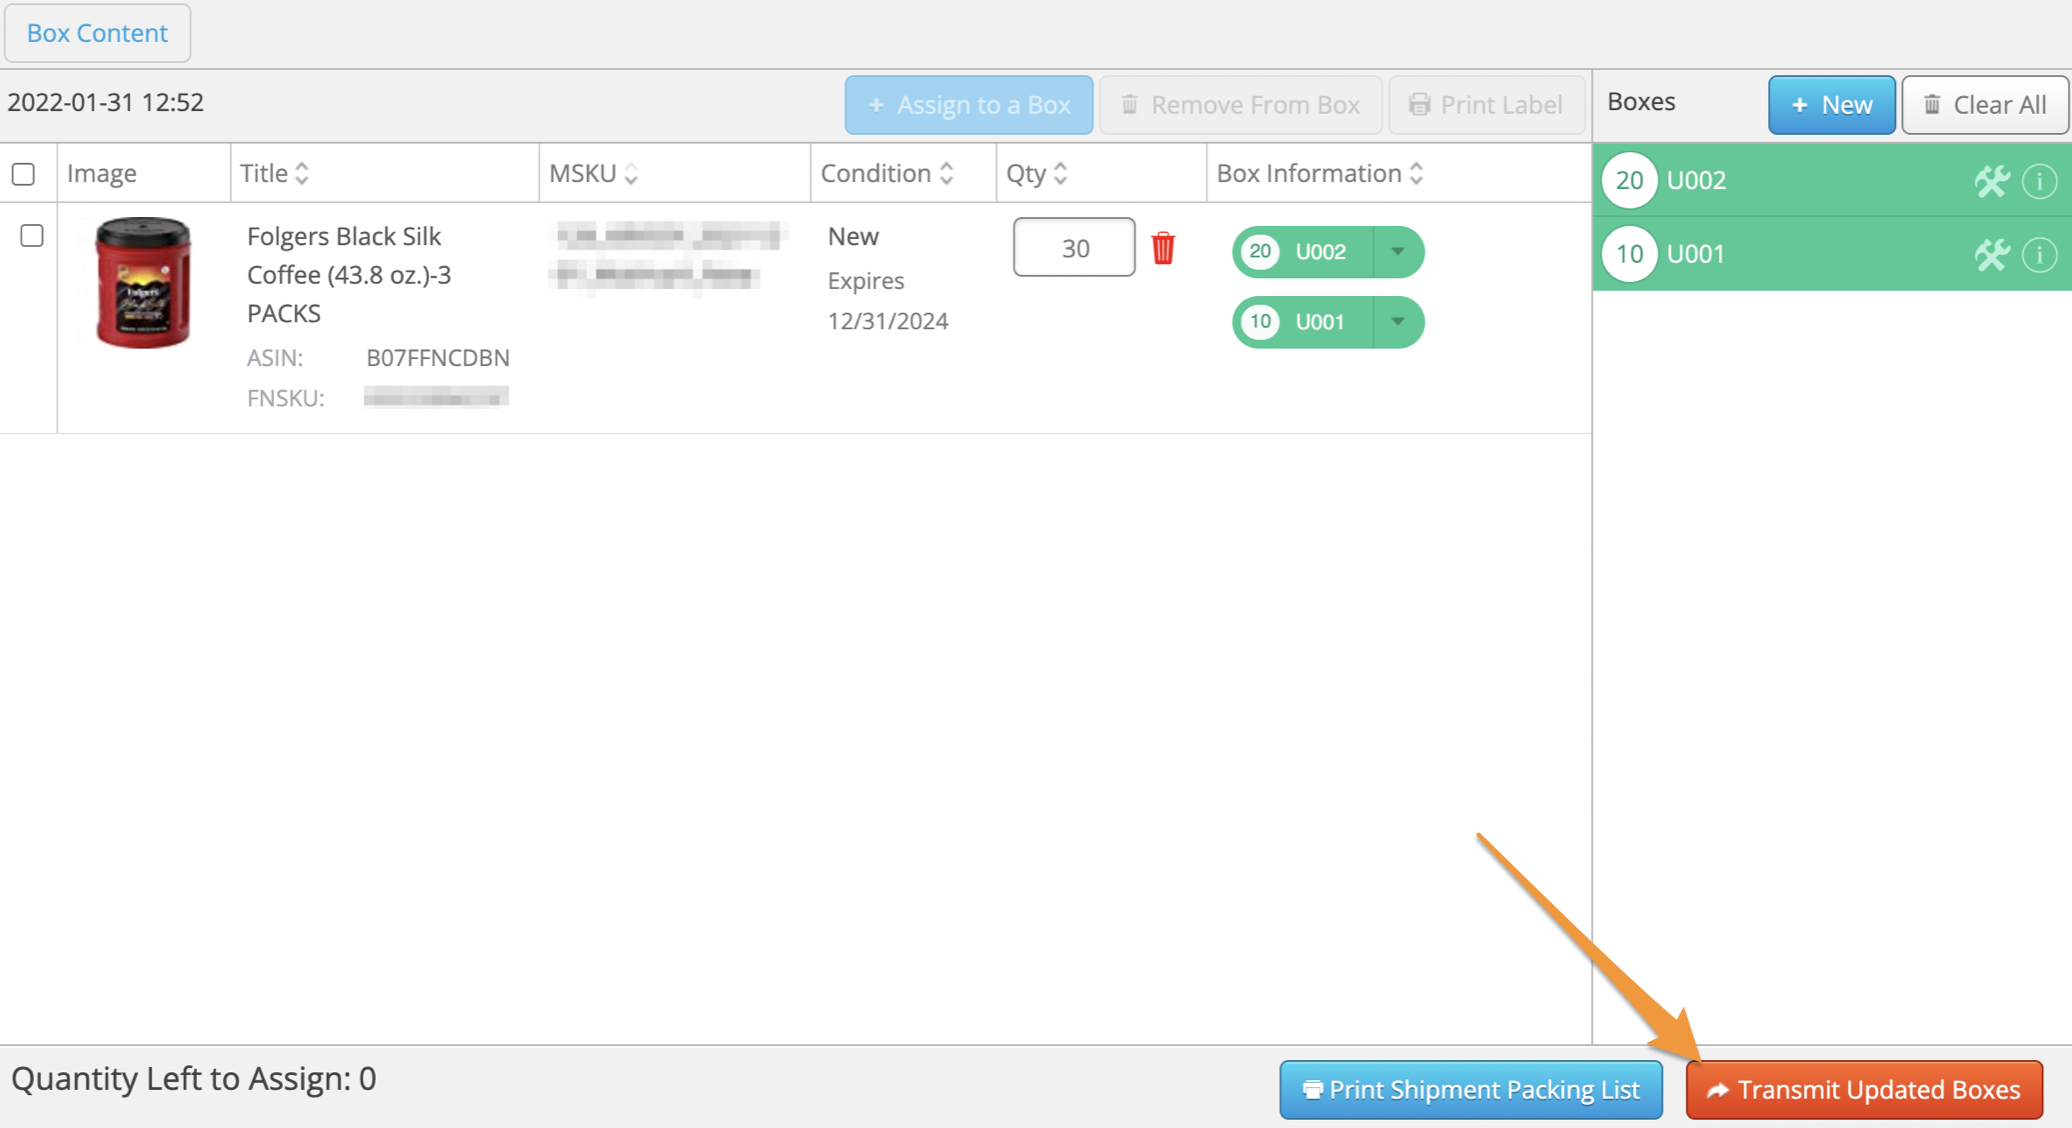
On the Box Contents page, click Transmit Updated Boxes.
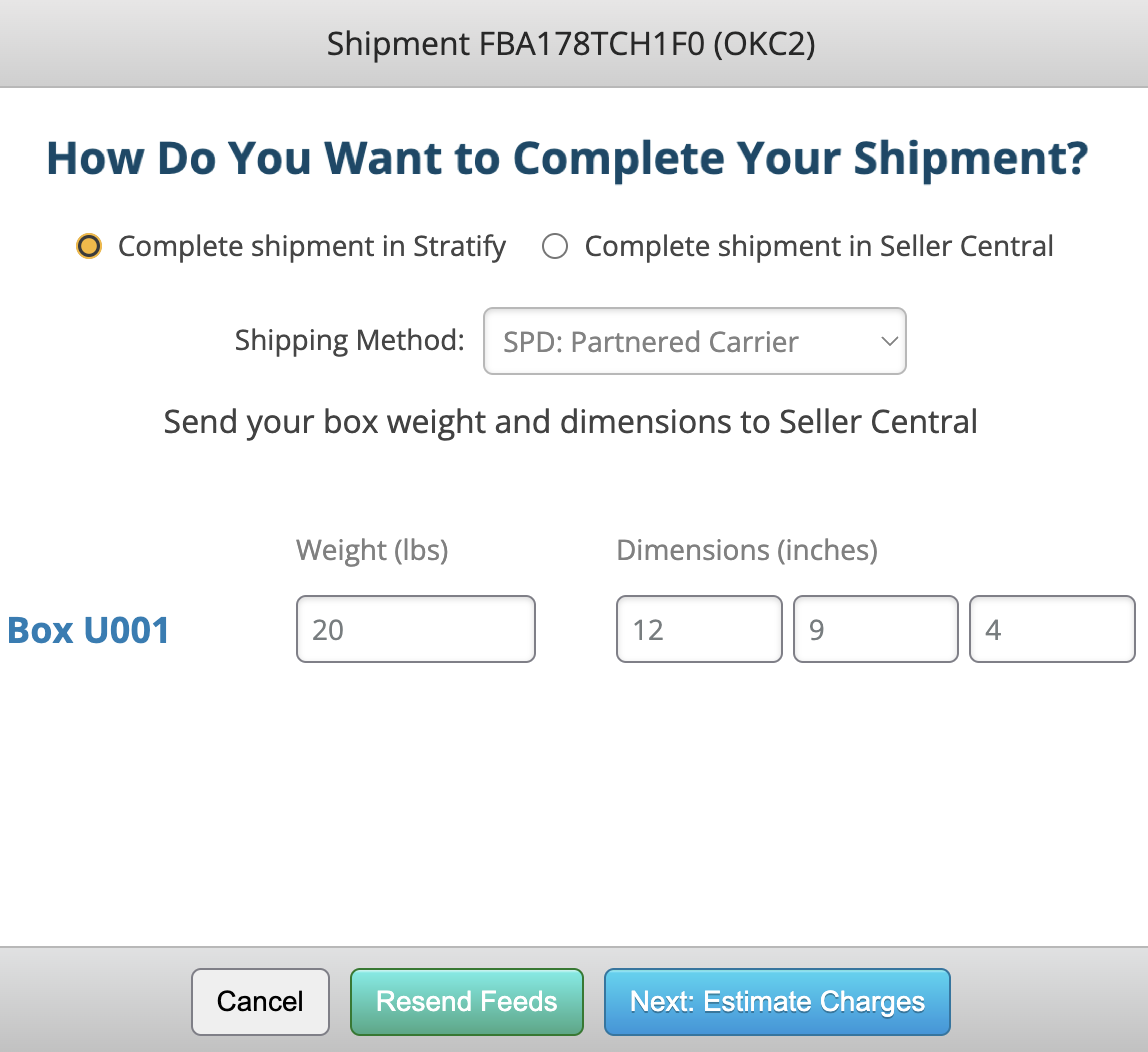
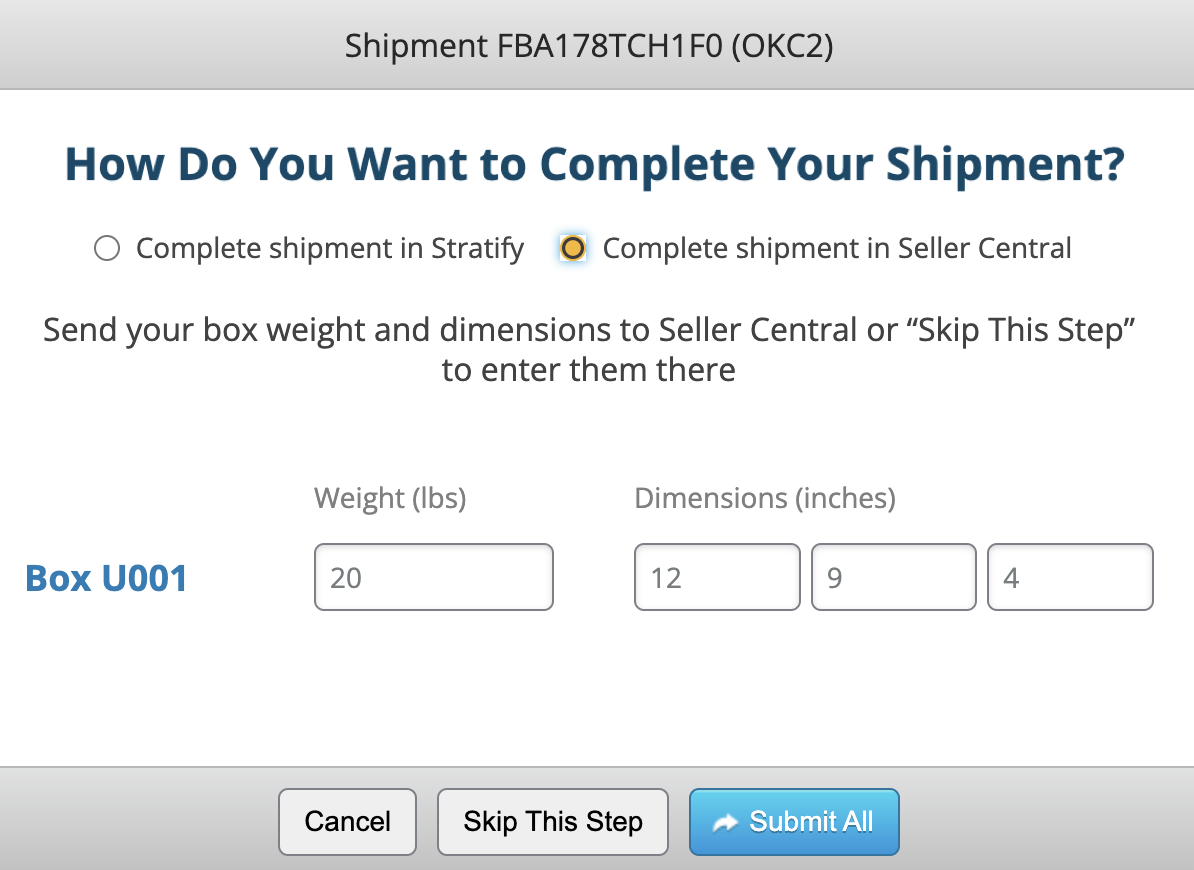
A window will appear asking you to select how you want to complete the shipment- in Stratify or in Seller Central.
Complete in Stratify
SPD: Partnered Carrier
Update the weight/dimensions for the boxes if needed.
If you made changes to any items in the shipment, click Resend Feeds and wait for them to process successfully. Then, click to proceed with estimating shipping charges and printing shipping labels.
Then, click Next: Estimate Charges to estimate shipping charges and print shipping labels.
Or, if only the weight/dimensions of the boxes were changed, click Next: Estimate Charges to proceed with purchasing and printing shipping labels.
SPD: Non-Partnered Carrier
Update the carrier and tracking IDs for the boxes if needed.
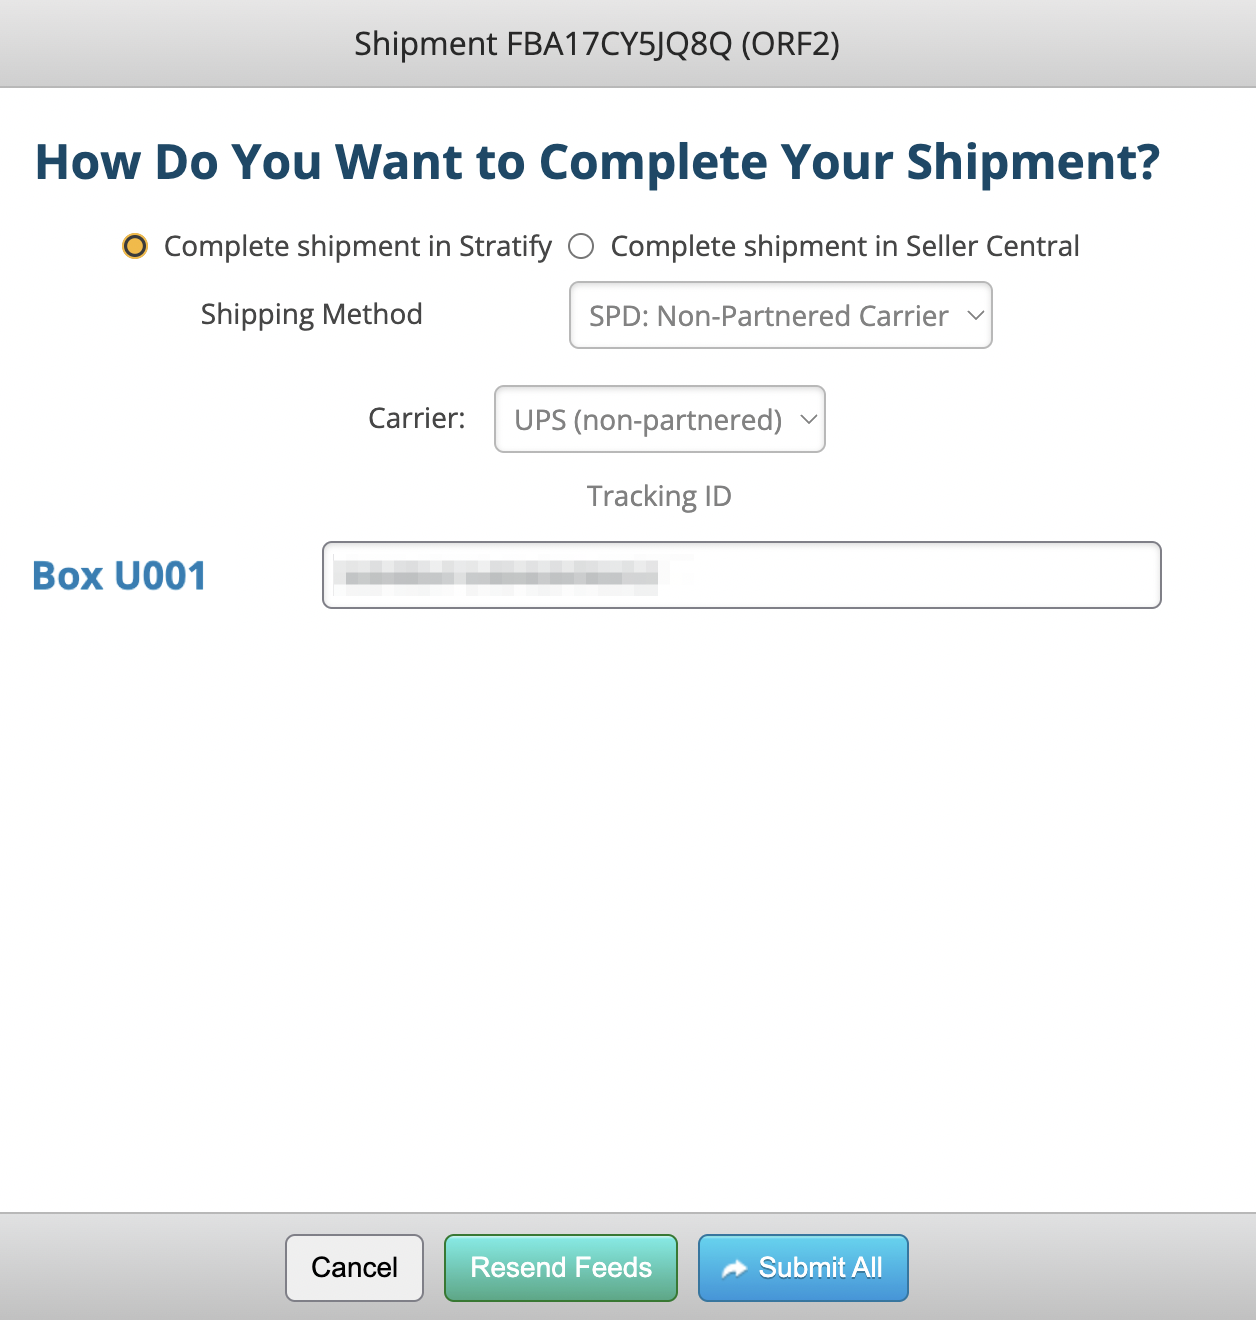
If you made changes to any items in the shipment, click Resend Feeds and wait for them to process successfully.
Click Submit All to send the updated information to Amazon.
The box labels will automatically download as a .PDF to your computer's downloads folder.
Complete in Seller Central
Adjust the box weight and dimensions if needed and click Submit All, or click Skip This Step if you'd like to enter them in Seller Central.
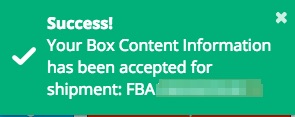
Wait for the green Success message on the right-hand side of the page before moving over to Seller Central to complete the shipment.