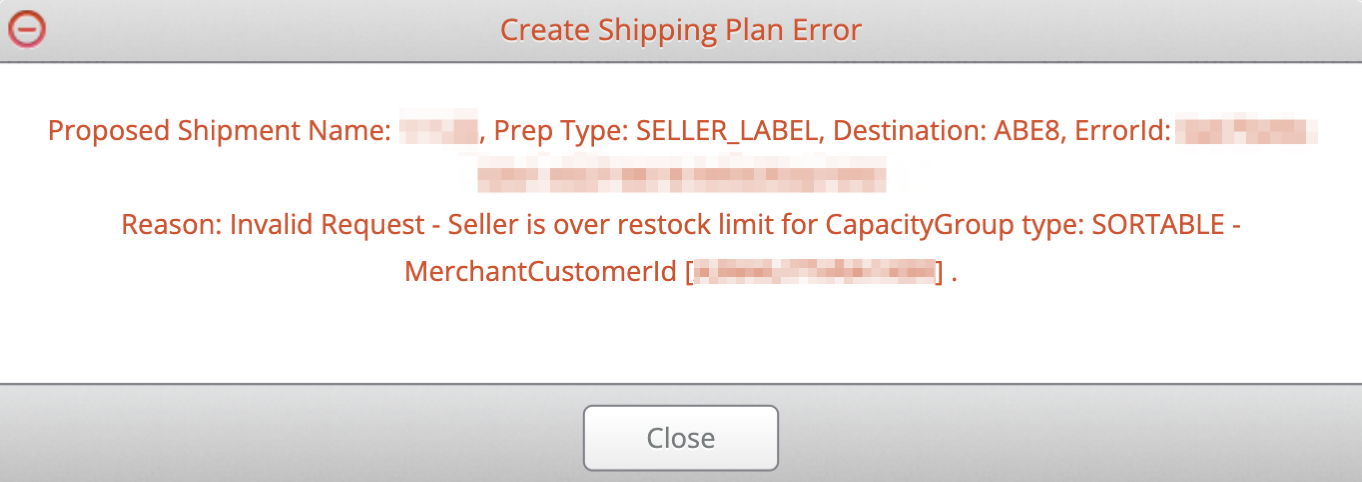
Reason: Invalid Request - Seller is over restock limit for CapacityGroup type: XXXXXXXX
This error is coming back directly from Amazon to let you know that you are not able to inbound the item due to the restock limit on your account.
Creating your shipment will likely take you over this limit, so it cannot be created. Once the inventory is below your limit for the capacity group, Amazon will allow you to send in more items for that group.
How to Check Your Restock Limits
Proceed by Contacting Seller Central Support
Proceed by Recreating the Shipments after Removing Items
How to Check Your Restock Limits
To check your restock limits, navigate to your Shipping Queue in Seller Central and click Restock Limits towards the bottom of the page (if needed) to view your totals:
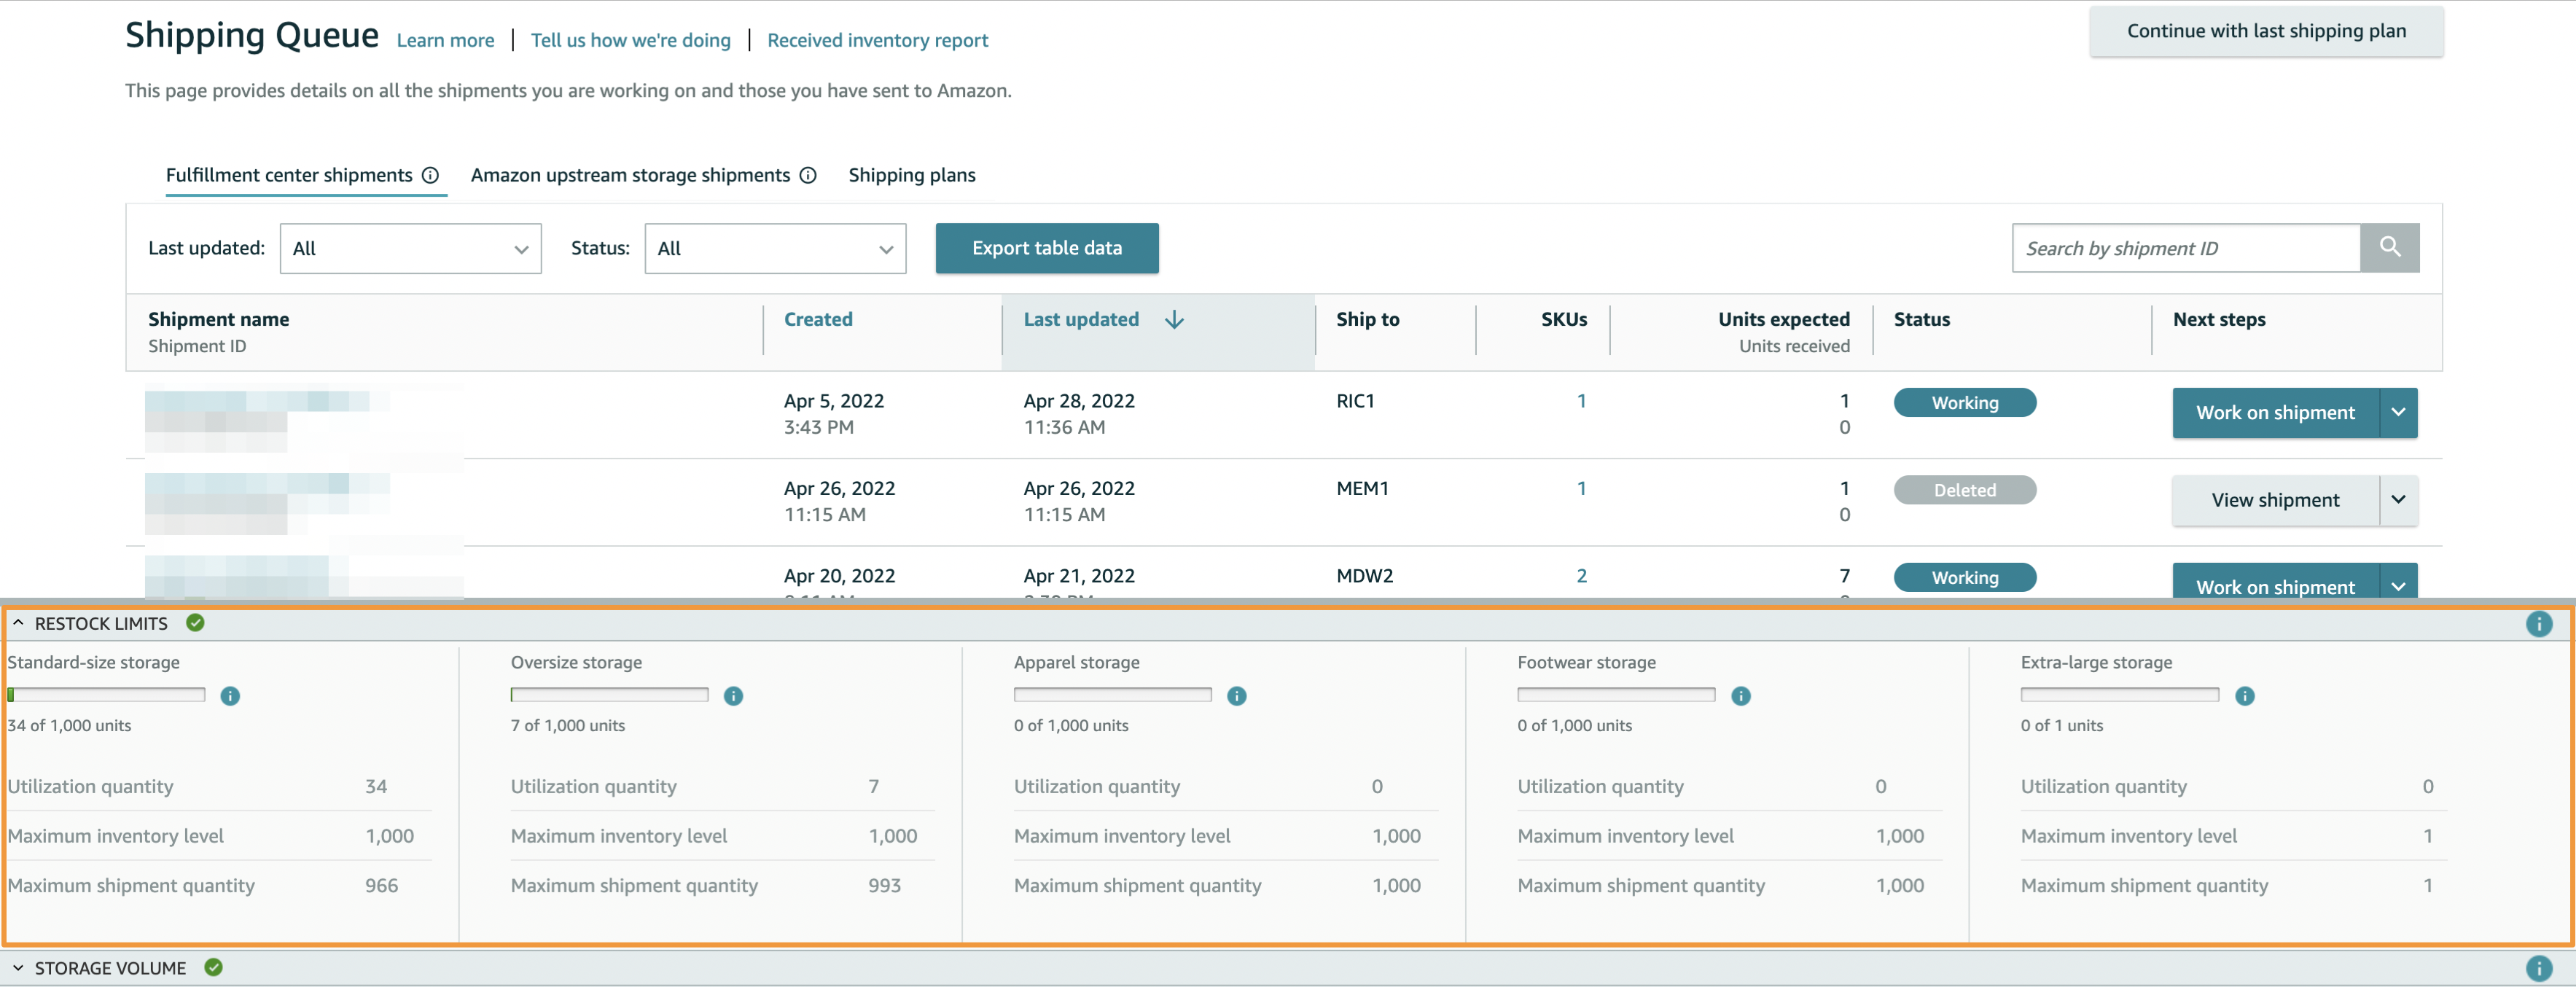
Check the corresponding Restock Storage Type with the Capacity Group included in the error message:
- SORTABLE - Check your Standard-size restock storage limits
- NON_SORTABLE - Check your Oversize restock storage limits
- EXTRA_LARGE - Check your Extra-large restock storage limits
- APPAREL - Check your Apparel restock storage limits
Proceed by Contacting Seller Central Support
If you have questions about your restock limits or if they appear incorrect, reach out to Seller Support for information or guidance on how to increase this availability. If they are able to increase it for the storage type, you can proceed with creating the shipment and processing the batch.
You can also review Seller Central's help article on this topic here:
Restock limits by storage type: Frequently asked questions
Proceed by Recreating the Shipments after Removing Items
Unfortunately, for Private batches, Amazon does not allow you to edit the quantity of items while a shipment is still in a proposed state, so you won't be able to adjust the units of the shipment prior to creating it. We've found that deleting items from the other shipments typically does not work to clear these types of errors, either.
If you are unable to get these restock limits below capacity in order to successfully create this shipment, you would first want to delete the shipments you have created from this batch within Seller Central. This is because Amazon does not allow you to send in and delete only some of the shipments in a plan.
In this case, since you can't create them all, you'll need to delete any shipments already created from the batch:
How to Delete Working Shipments in Seller Central
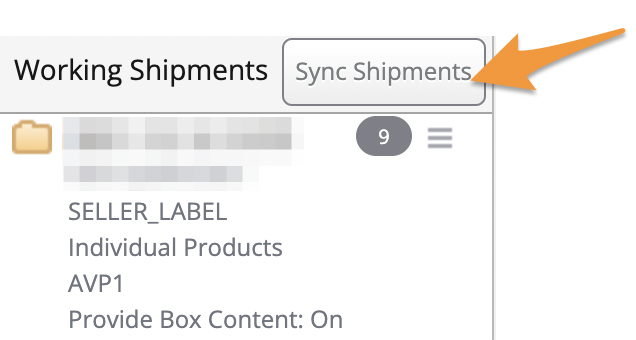
Once they've been deleted, click the Sync Shipments button on the List>List and Prep page in Stratify near the Working Shipments section to update this area.
Next, manually close your batch by clicking the three lines next to the batch name and selecting Close:
Finally, navigate to List>Closed batches, click the batch name, and choose Restore>Just Restore:
This will bring your batch back to the List & Prep page with the batch where you can remove items as needed:
How To Delete an Item From a Batch
How to Edit Items in an Open Batch
Once done, you can process your batch as normal to proceed with creating your shipments without additional errors.
Note: We always recommend creating all shipments on the Proposed FBA Shipments page for a batch before proceeding with entering the box content information for any of them. This ensures all the shipments can be created before taking the time to assign the items to boxes.