We are excited to introduce a more reliable way to print using a DYMO Printer (one that is not at the mercy of those pesky browser updates!) This feature is called IL Print.
This article will cover setting up IL Print on Windows OS. Please click here for Mac OS instructions.
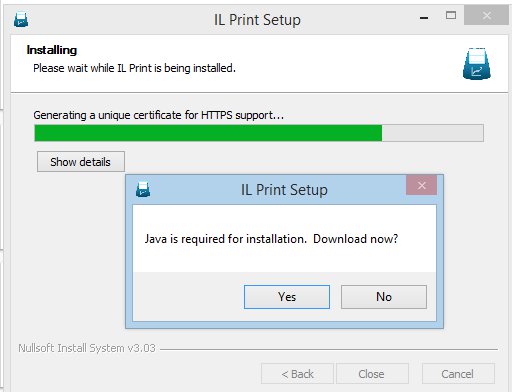
Note: Amazon Coretto is part of the installation for IL Print.
Before you begin, please ensure you have followed the steps to install the DYMO drivers on your computer. Windows Version 8.7.4 is the most current version that is compatible with IL Print.
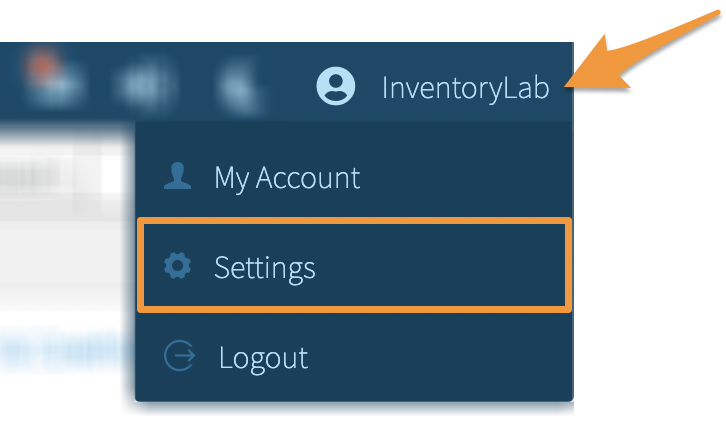
To get started, select your name in the upper right corner and choose Settings.
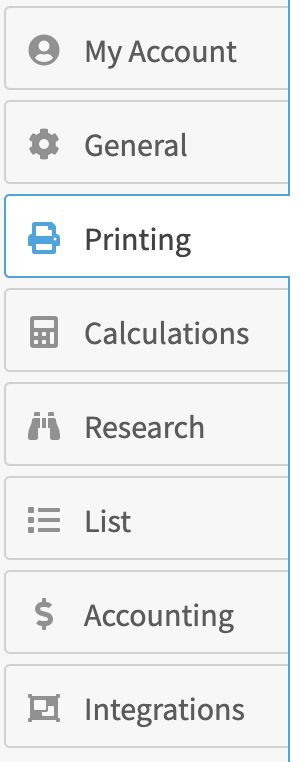
Click Printing from the left menu.
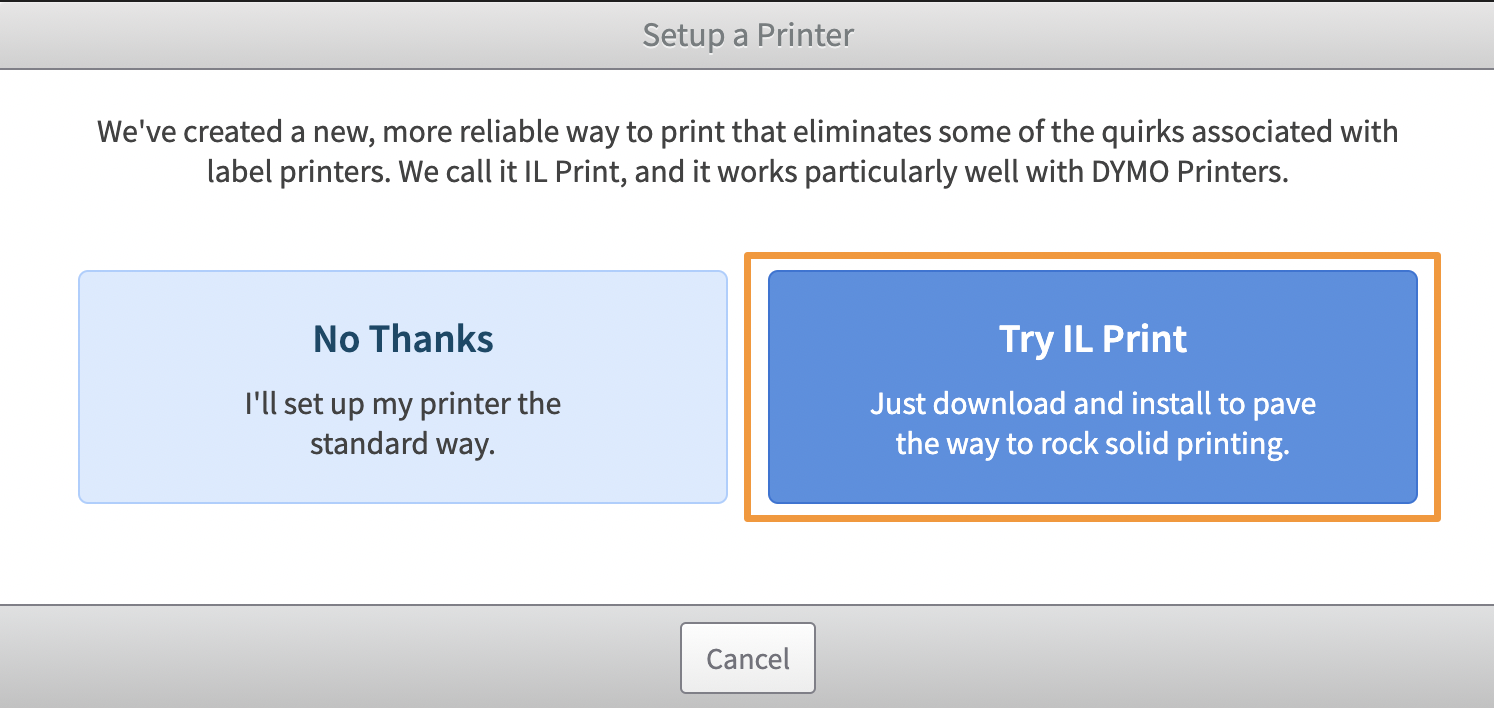
Click the Set Up Your Printer button.

Once selected, you will see the option to use the Standard print method (to print using your web browser) or to use IL Print. Click Try IL Print.
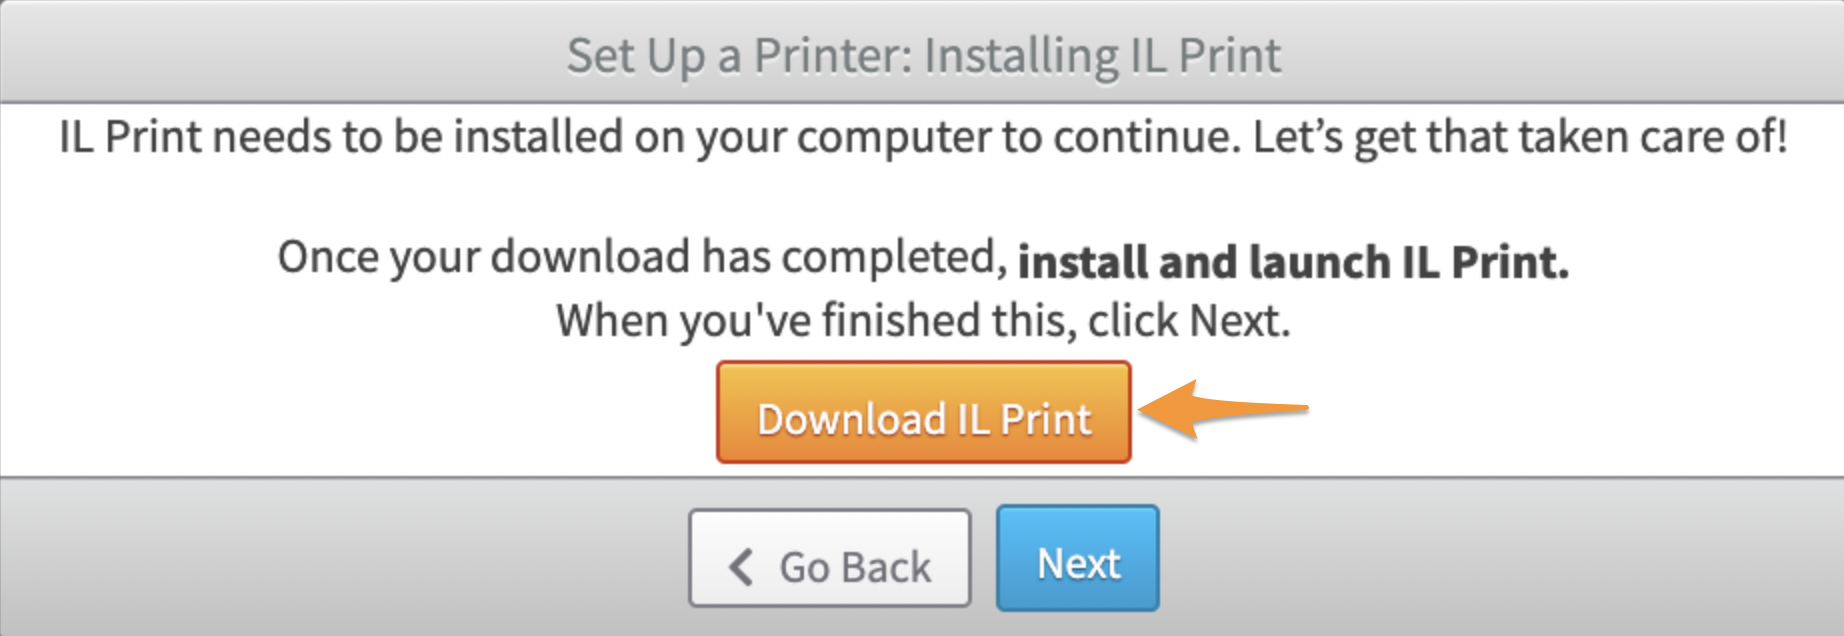
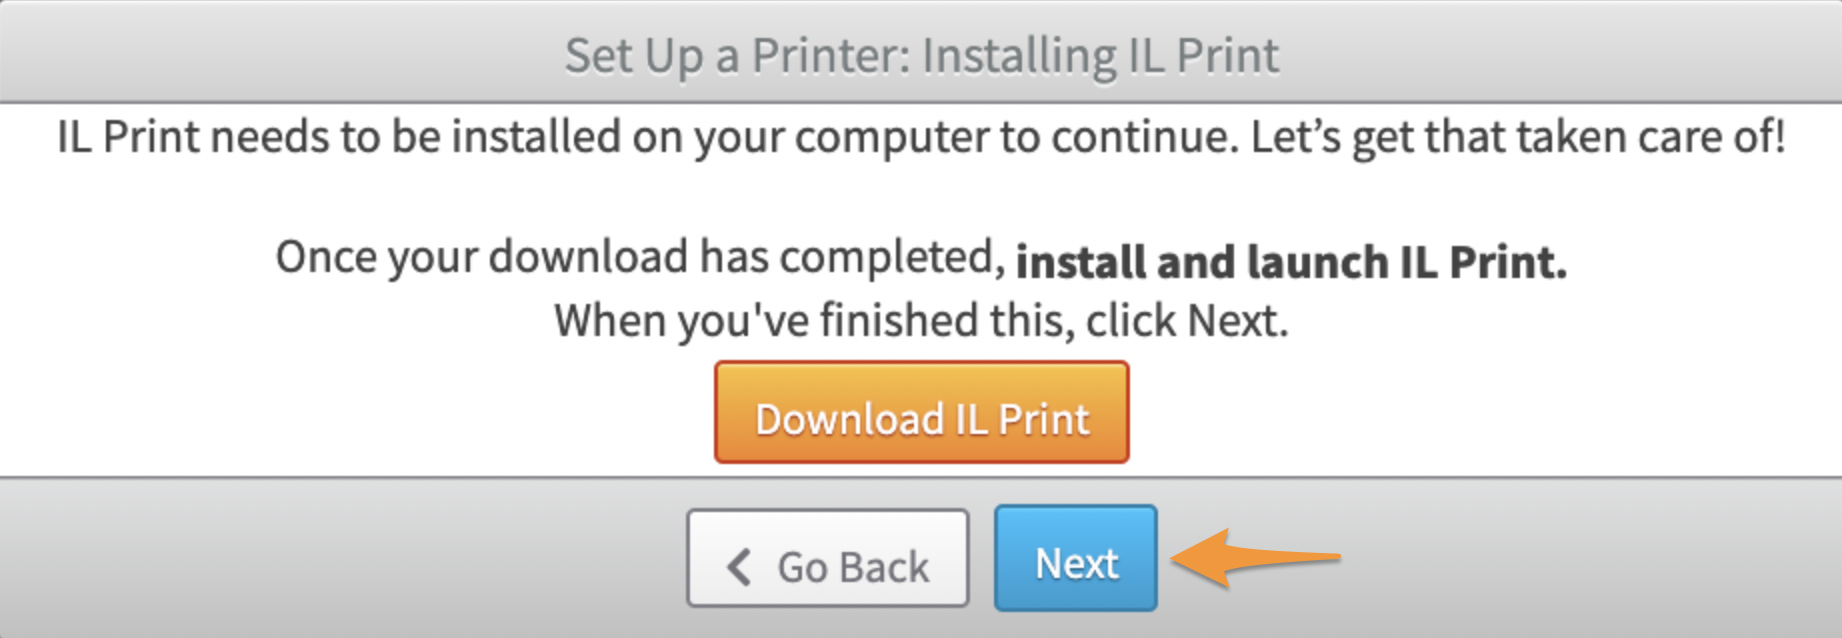
You will be directed to download IL Print so that it can be installed on your computer. Click Download IL Print to proceed.
The IL Print application will automatically begin to download, which you will typically see in the lower-left corner of your browser.
If you do not have downloaded files set to open automatically once complete, you can click on the arrow next to the file in your browser and select Open to launch the installation wizard.
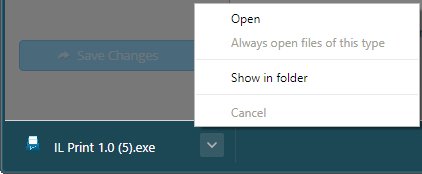
Note: If the download does not appear in your browser bar at all, try navigating to This PC>Downloads and double-clicking IL Print 1.0.exe to open it.
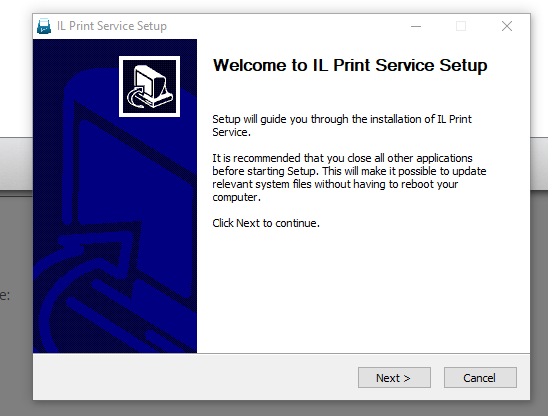
Follow the prompts in the installation wizard to install IL Print.
In the case that you do not have an updated version of Java installed, you may see an Installation Failed error. If this occurs, follow the prompts to update your Java software and then re-try the installation.
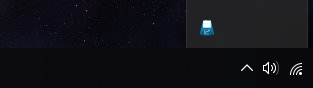
Once you have received the Successful Install message, the IL Print application should be open and running on your computer.
To make sure, check that the IL Print icon is visible in your system tray, which can be found on the right side of your Windows Taskbar.
Now that IL Print is running, it's time to navigate back to Stratify to click Next to finish up the setup.
Select your printer model and label size. A list of supported labels for DYMO printers can be found here.

If you are using a DYMO 450 Twin Turbo model, you will also have the option to choose which side you want to print from.
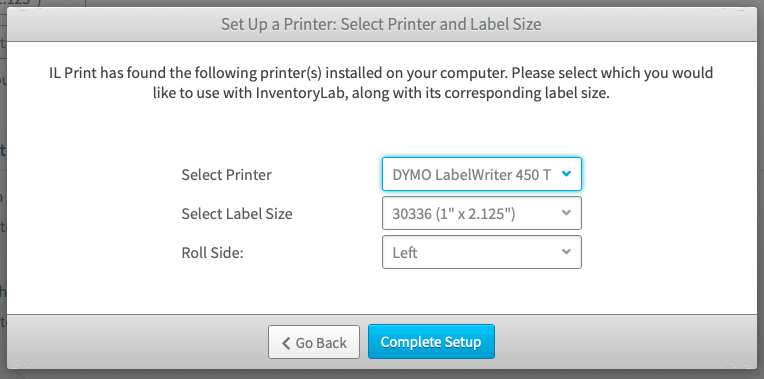
After making your selections, click Complete Setup.
Your printer will now be displayed under the Manage Printer section in your Print Settings.
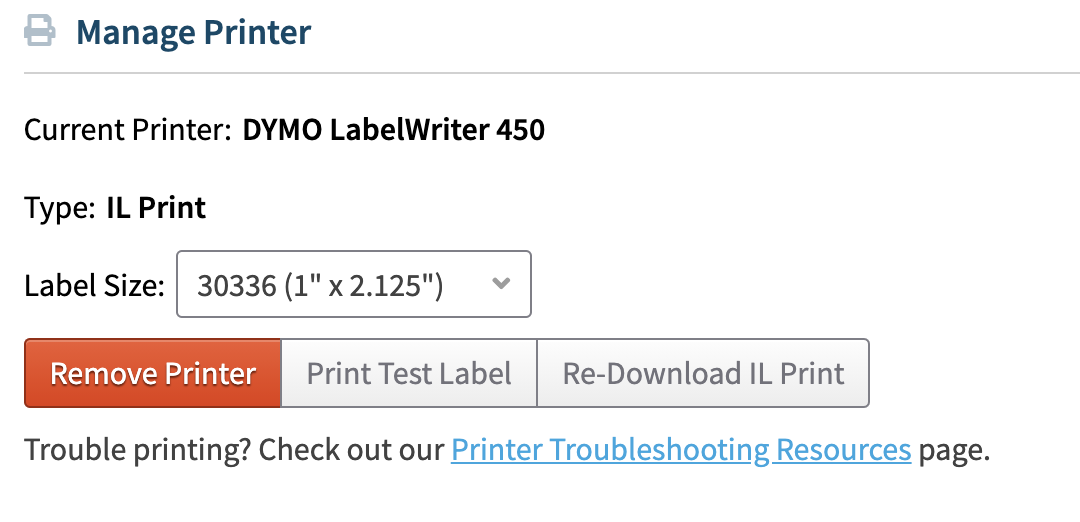
To change your label type, click the current label next to Label Size and choose a different one from the dropdown menu.
Clicking the Remove Printer button will clear your print settings for a fresh start.
Clicking the Print a Test Label button will print an example label to check your current settings.
Clicking the Re-Download IL Print button will download the application again if needed.
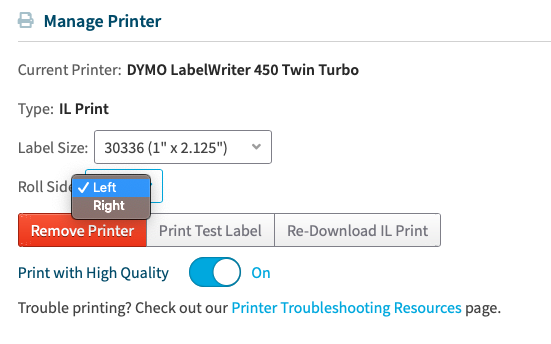
If you have the DYMO 450 Twin Turbo model selected, you can also change your printer roll side as shown below.
That's it! You're now ready to print properly formatted FNSKU labels using Stratify.
For information on the options available under the Manage Label Printing section of your Print Settings page, please see Print Settings.