Amazon released a new interface called Send to Amazon that changes the way the shipping plans are uploaded into Seller Central.
The steps in this article will guide you through exporting a shipping plan file from Stratify and uploading it to Seller Central using the Send to Amazon interface.
Upload a Shipping Plan Using Send to Amazon
Editing the Send to Amazon File Before Uploading
Upload a Shipping Plan Using Send to Amazon
To bypass creating shipments in Stratify, you will need to add the items to a Private batch.
After everything that needs to be shipped has been added, click the Review Batch button at the bottom of the List & Prep page.

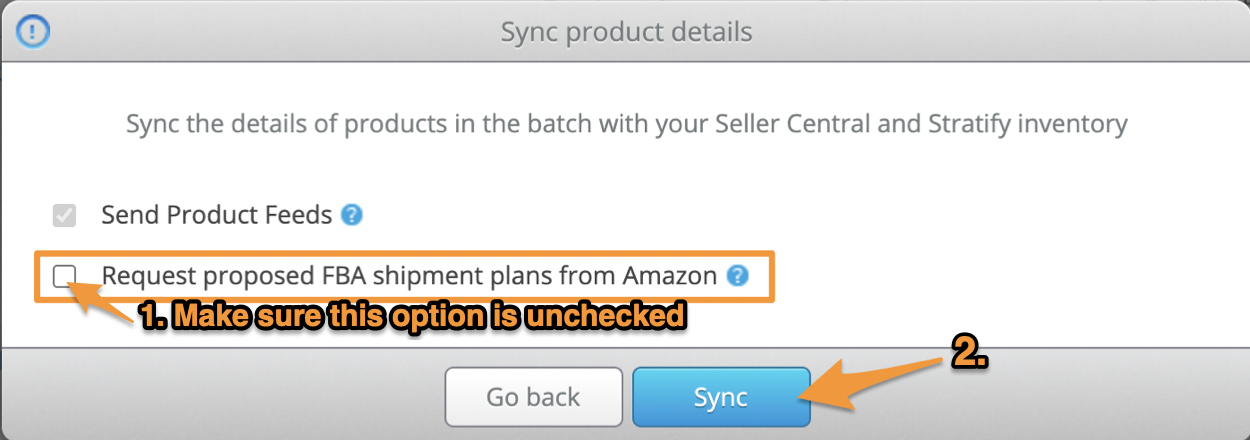
On the Review Batch page, click Submit. This will bring up a window that gives you the option to send your product listing feeds, or send feeds and request proposed FBA shipment plans.

When the window appears, uncheck the box for the Request proposed FBA shipment plans from Amazon option, then click Sync. This will close your batch and allow you to begin the process of uploading the shipping plan into Seller Central.
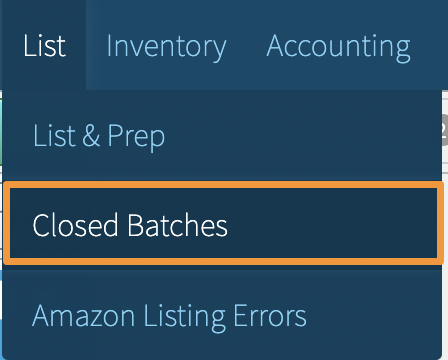
From here, go to List>Closed Batches:
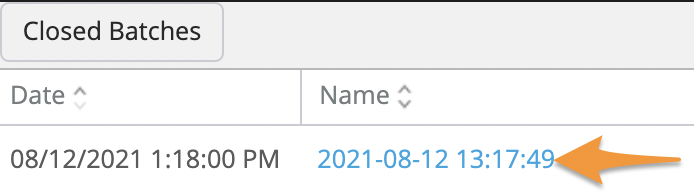
Click the name of the batch you need a Shipping Plan File for:
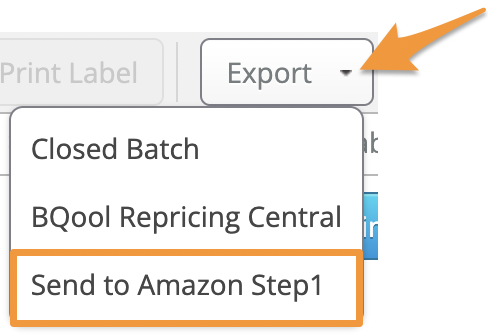
Click Export and choose Send to Amazon Step 1 from the dropdown menu. This will generate a properly formatted .txt file that can be imported to Seller Central's Send to Amazon page.
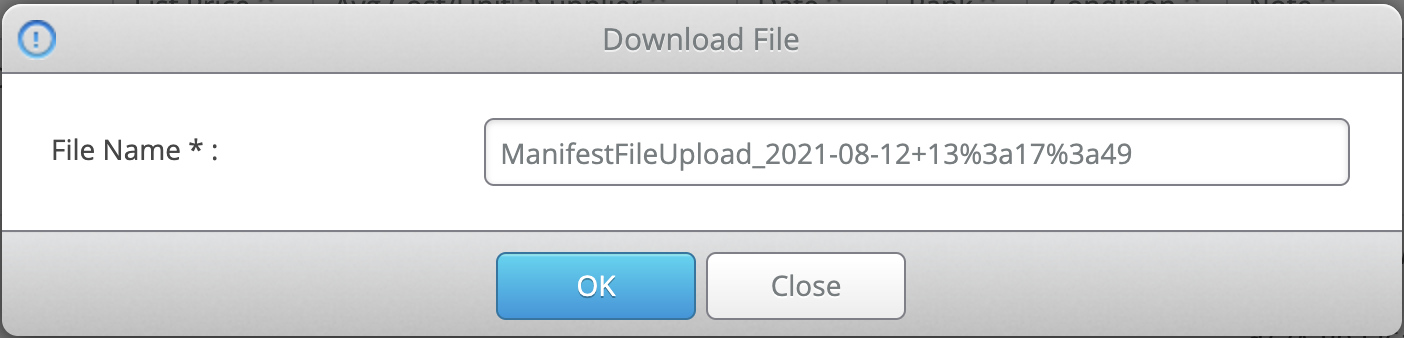
When the prompt appears, you can change the name of the file before clicking OK to save it on your computer.
Note: For case-packed batches, you will need to manually add the width, height, and length of the items to the file. This is because Amazon requires this information during Step 1 of the Send to Amazon workflow for case-packed items.
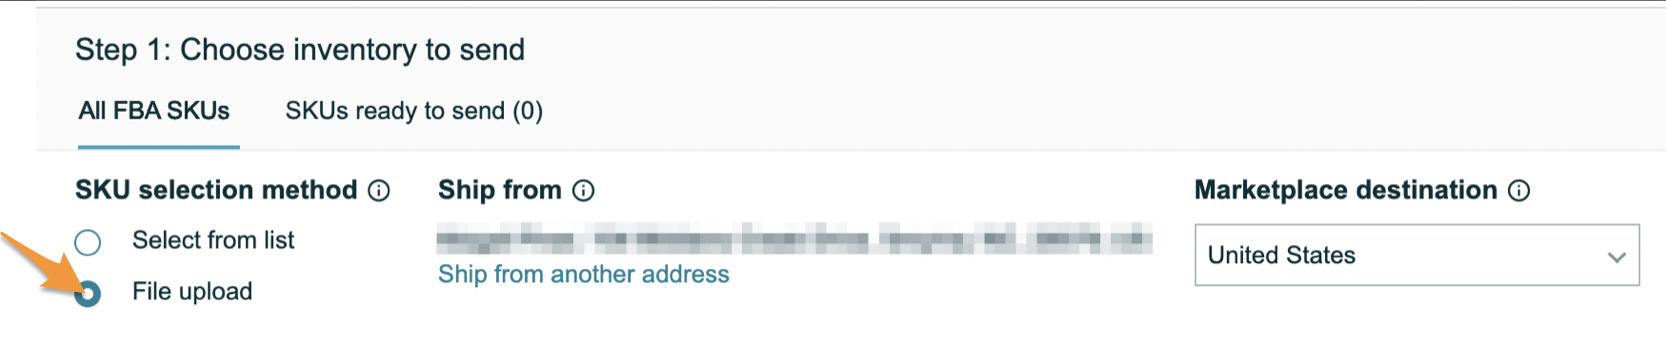
Now, you're ready to upload! Navigate to Seller Central>Inventory>Shipments>Send to Amazon or visit this link (click here) to get started.
Once you're on the Send to Amazon page, locate the Step 1 section and click File upload.
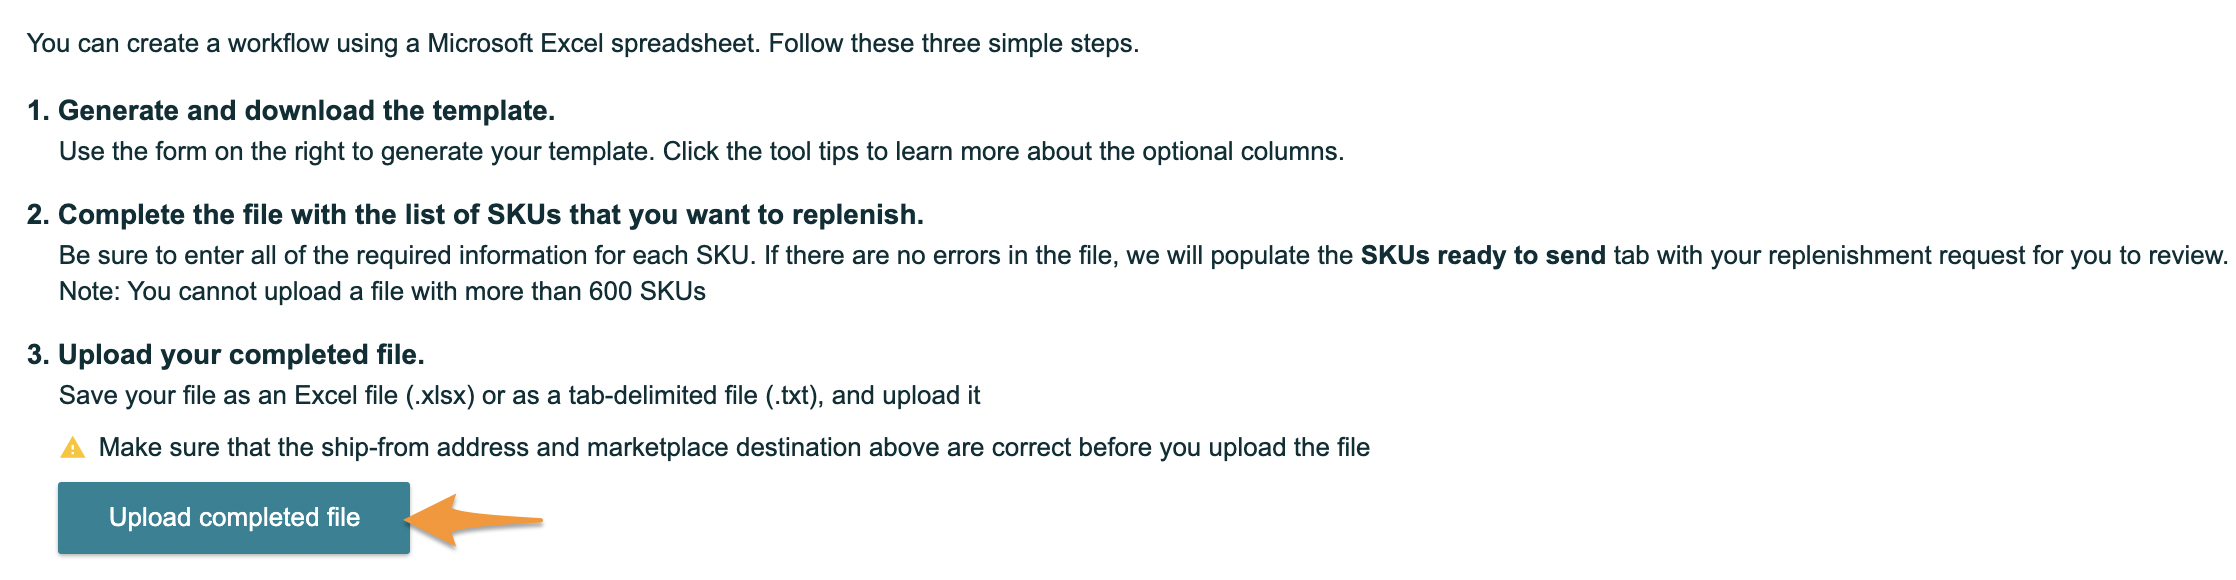
Next, click Upload completed file and choose the .txt file from the Closed Batch.
- Please note that you must wait for 15 to 30 minutes for your feeds to fully sync your listings over to Amazon prior to uploading your Shipping Plan file into Seller Central. If you attempt the upload too early, Amazon will give an "MSKU not found for one or more SKUs in the destination marketplace" error.

Seller Central will process the file at this time. Once done, you will be asked to resolve any issues with the MSKUs, such as selecting a prep category, identifying who is labeling, or entering expiration dates for items that are missing this information. Then, you'll move on to providing your box content information and calculating shipping charges to finish up the shipment.
More information on the Send to Amazon process can be found here in Seller Central:
Create shipments with Send to Amazon
Editing the Send to Amazon File Before Uploading
You can edit or combine multiple closed batches into one Send to Amazon file before uploading it to Seller Central. This may come in handy if you want to:
- Combine items from multiple batches into the same shipment
-
Combine case-packed and individual items into the same shipment
Note: This option is unique to the Send to Amazon workflow.
- Enter the width, height, and length of the boxes before importing
Note: This step is required for case-packed items. - Identify who labels and the prep owner before importing
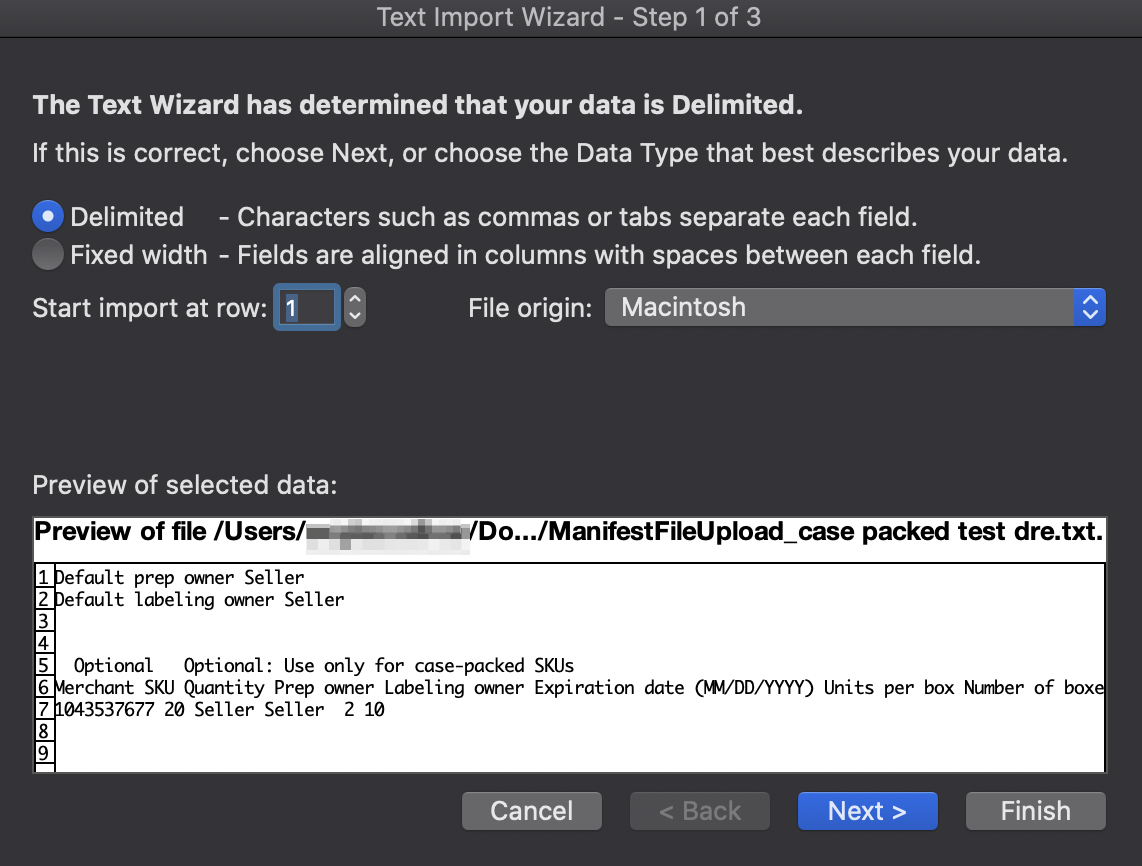
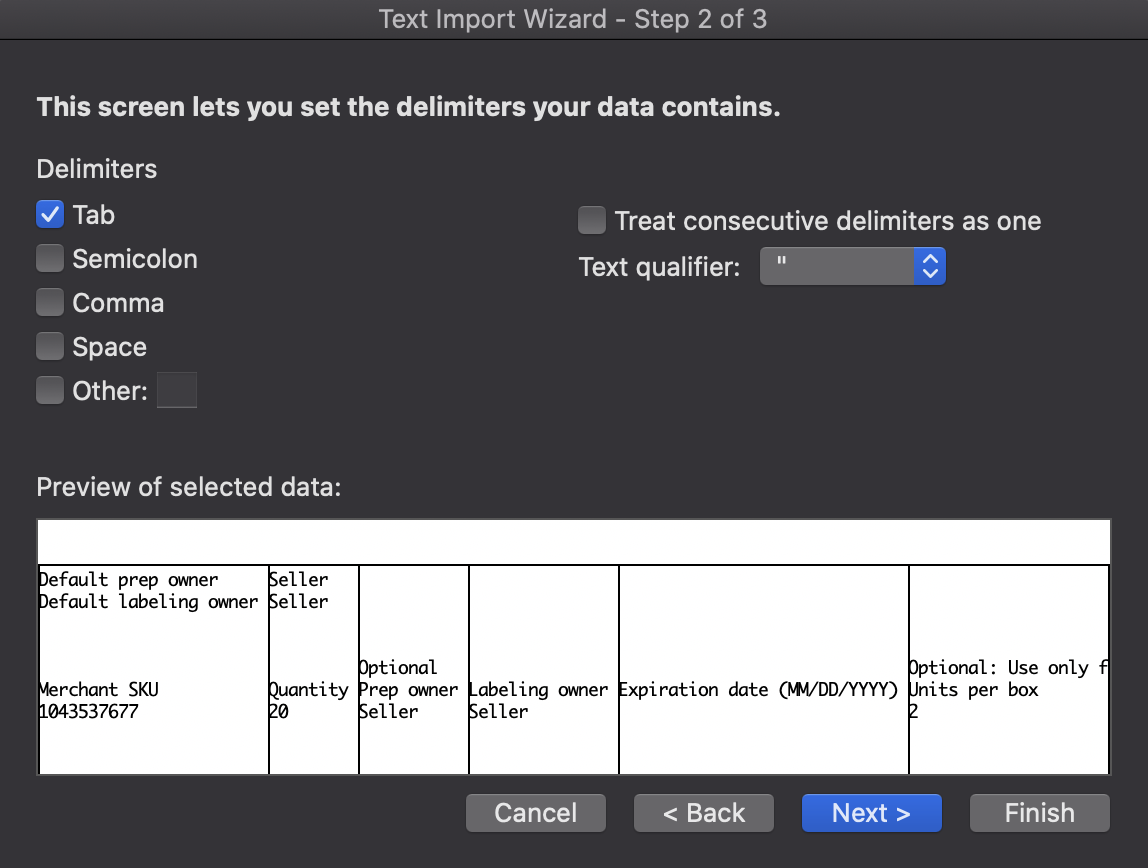
To do this, open the .txt file exported from Stratify in Excel.
This will open it in Excel's Text Import Wizard, which will determine that the data is Delimited. Click Next to proceed.
On the next step, keep the Delimiters box for Tabs checked then click Next.
On the final step, keep the Column data format selection as General, then click Finish.
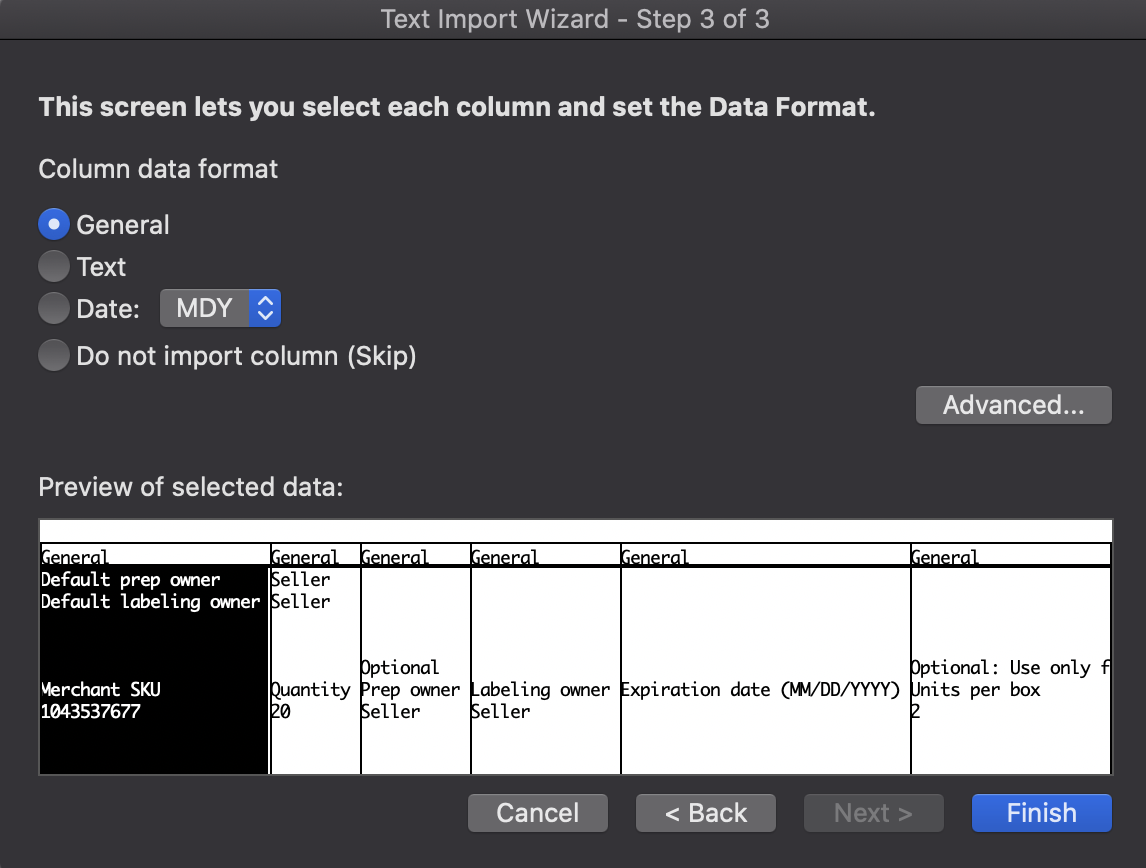
The file will then open an Excel sheet with the data from the .txt file in different columns. At this point, you can enter additional details you want to import along with the file, or copy/paste items from other closed batches to combine them.

Once all the changes have been made, be sure to save your file, then you're ready to import! You can either save it as an Excel file (.xlsx) or as a tab-delimited file (.txt) for it to be formatted properly for Send to Amazon.