If you want to list items using Stratify but use different third-party software to generate 2D barcodes for the shipments, follow the steps below!
Listing Items & Creating Shipments
Box Content Settings
To provide box content using 2D barcodes, you must have this option turned on both in Seller Central and in Stratify.
Turning on 2D Barcodes in Seller Central
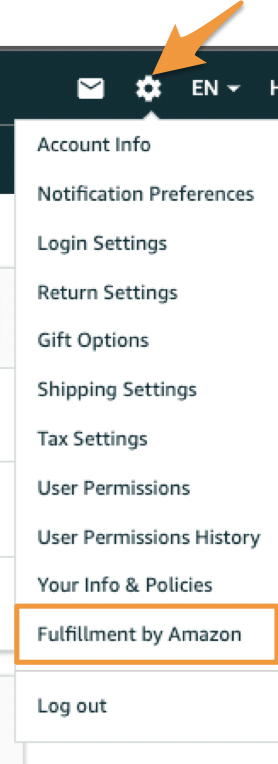
Log in to Seller Central and click the Settings gear in the upper right corner.
Hover over it and select Fulfillment by Amazon from the drop-down menu, as shown below:
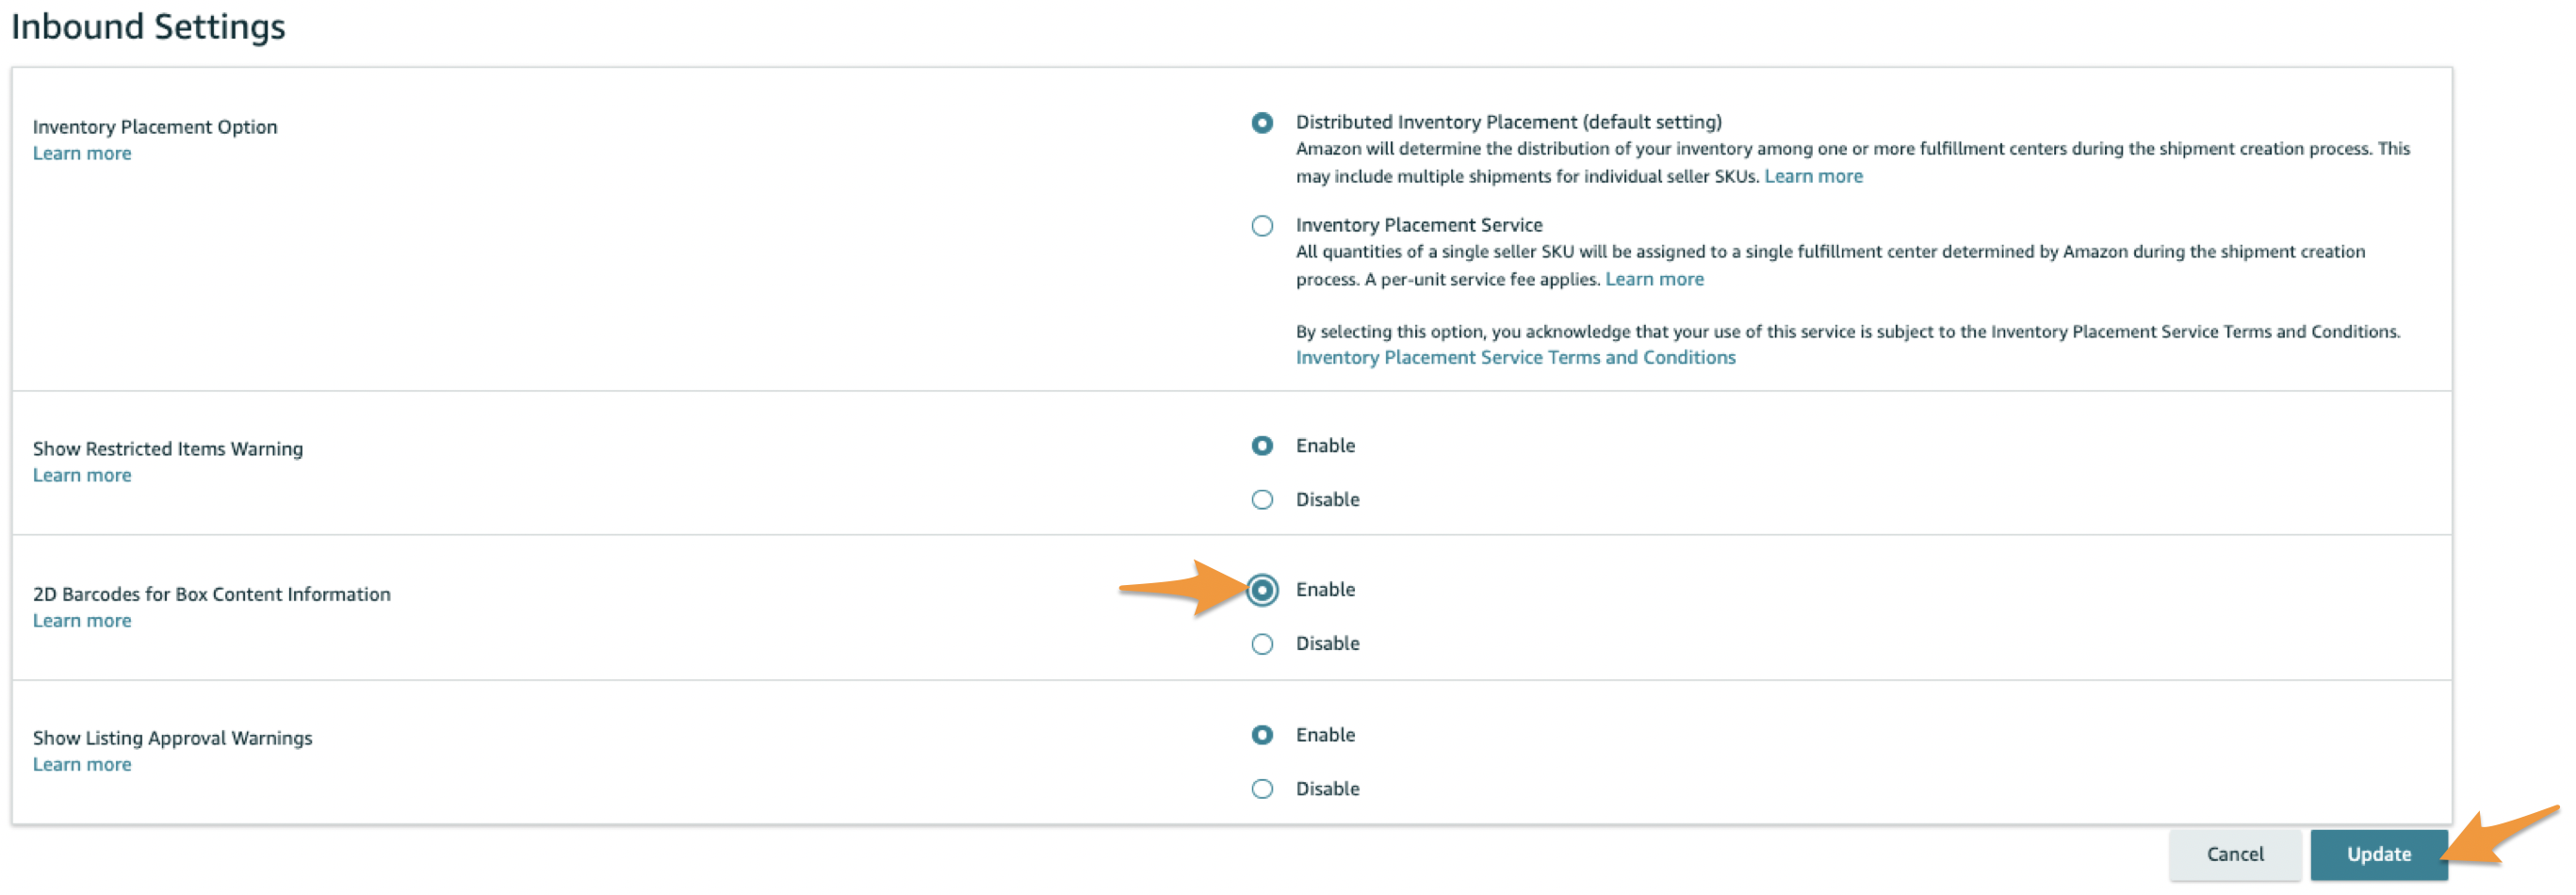
Locate the Inbound Shipping section and confirm that the option for 2D Barcodes for Box Content Information is Enabled.
If not, click the Edit button.

Select Enable in the 2D Barcodes for Box Content Information section, then click Update.
Turning on Box Content in Stratify
When creating a new batch on the List>List & Prep page, set the Provide Box Content option to On- Using 2D Barcodes.
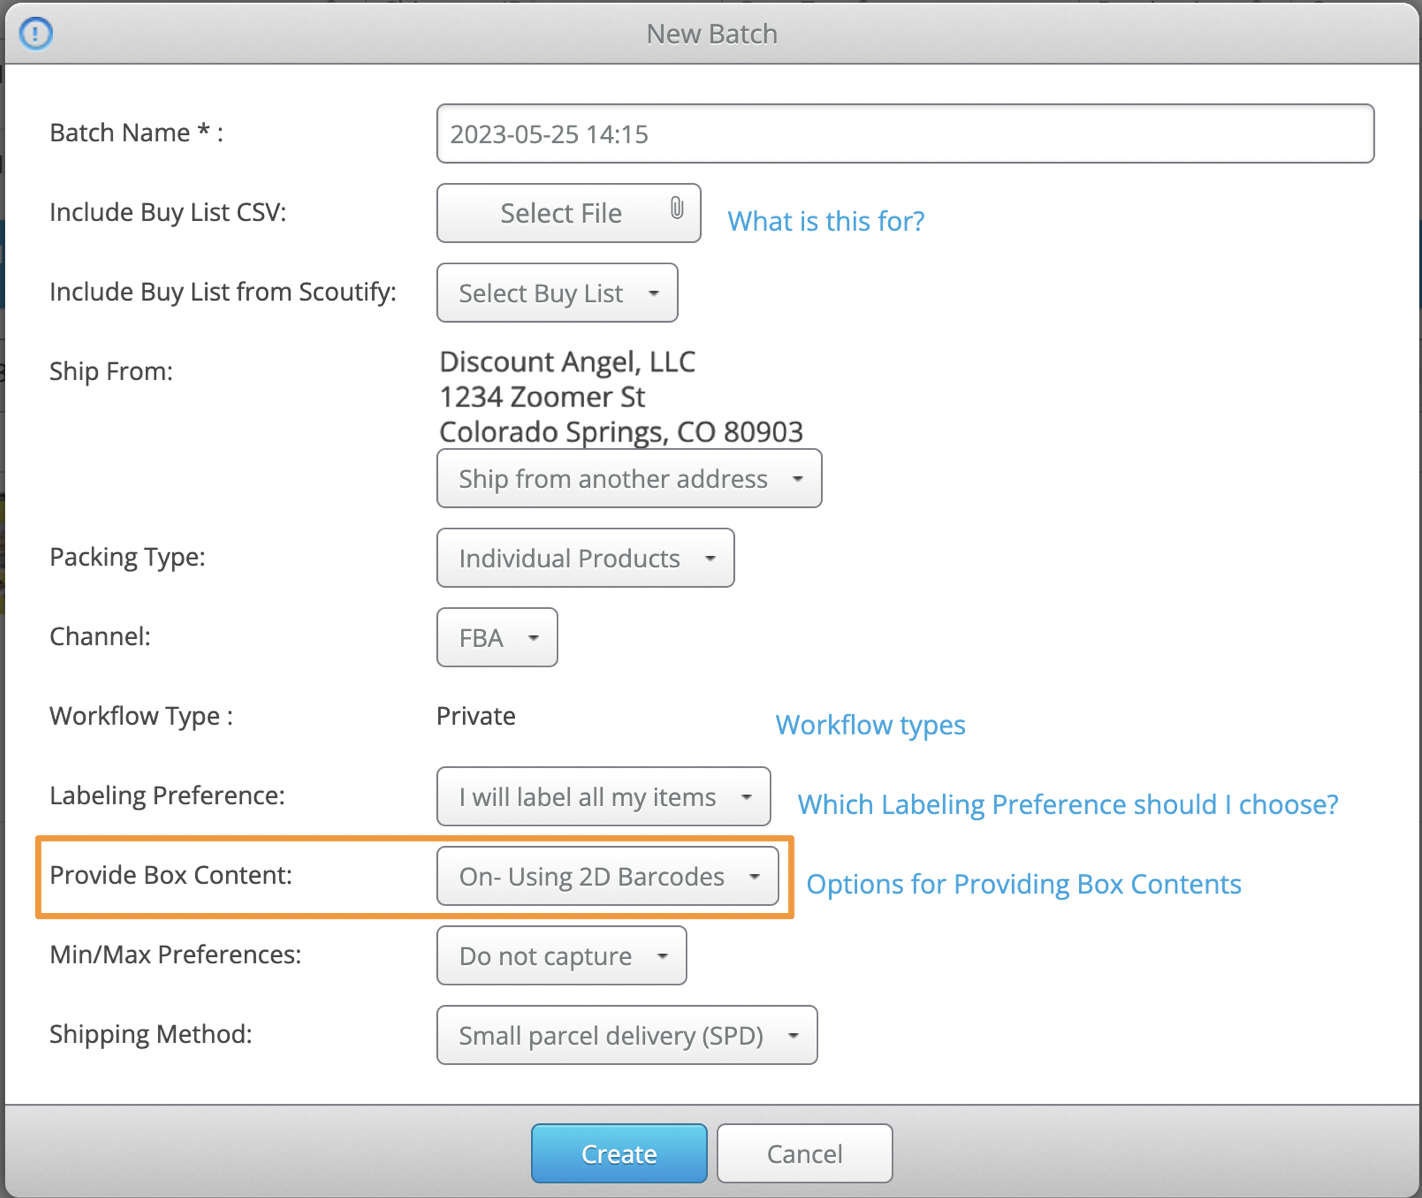
With this selection, you're all set to add your items to the batch and proceed to create shipments for them.
Listing Items & Creating Shipments
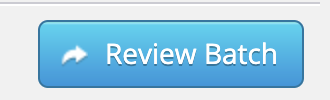
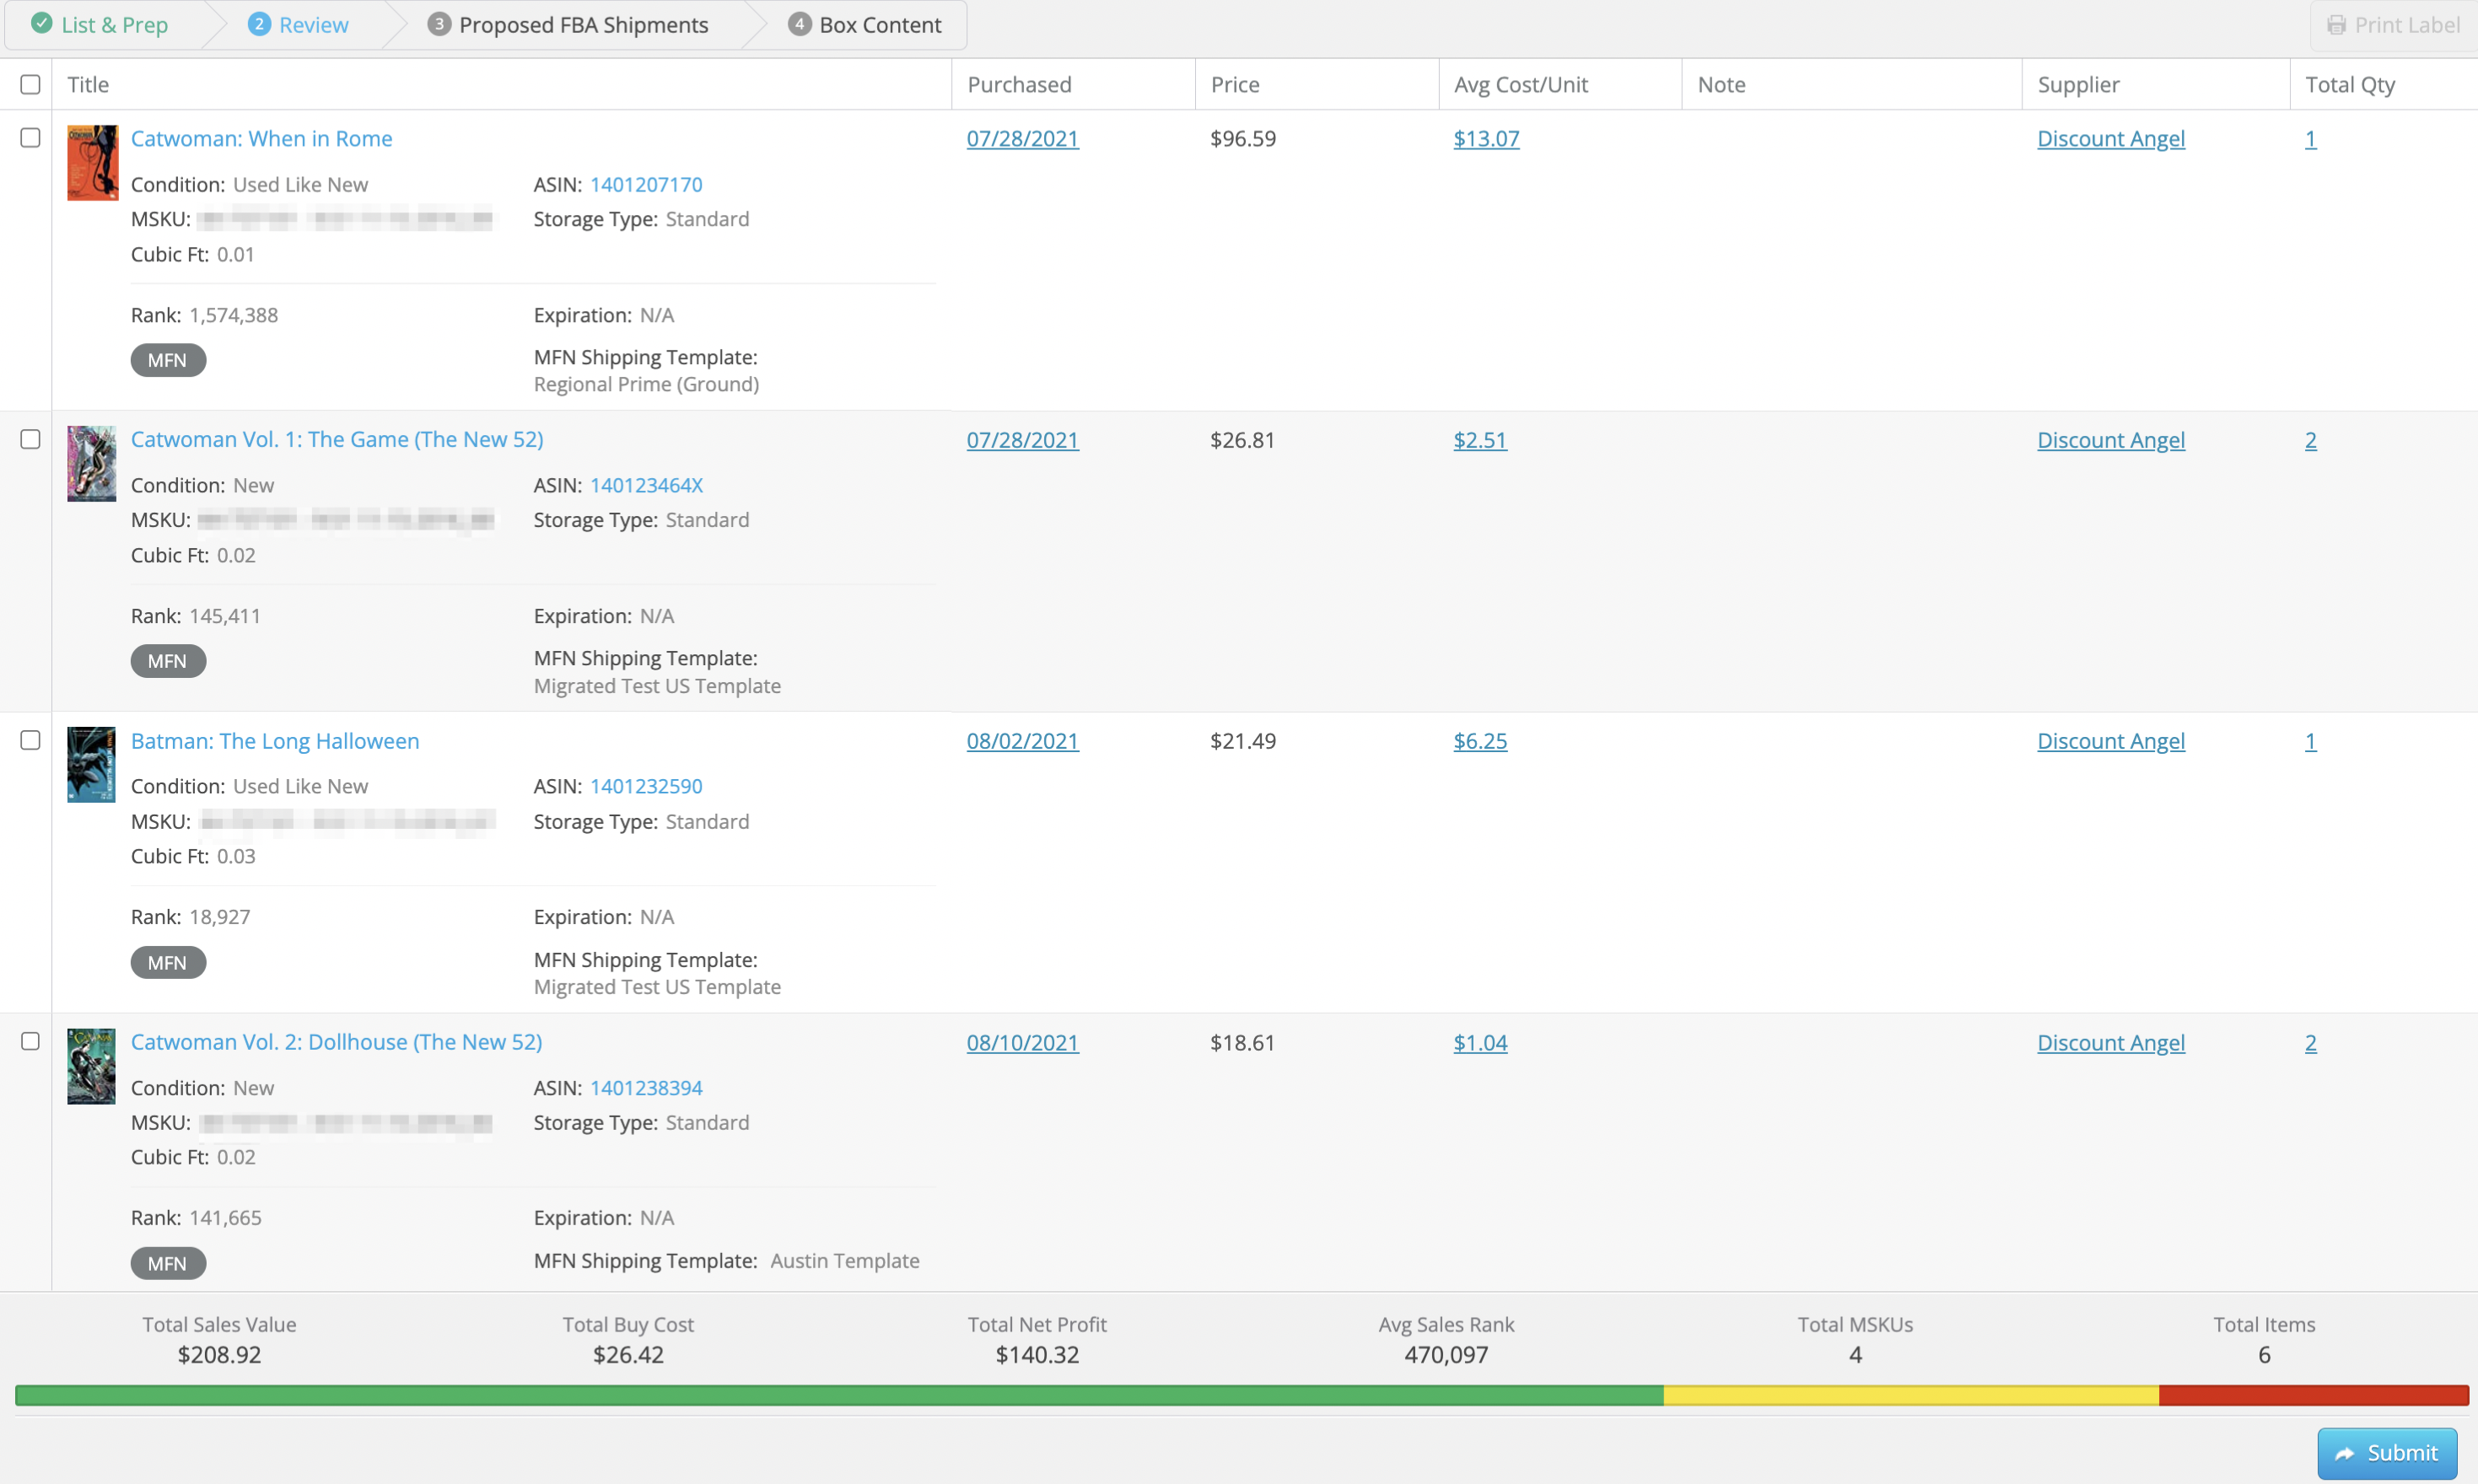
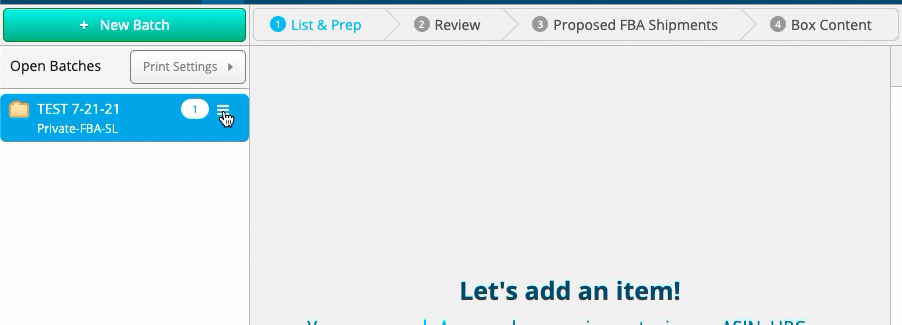
Add the items to the batch as you normally would. This can be done by adding them manually or by uploading a buy list.
Once you've added all your items, click the Review Batch button in the lower right corner of the screen.
This will bring you to a page where you can review and take action on the items in your batch before syncing product feeds with Amazon and creating shipments. More information on this page can be found here - Review Batch - Private Workflow
Once you've reviewed your batch contents, the next step in the workflow is to send your product feeds to Amazon.
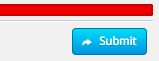
To proceed, click the Submit button in the lower right corner of the Review Batch page.
A pop-up will appear, and you can decide whether to Send Product Feeds Only or Send Feeds/Create FBA Shipments.
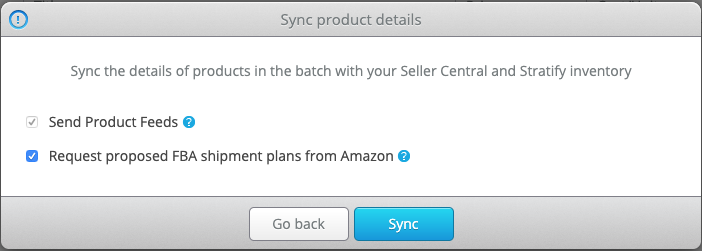
To create FBA shipments for the items in the batch, keep both boxes selected and click Sync to move on to the next step.
You will be brought to the page where you can review Amazon's final destinations for the items in the batch and create your FBA shipments. More information on this page can be found here - Proposed FBA Shipments: Create Shipments – Private Workflow
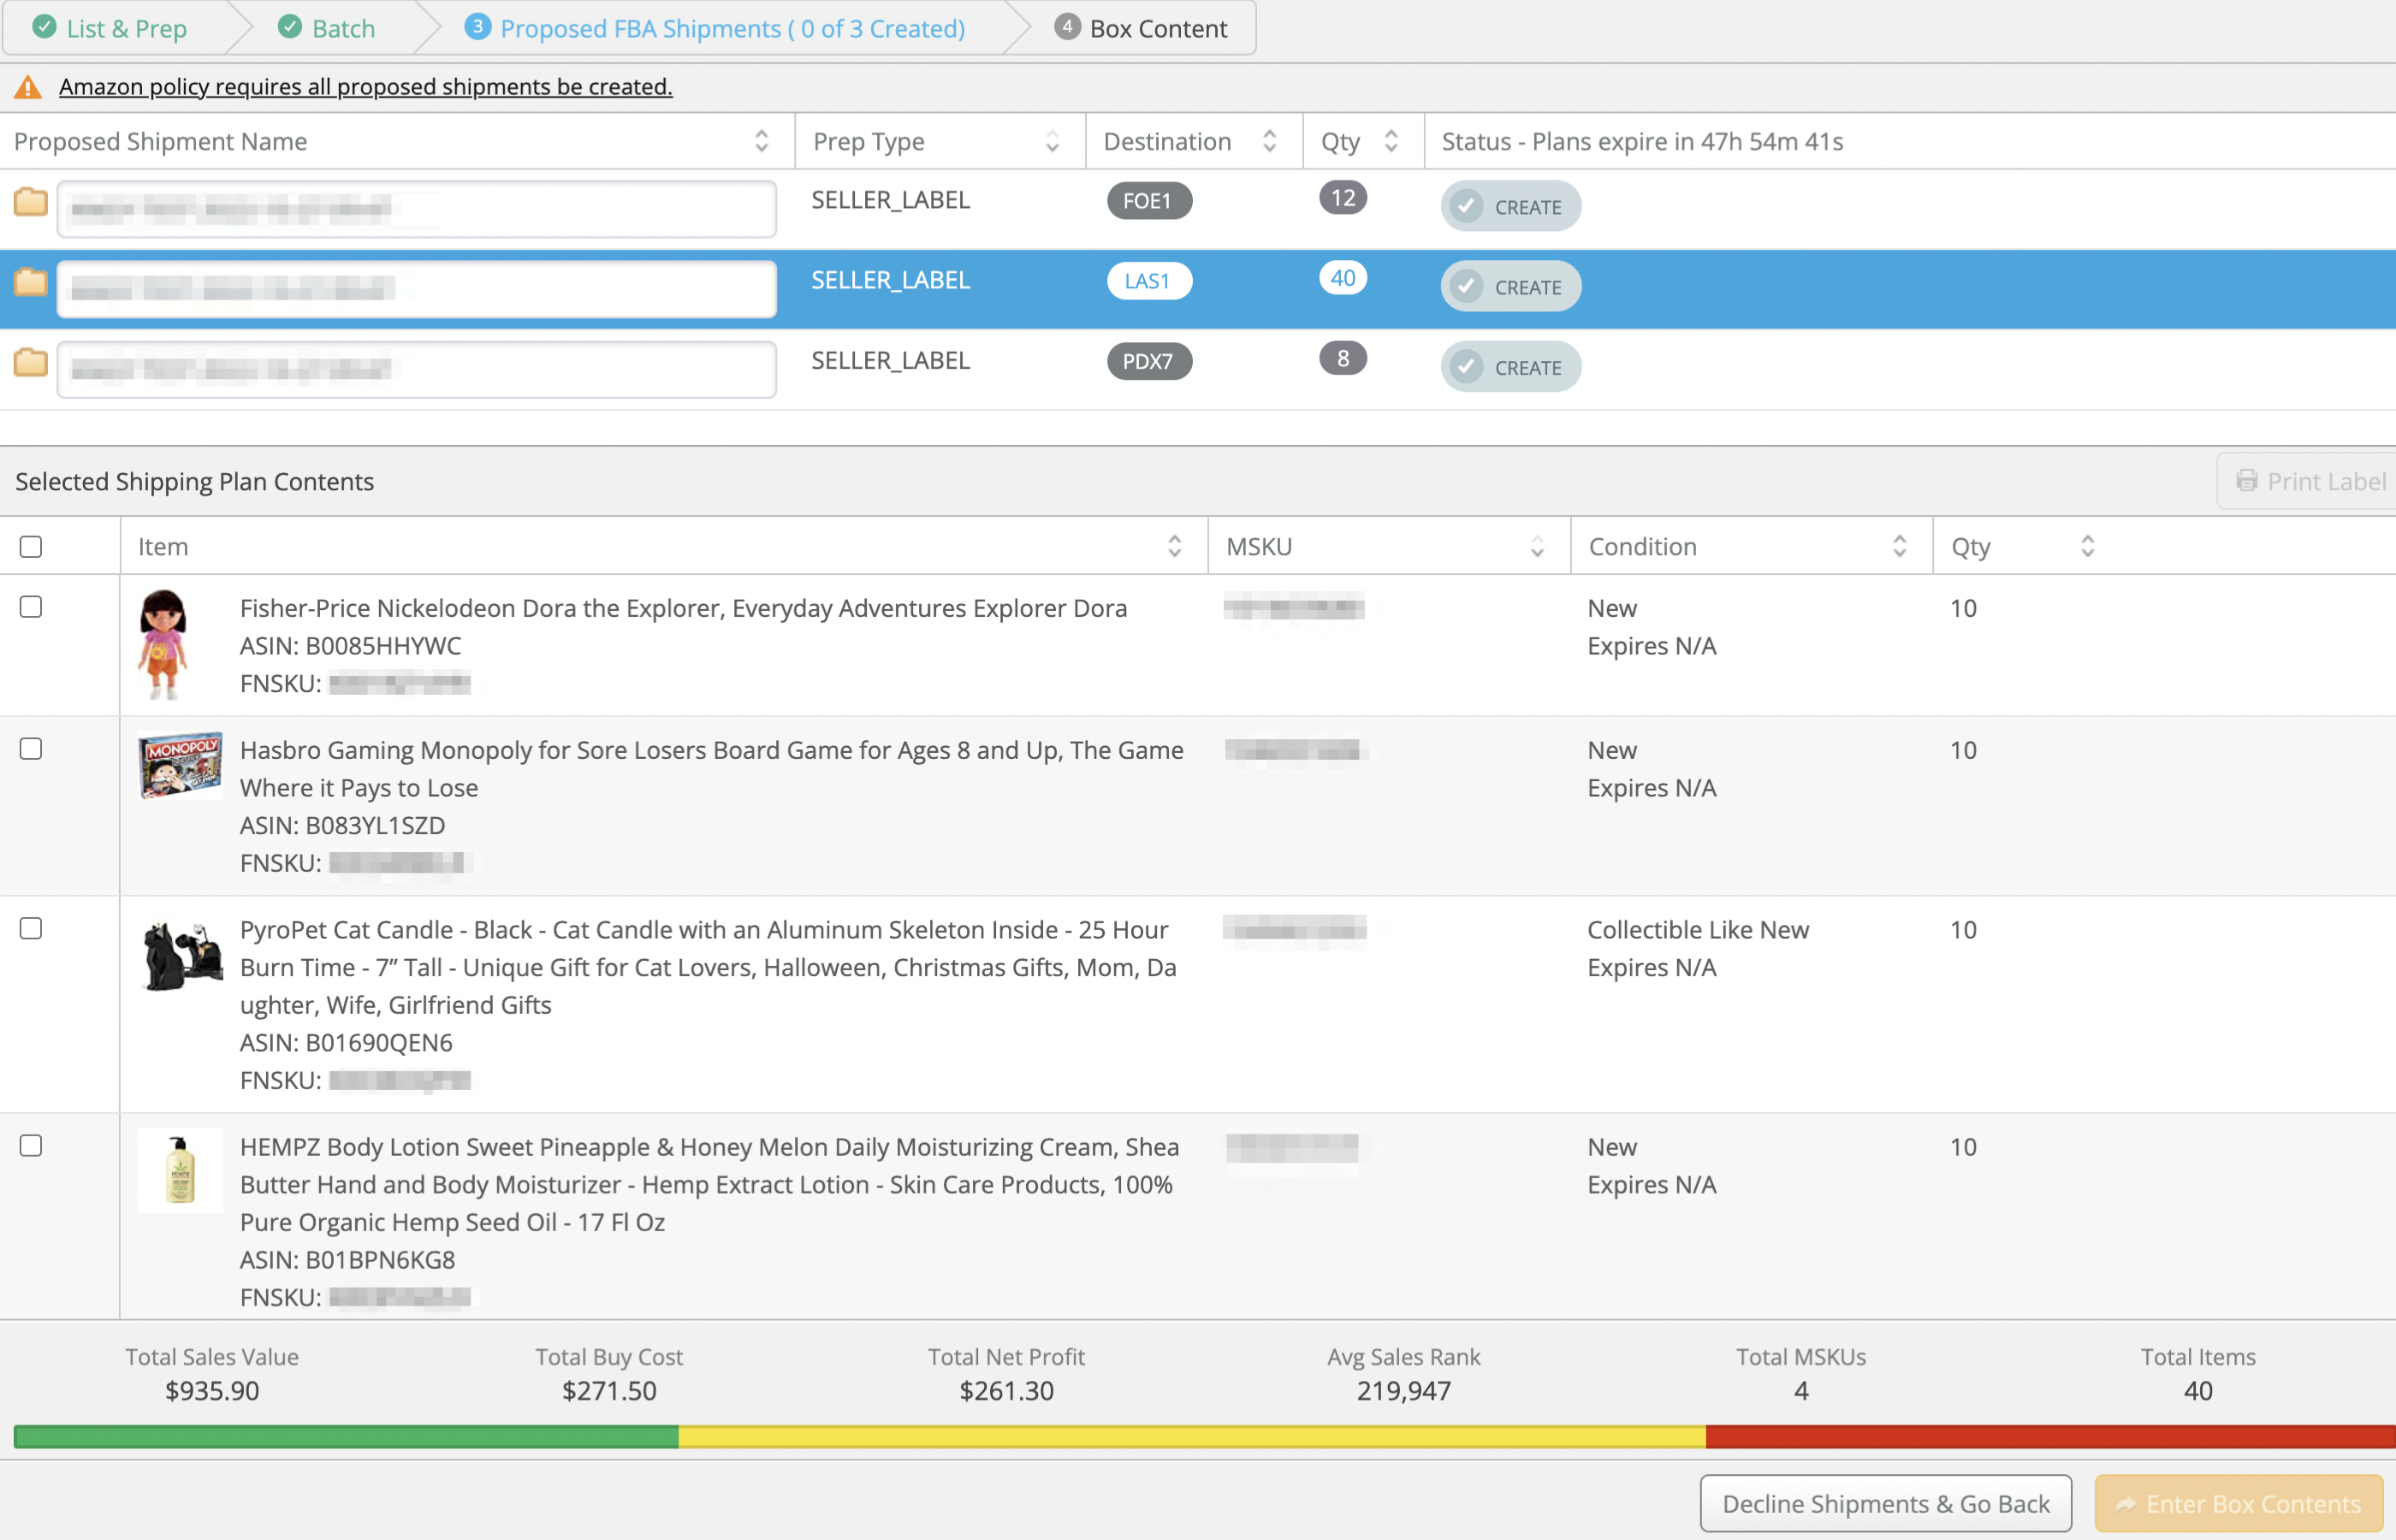
To create a shipment, click the Create button next to it. It will then prompt you if you are sure you'd like to create the shipment:

To proceed, click Yes, Create then the shipment will be created and appear in the Working Shipments window.
If you have multiple shipments for a batch, you'll see how many you have left to create towards the top of the page. Repeat these steps for all remaining shipments.

Note: To stay within Amazon's guidelines, be sure to create all of your proposed shipments before moving to the next step.
Closing the Batch
Once you've created all the proposed shipments for the batch, you can move over to your preferred software for 2D barcodes to complete your box content information and generate the 2D labels.
To prevent the batch from remaining open in Stratify, you can close it manually by clicking the three lines next to the batch name under Open Batches, then click Close.
When asked to confirm, click OK to proceed.
Once you have confirmed you have closed the batch, you can always view it again by going to List>Closed Batches. For details, please see- Closed Batches