Many times, the quantity of an item needs to be changed after you have already begun the listing process. You may have found an extra one in your pile or discovered one was damaged and needed to be removed.
The good news is, you can always edit the quantity of units in shipments as long as they are in "Working" status.
When you make changes to the quantity of an item in a shipment in Stratify, the same changes will be reflected for the shipment in Seller Central. Any edits you make will also be reflected in the batch once it is closed and displayed on the List>Closed Batches page in Stratify.
Depending on the Box Content setting for the batch that the shipments were created from and where you are in the workflow for the batch, the process to edit the quantity for items is a little different. For steps, pick the option that best fits your scenario below.
Note: With the Send to Amazon workflow, you can only follow the "Box Contents On" steps below prior to navigating to the shipment's page in Seller Central. Once you are on the shipment page with Send to Amazon, changes can no longer be made through their API.
Box Content On - Proposed FBA Shipments Page
Box Content On - Box Content Page Prior to Completing Box Content
Box Content On - Box Content Page After Completing Box Content
Printing Additional Labels When Increasing Quantity
Box Content On - Proposed FBA Shipments Page
With Box Contents On or Off, you can change the quantity of items in shipments once you have created a proposed shipment on the Proposed FBA Shipments page.
At that point, the Qty field for each item in the shipment becomes editable in the Selected Shipping Plan Contents area.
To change the quantity of an item in a shipment, click in the Qty field and change the value. After clicking out of the field or pressing Tab or Enter/Return on your keyboard, you will see that the new quantity has been saved for the item.

Note: You must also still abide by the 5% or 6 unit rule from Amazon that limits how much you can change quantity. (You will see a pop-up warning you of this if you attempt to make changes outside of these limits.)
You can also delete items completely by changing the Qty field value to zero or clicking the trashcan icon.

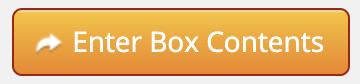
Once you are happy with the items in the shipments, click the Enter Box Contents button to move to the Box Content page.
Box Content On - Box Content Page Prior to Completing Box Content
If you have moved past the Proposed FBA Shipments page, and are on the Box Content page for the shipments, it's not too late to change the quantity of items in them if needed.
To change the quantity of an item in a shipment, click in the Qty field and change the value. After clicking out of the field or pressing Tab or Enter/Return on your keyboard, you will see that the new quantity has been saved for the item.
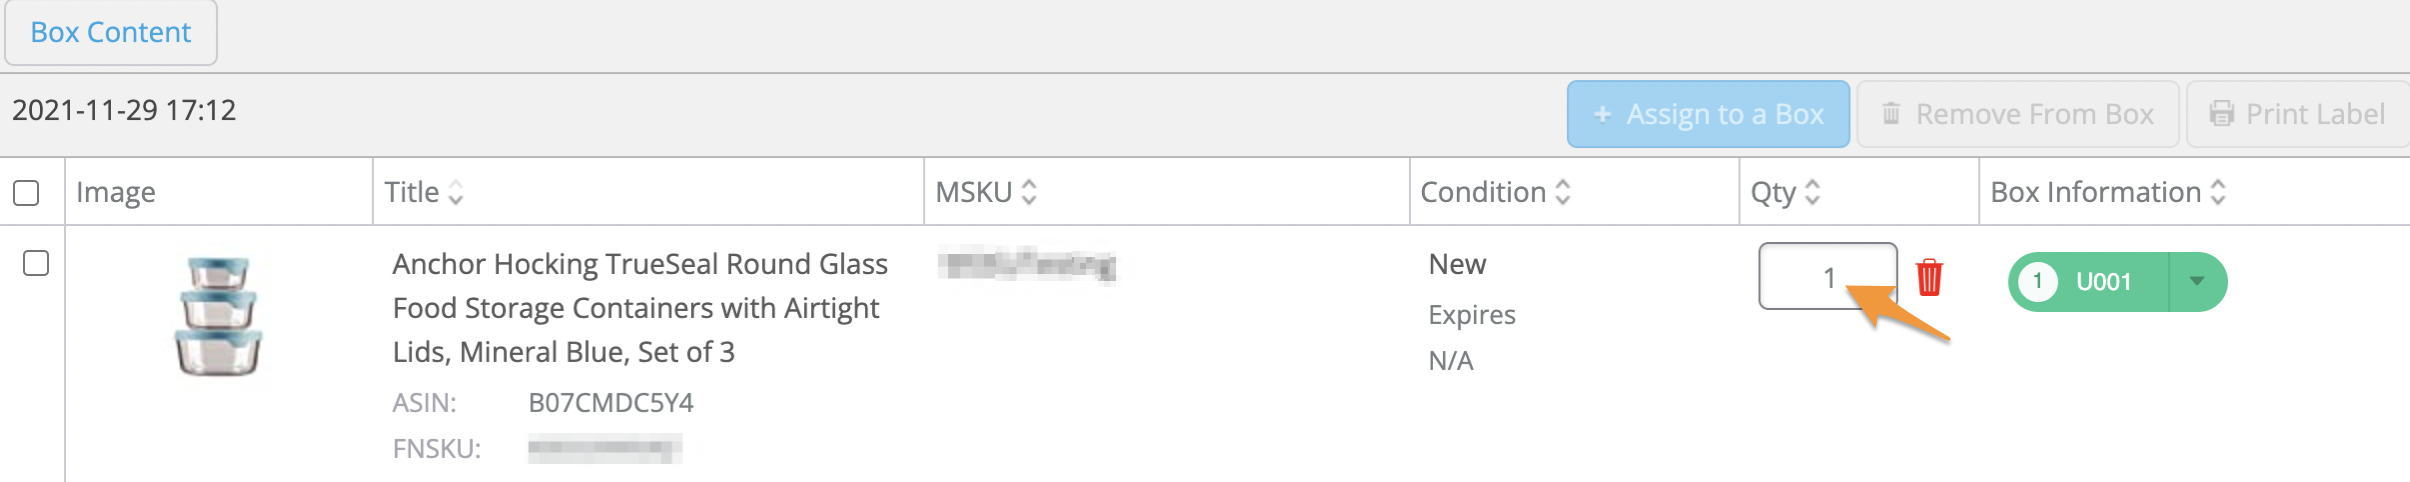
Note: You must also still abide by the 5% or 6 unit rule from Amazon that limits how much you can change quantity. (You will see a pop-up warning you of this if you attempt to make changes outside of these limits.)
If you need to decrease the quantity of an item that is assigned to multiple boxes, you will need to adjust the quantities assigned to the box(es) prior to adjusting the number in the Qty field. This is because the system is unsure which box to remove the quantities from automatically.
For example, if the quantity of the item pictured below needed to be changed from 5 units to 4, an error will appear since the units are assigned to two different boxes.
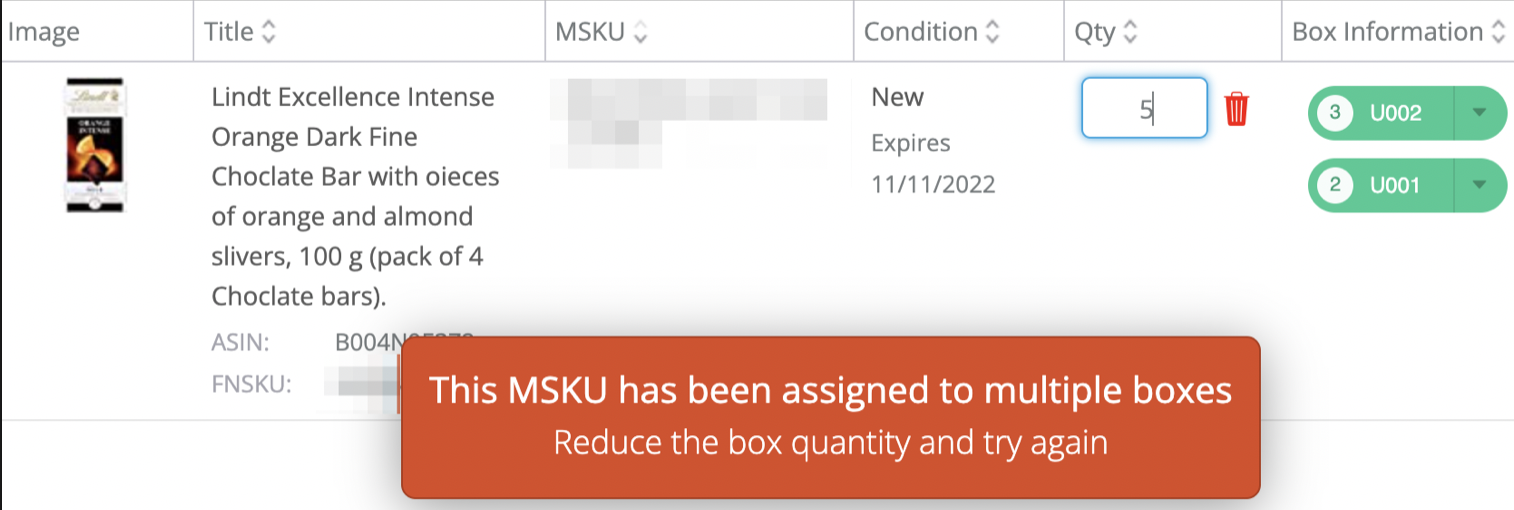
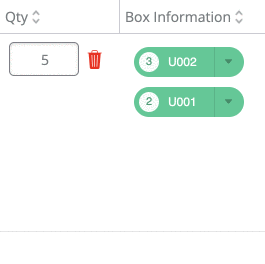
However, unassigning 1 unit from the box to match what was removed from the shipment prior to adjusting the Qty field bypasses this.
You can also delete items completely by changing the Qty field value to zero or clicking the trashcan icon.
Box Content On - Box Content Page After Completing Box Content
If you have already completed your Box Content information and your batch has closed, but you need to change quantities, you can use the same capability through your Working Shipments window.
First, on the List>List & Prep page in Stratify, locate the Working Shipments window.
Click the three horizontal lines to the right of the shipment that your item is in and select Work on Shipment.
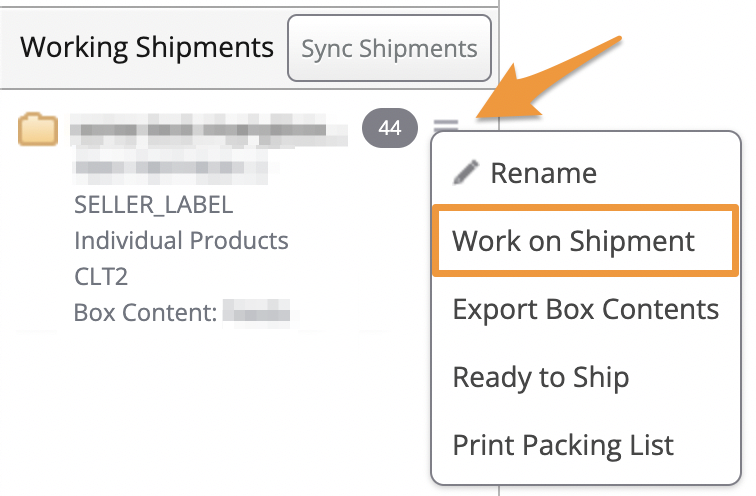
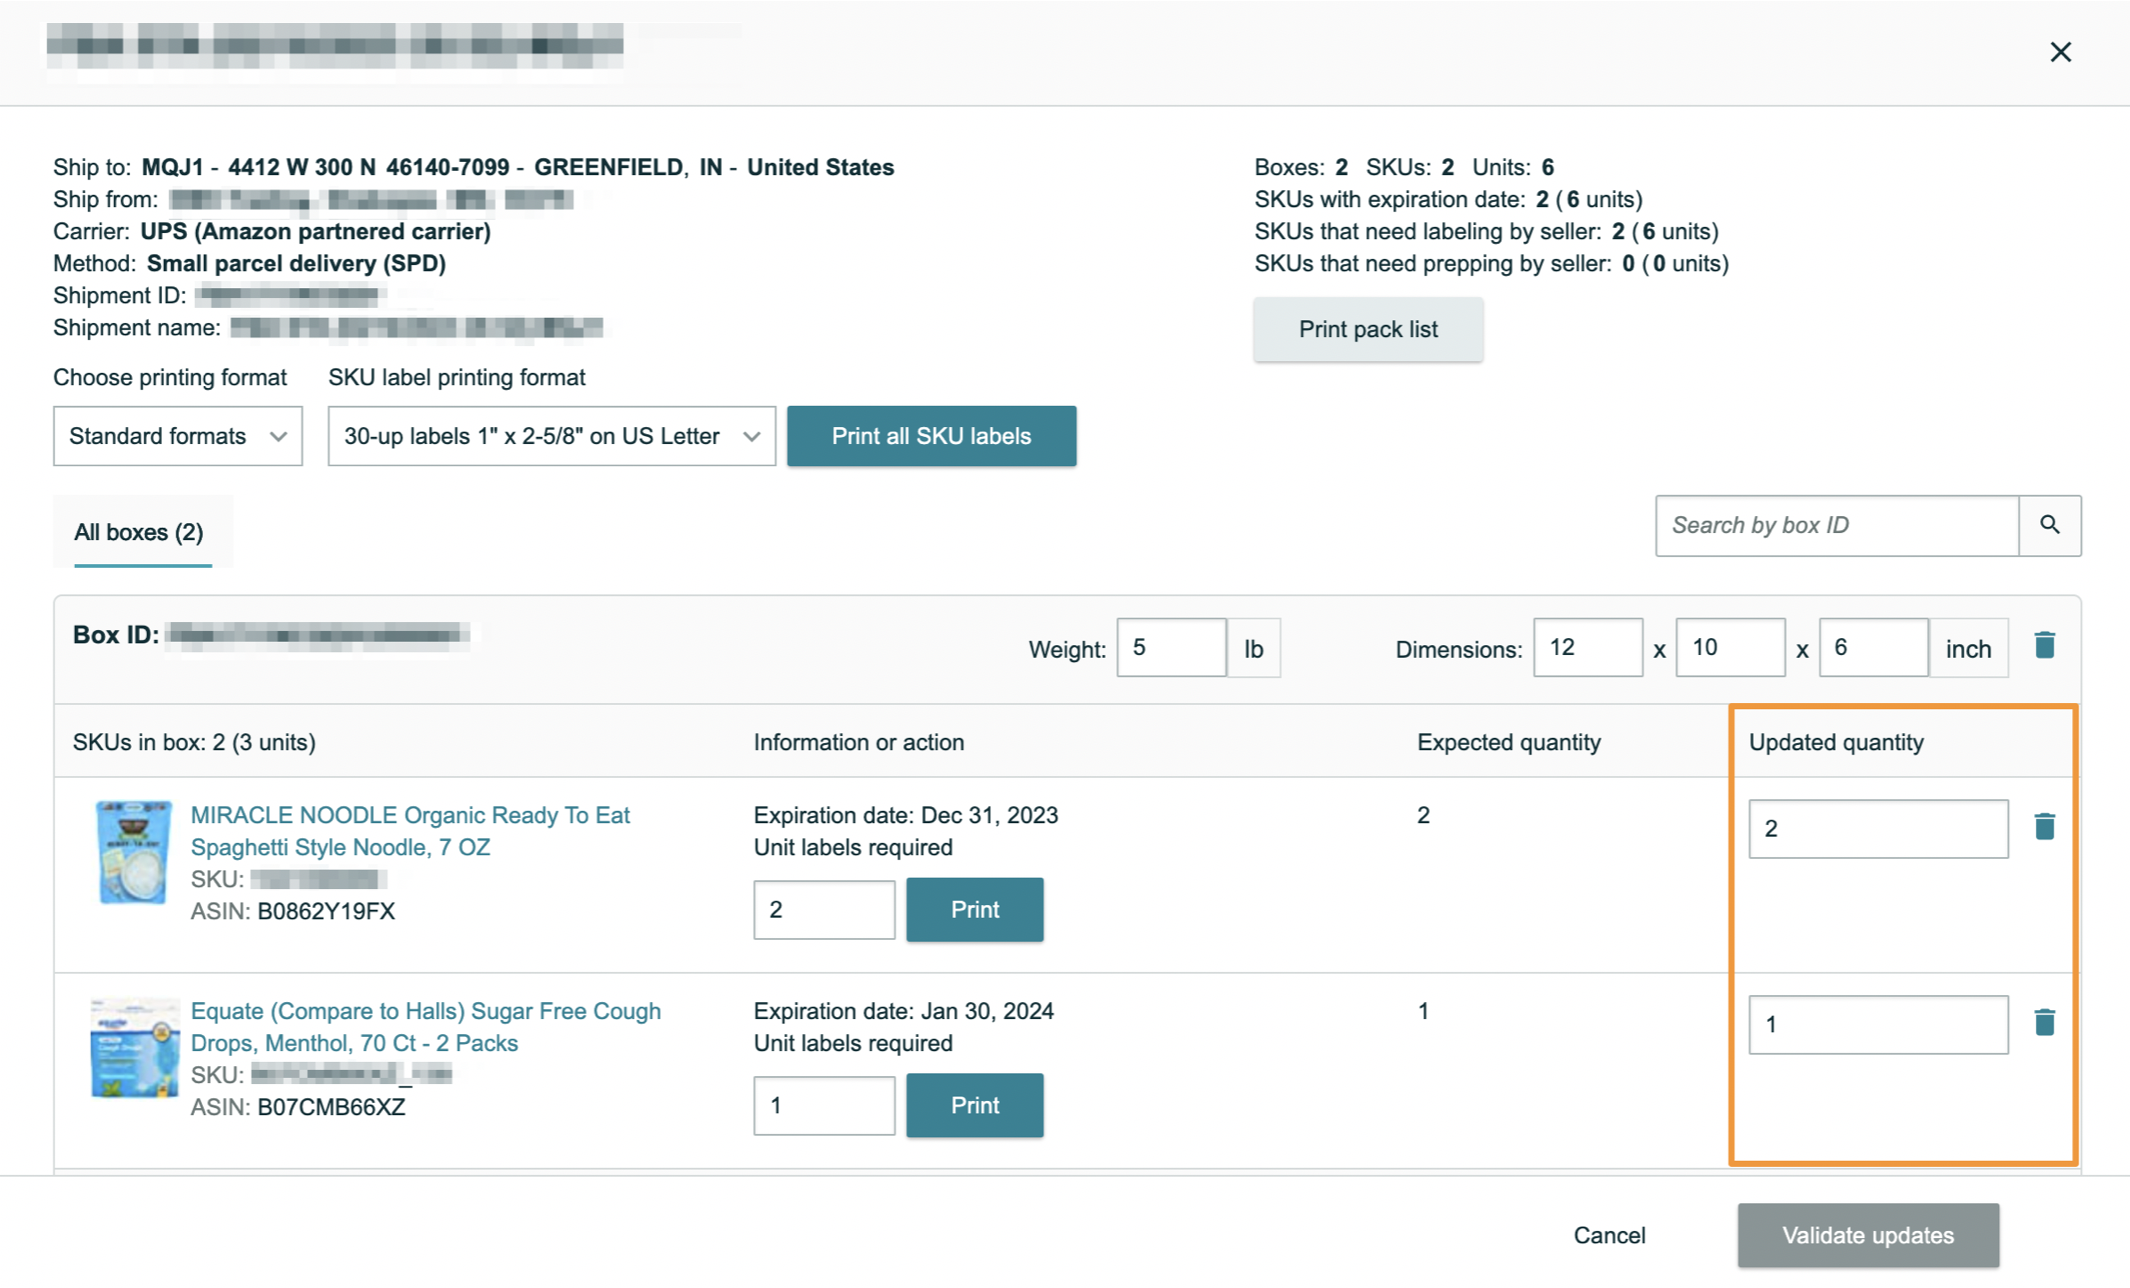
You will see your shipment information open up on the right-hand side where you can make any needed changes.
To change the quantity of an item in a shipment, click in the Qty field and change the value. After clicking out of the field or pressing Tab or Enter/Return on your keyboard, you will see that the new quantity has been saved for the item.
Note: You must also still abide by the 5% or 6 unit rule from Amazon that limits how much you can change quantity. (You will see a pop-up warning you of this if you attempt to make changes outside of these limits.)
If you need to decrease the quantity of an item that is assigned to multiple boxes, you will need to adjust the quantities assigned to the box(es) prior to adjusting the number in the Qty field. This is because the system is unsure which box to remove the quantities from automatically.
For example, if the quantity of the item pictured below needed to be changed from 5 units to 4, an error will appear since the units are assigned to two different boxes.
However, unassigning 1 unit from the box to match what was removed from the shipment prior to adjusting the Qty field bypasses this.
You can also delete items completely by changing the Qty field value to zero or clicking the trashcan icon.
Once all the adjustments have been made, the next steps will vary depending on the Box Content Setting for your batch.
Transmitting Updated Feeds
If the Box Content Setting for the batch is On- Using Feeds, you must transmit the updated information to Seller Central before moving there to finish up the shipment.

For full steps, please see- Box Content Using Feeds - How to Resend Your Box Content Information
Printing Updated 2D Barcodes
If the Box Content Setting for the batch is On- Using 2D Barcodes, you must print new barcode labels with the updated information.
For full steps, please see- Box Content Using 2D Barcodes - How to Print Updated 2D Barcode Labels

Box Content Off
With the Send to Amazon workflow, the only time you can change the quantity of units in a shipment is during Step 3, which takes place after completing the box content information and confirming shipping charges.
To do this, during Step 3, click View or edit contents next to the shipment.

A window will open where you can make adjustments to the quantity of each item in the shipment (by the 5% or 6 unit rule) or click the trash can icon to delete an item completely.
Note: If you make any changes to the number of units in the shipment during Step 3 of the Send to Amazon workflow, you will also need to adjust your replenishment rows in Stratify for the items accordingly to avoid inventory alerts. For details, please see- Adjusting Your Replenishment Rows to Resolve an Inventory Alert
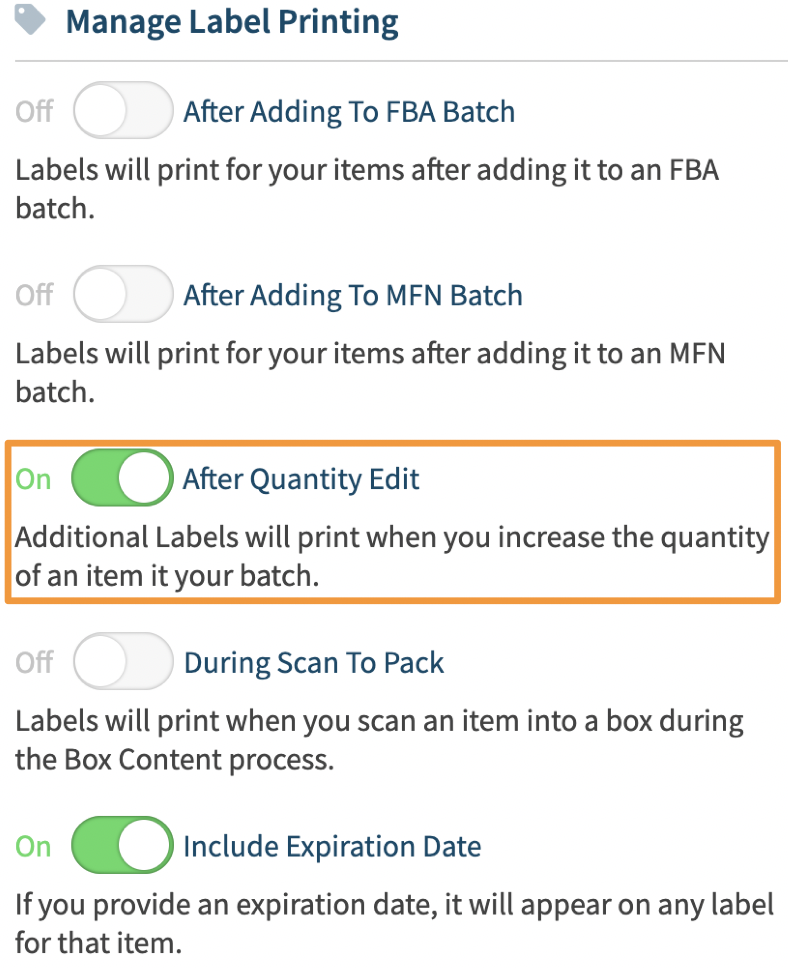
Printing Additional Labels When Increasing Quantity
If you have the After Quantity Edit option enabled under Settings>Print Settings, additional labels will automatically print when you increase the quantity of items. For example, with this setting turned On, if you add two more units of an MSKU to a shipment, two additional labels will print for you automatically.
If you've increased the quantity for an item but prefer to print labels manually, please see- Printing Labels Manually