You can set up a Zapier integration to link InventoryLab with another program. To start, you'll be able to set up an integration with the following triggers:
When a new expense is created on the Other Expenses page
When an expense is edited
When an expense is deleted
When selecting to send a product zap through Scout.
If you are looking to set up automation for your product information in Scout, please see Set Up an InventoryLab Product Information Integration using Zapier
The expenses zap can keep you updated on additional expense transactions within your account. To set up the integration, follow the steps below.
In Stratify
1. In Stratify, navigate to Account Name>Settings>Integrations.
2. Under Automation, click the toggle switch for Zapier.

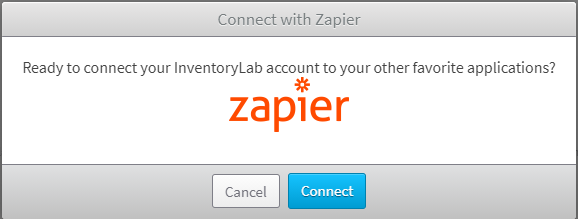
3. A prompt will appear. Choose Connect.
4. You are now able to set up the integration within Zapier. The button will show as On and an API key will appear. Click Copy to copy the API Key.

In Zapier
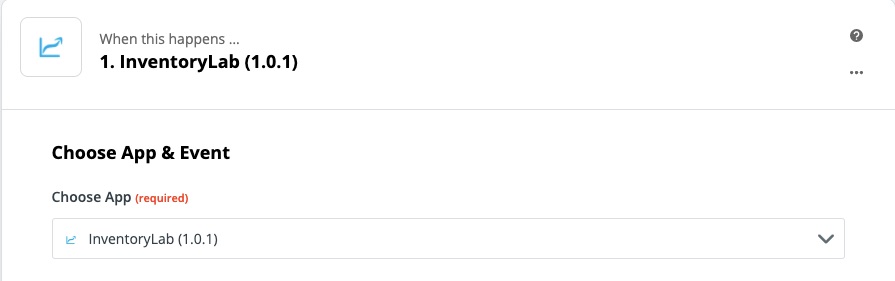
5. In Zapier, click Make a Zap.

6. For the trigger (When this happens...), under Choose App, select the latest version of InventoryLab.
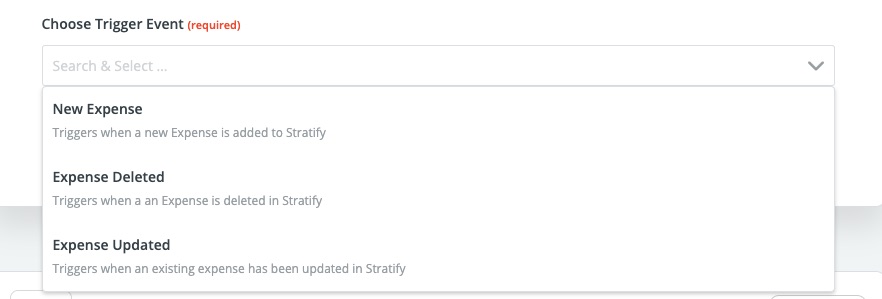
7. Under Choose Trigger Event, you have the option to select:
- New Expense - Triggers when a new Expense is added to Stratify in the Other Expenses page.
- Expense Deleted - Triggers when an Expense is deleted in Stratify within the Other Expenses page.
- Expense Updated - Triggers when an existing expense in the Other Expenses page has been updated in Stratify.
8. After selecting your Trigger, click Continue.
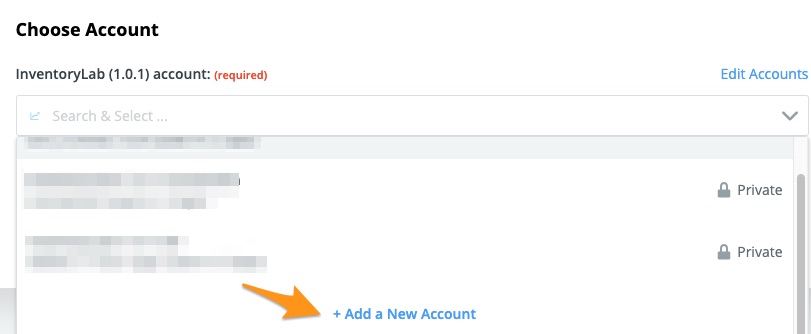
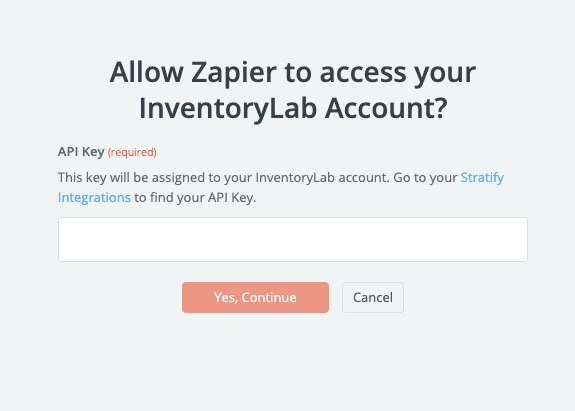
9. After Choose Account, click the drop-down to select an account if already added. If not, choose + Add a New Account.
10. A pop-up will appear. Paste in the API Key you copied from Stratify and choose 'Yes, Continue'.
11. After selecting the new account, choose Continue.
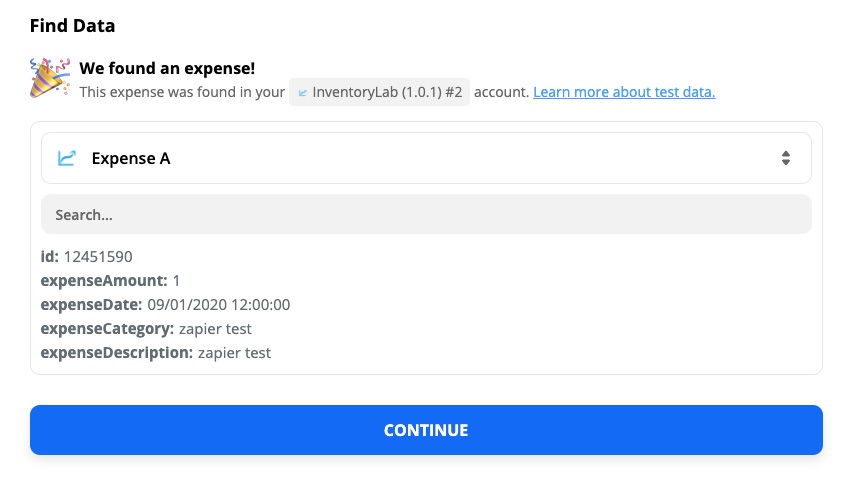
12. Next, you'll want to test your data. Zapier will use an expense to test that they are able to find an expense transaction, so you may need to add one to your InventoryLab account if you don't have any. Once that's done, click Continue.
13. Finally, you'll set up the app you would like to integrate with. To get started, take a look at some of the articles under Zapier's Help Portal. Just search for the app you would like to link to.
You'll be able to choose the following selections from the expense:
- Expense Amount
- Expense Category
- Expense Date
- Expense Description
To get you started, here are a few help pages for possible syncs:
Note: Only manually created expenses or recurring expenses manually scheduled are eligible for the integration.