You can set up a Zapier integration to link InventoryLab with another program. To start, you'll be able to set up an integration with the following triggers:
When a new expense is created on the Other Expenses page
When an expense is edited
When an expense is deleted
When selecting to send a product zap through Scout.
If you are looking to set up automation for your expenses, please see Set up an InventoryLab Expenses Integration Using Zapier
To start sending product information from Scout to another program, follow the steps below:
In Stratify - Set Up a Zapier Connection
In Scout - Create a Zap Using a Template
In Zapier - Create Your Own Zap
In Stratify - Set Up a Zapier Connection
1. In Stratify, navigate to Account Name>Settings>Integrations.
2. Under Automation, click the toggle switch for Zapier.

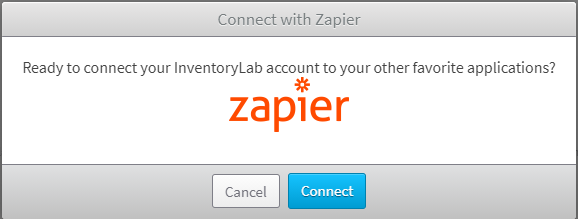
3. A prompt will appear. Click Connect.
4. You are now able to set up the integration within Zapier. The button will show as On and an API key will appear. Click Copy to copy the API Key.

From here, you can set up a zap using one of our templates directly in Scout, or you can set up your own within Zapier.
In Scout - Create a Zap Using a Template
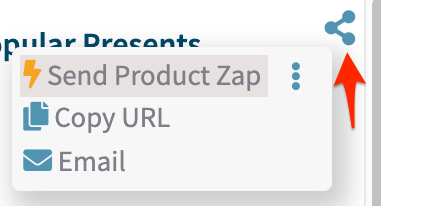
1. Under Research>Scout, search for your item and pull up the details.
2. Click the share button at the top right and click Create Product Zap.
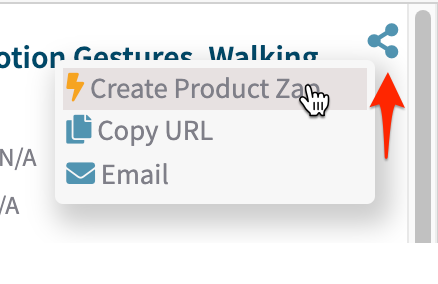
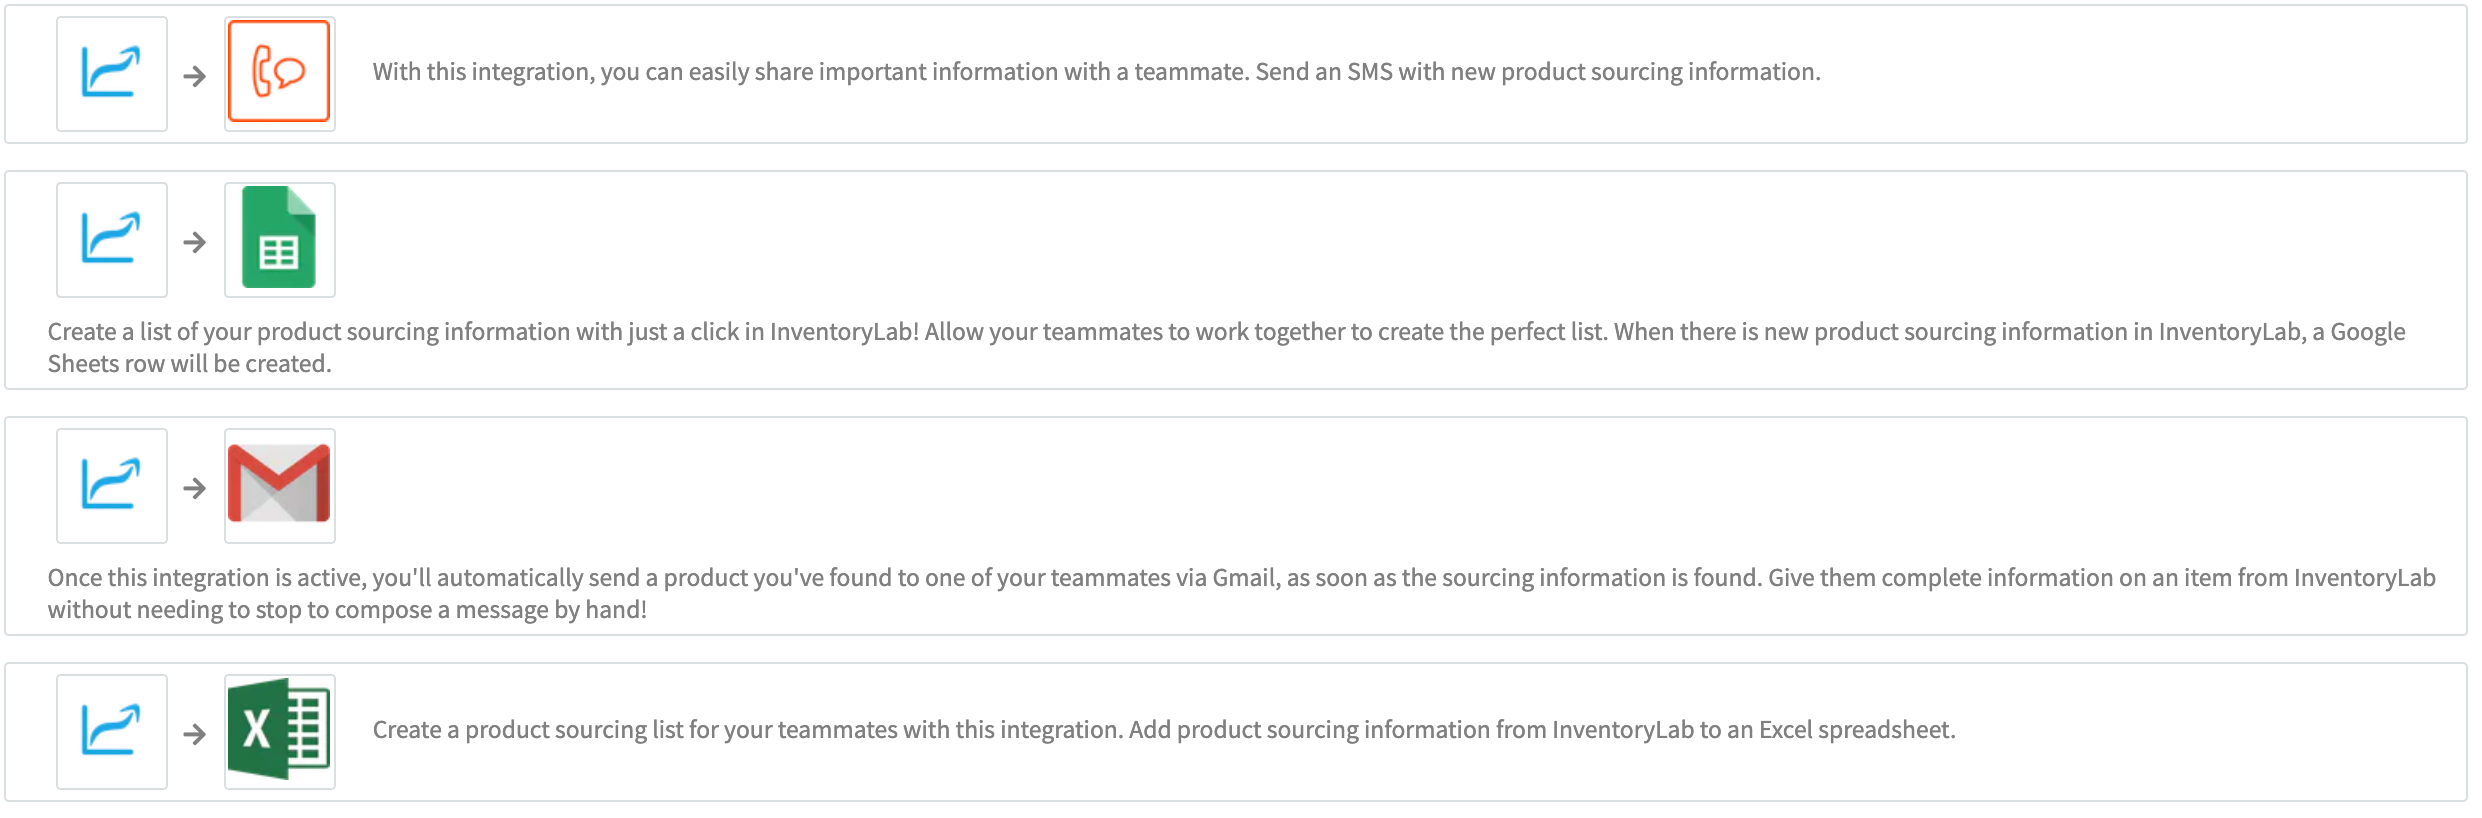
3. Select a template for your zap. Scroll to see all of the options.
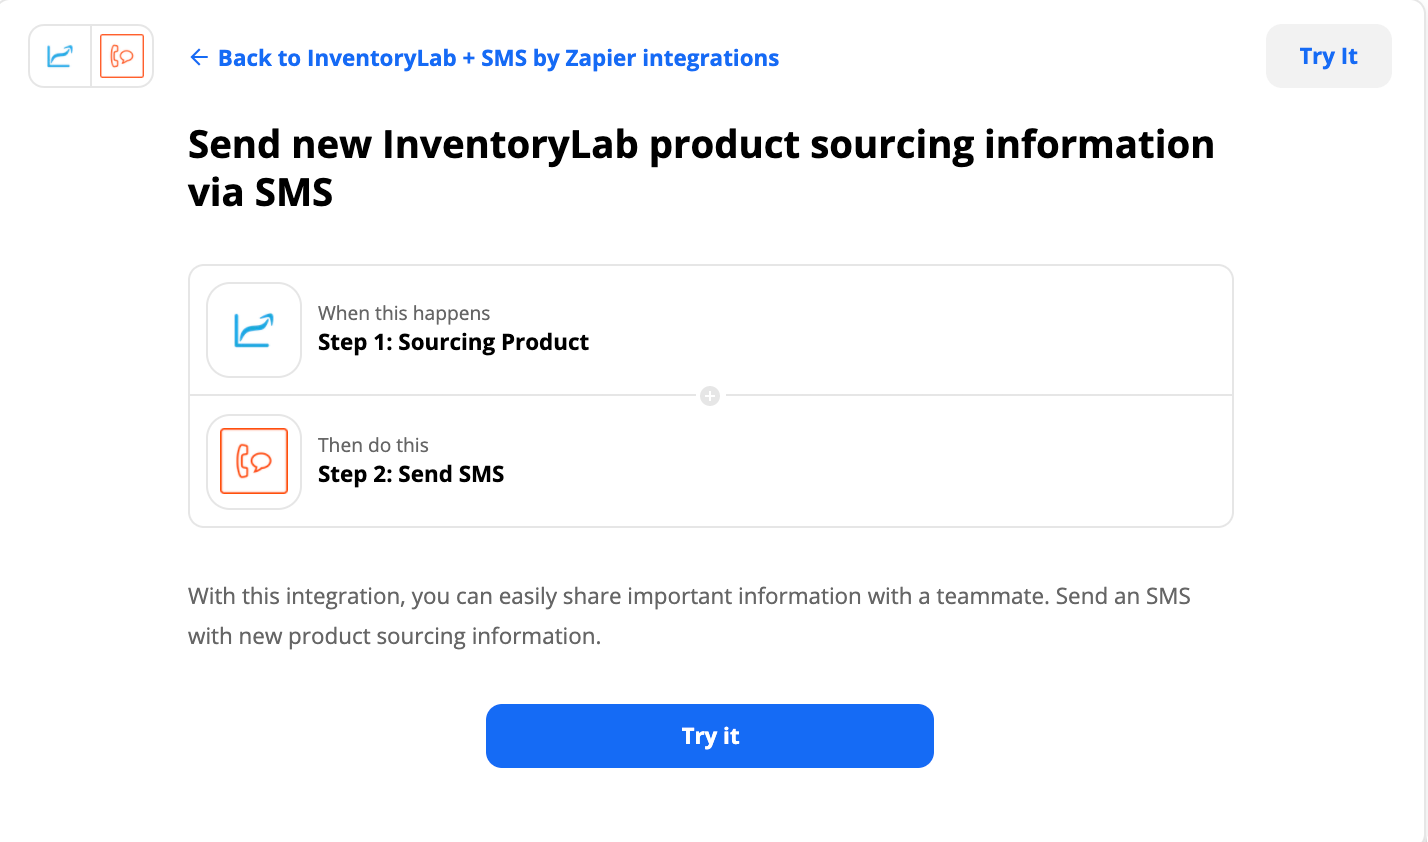
4. Once you select a template, you will be taken to Zapier to finalize the zap and turn it on. Select Try it and make any needed adjustments to the zap.
See the In Zapier - Create Your Own Zap section for instructions on setting up the InventoryLab portion of the zap.
Note: Only one zap can be set up at a time for product information. If you turn a new product sourcing zap on for InventoryLab through Scout or in Zapier, the older zap will be inactivated, even though it shows as ON in Zapier. To turn it back on, flip the zap off and on again.
In Zapier - Create Your Own Zap
1. In Zapier, click Make a Zap.

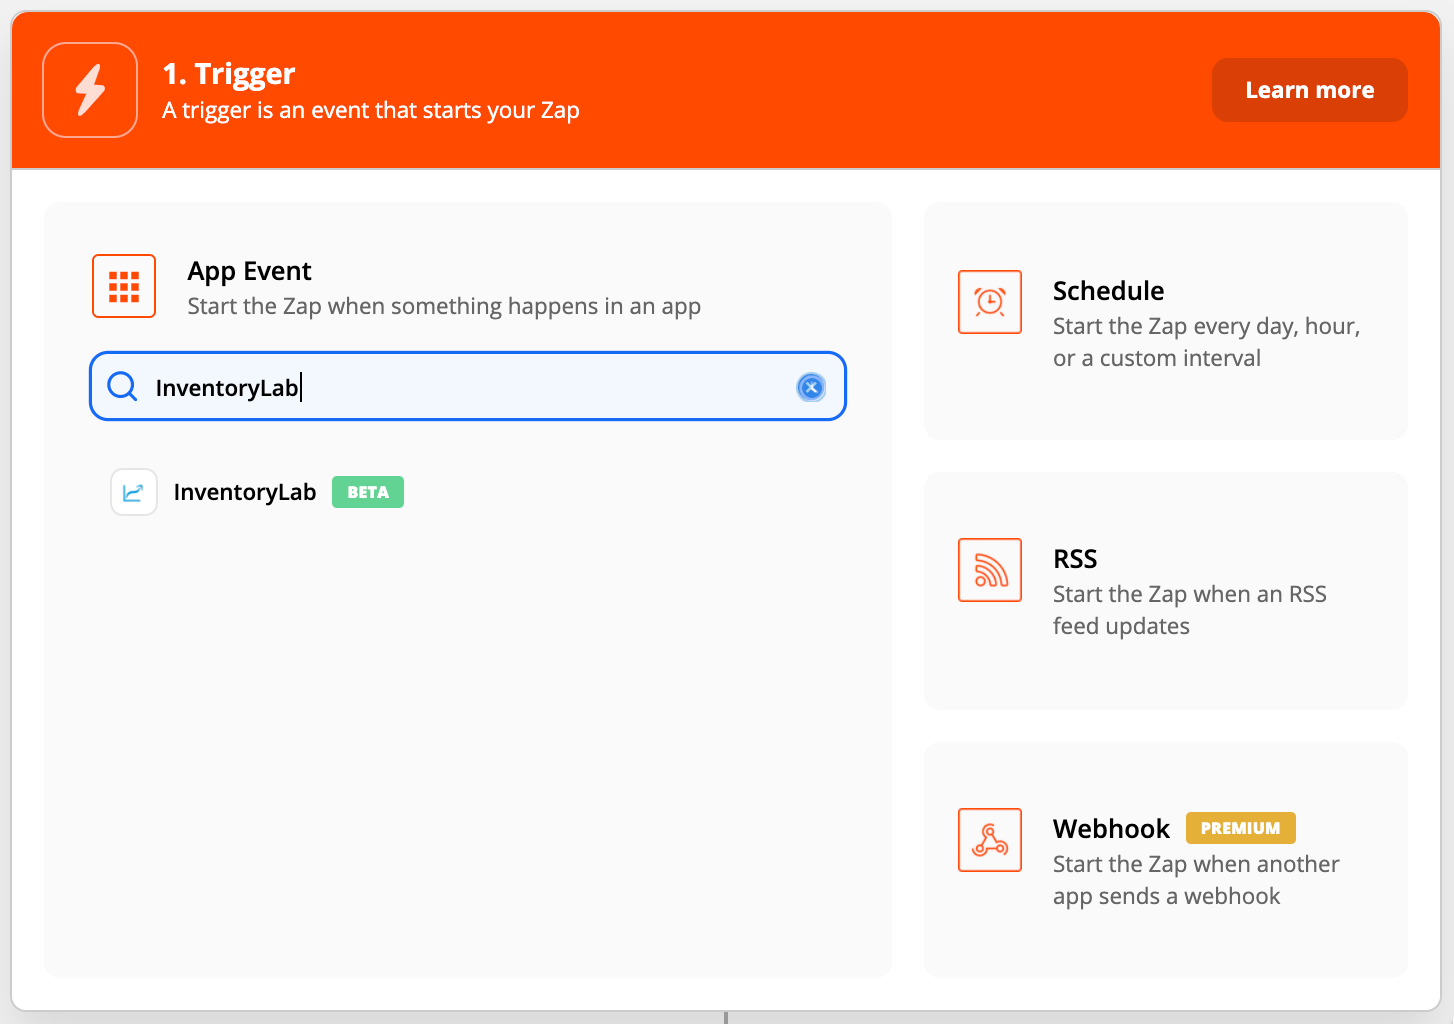
2. Under 1. Trigger, search for InventoryLab, and select it.
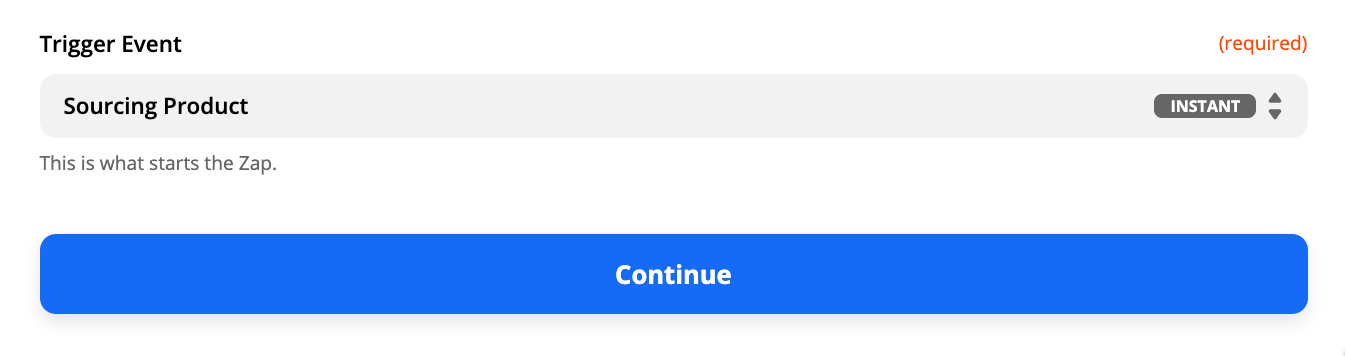
3. Under Trigger Event, select Sourcing Product, then Continue.
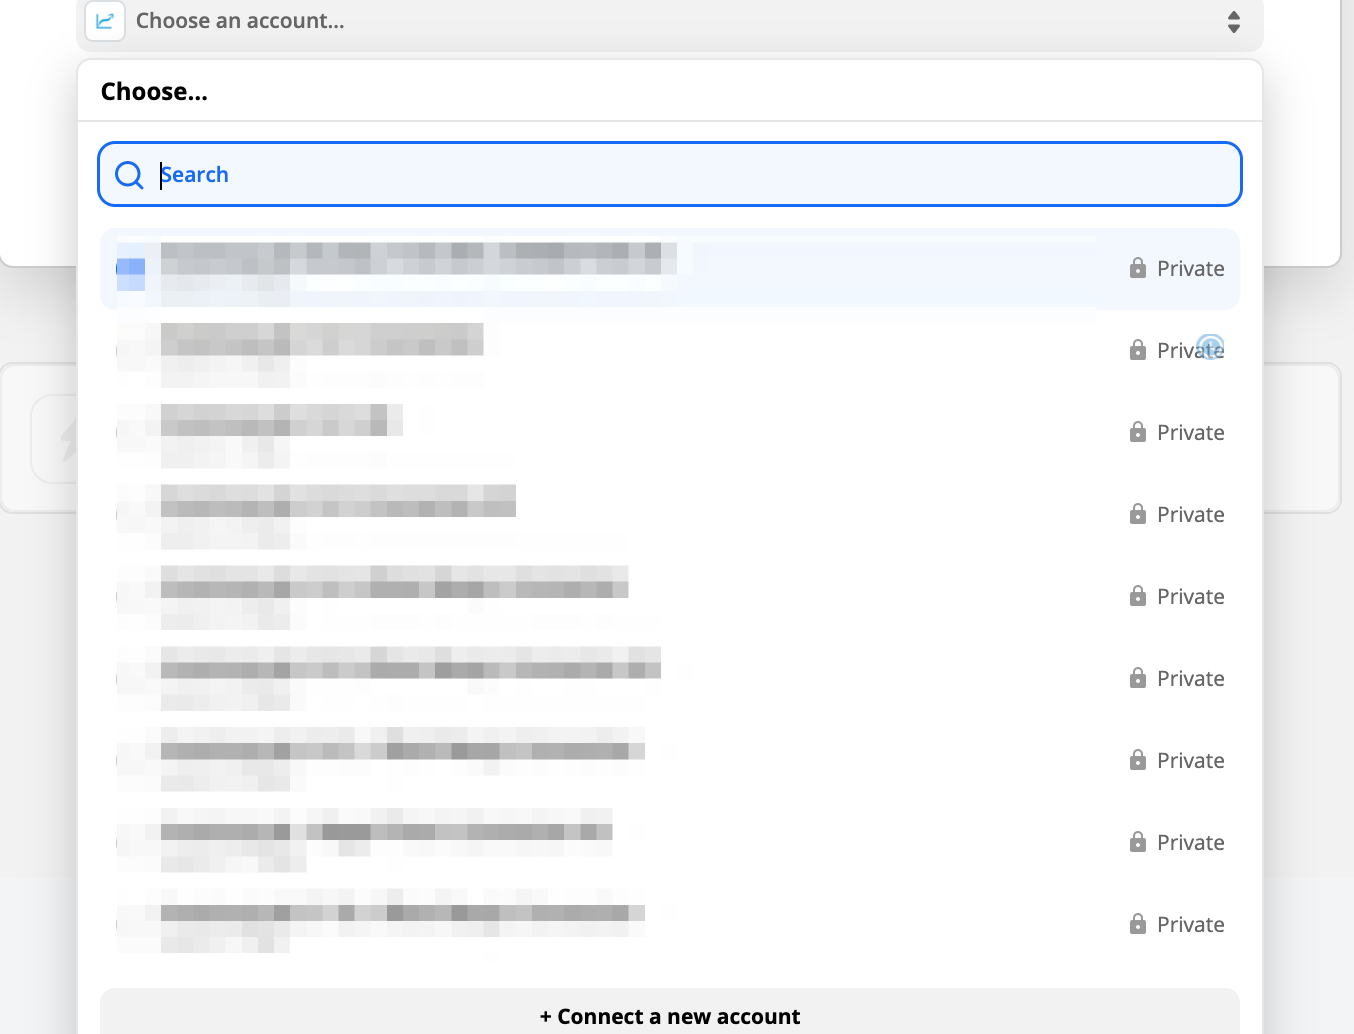
4. After Choose Account, click the drop-down to select an account if already added. If not, choose + Connect a new account.
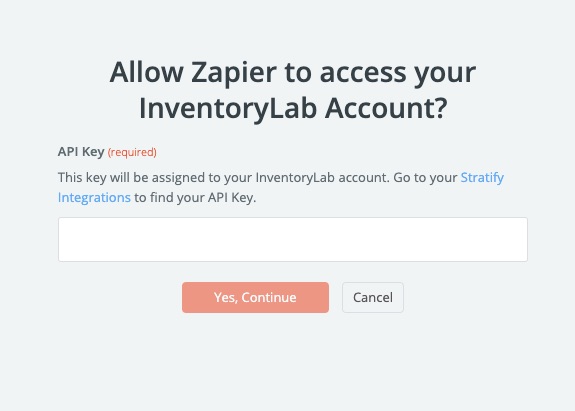
5. A pop-up will appear if you need to set up a new connection. Paste in the API Key you copied from Stratify and choose Yes, Continue.
6. After selecting the new account, choose Continue.
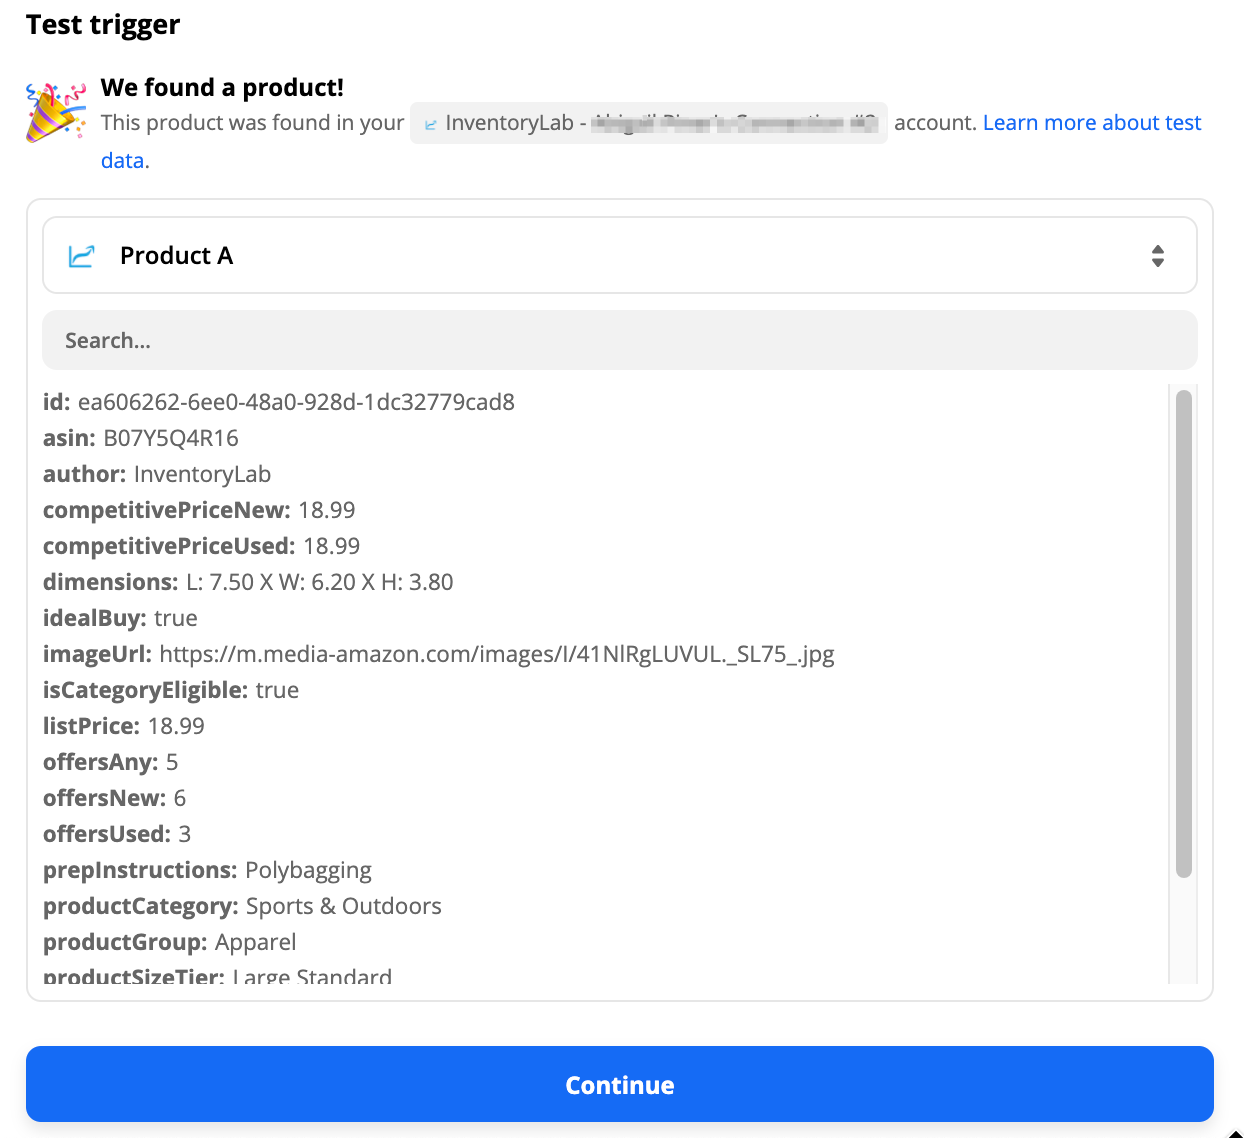
7. Next, you'll want to test your connection. Zapier will use test ASIN data.
8. Finally, you'll set up the app you would like to integrate with. To get started, take a look at some of the articles under Zapier's Help Portal. Just search for the app you would like to link to.
You'll be able to choose the following selections to send for your product:
- ASIN - The ASIN of the item
- Title - The title of the product.
- Author - The author of the item (if a book)
- Ideal Buy - If this item meets your ideal buy parameters or not.
- Scout URL - A link to the item in Scout.
- Buy Box - New: The New Buy Box (Featured Offer) price of the item.
- Buy Box - Used: The Used Buy Box (Featured Offer) price of the item.
- Dimensions - The dimensions of the item.
- Original List Price - The original list price of the item.
- Total Offers - The total amount of offers for the category.
- Sales Rank - The sales rank of the product.
- Image - A link to the product image.
- Prep Instructions - The required prep instructions for the item.
- Sub Category - The product subcategory.
- Main Category - The product main category used for fees.
- Size Tier - The size tier of the product used for fees.
In Scout - Using your Created Zap
1. Under Research>Scout, search for an item.
2. Under the product details, click the Share button and select Send Product Zap.
The last zap turned on will send.
If you need to change or create a new zap using templates, click the three dots to be taken to the template prompt.