Any shipment received at an Amazon fulfillment center without box content information is subject to fees that Amazon assesses. InventoryLab has built options to provide this information into your workflow to make your life easier!
This article details entering box content and printing 2D Barcodes.
Have a barcode scanner? Check out this article for steps on scanning items to assign them to boxes- Box Content Scanning
2D Barcode Label Requirements
The 2D barcode labels generated by InventoryLab are PD417, the recommended type by Amazon.
Amazon also recommends printing these labels using either a thermal or laser printer. Their support article states:
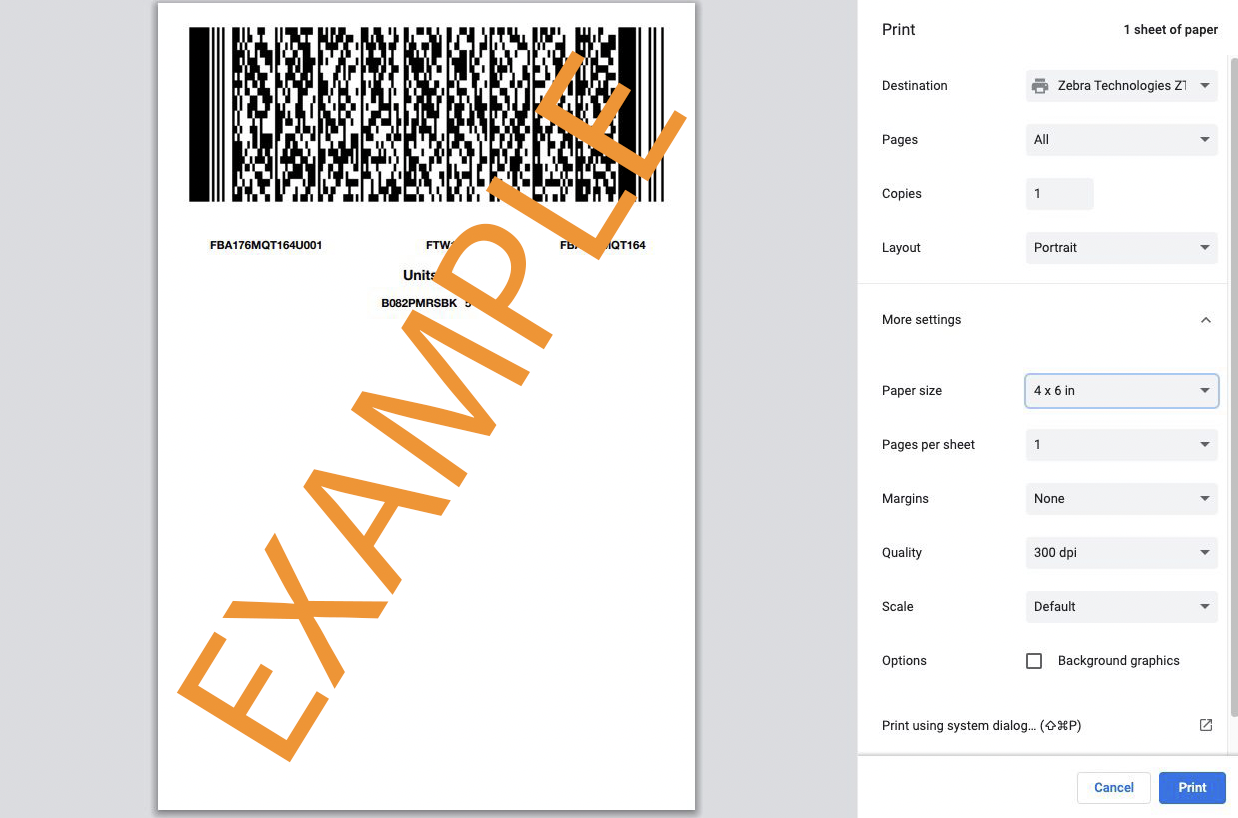
We recommend thermal or laser printers for printing your 2D barcode labels. Do not use inkjet printers. To prevent the PDF print area from scaling, make sure the printer’s scaling settings are set to none or 100%. We also recommend that you periodically test your barcodes by scanning them.
For more information, please refer to their article- Provide 2D barcodes for box content information
Box Content Settings
To provide box content using 2D barcodes, you must have this option turned on both in Seller Central and in Stratify.
Turning on 2D Barcodes in Seller Central
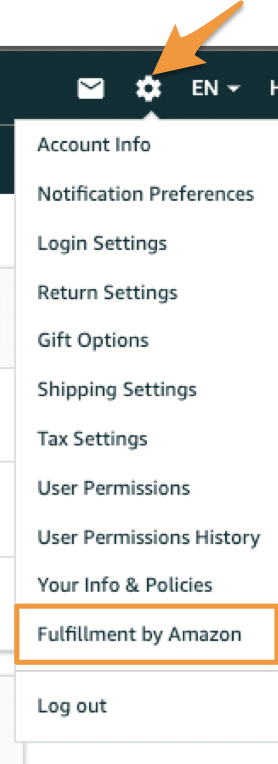
Log in to Seller Central and click the Settings gear in the upper right corner.
Hover over it and select Fulfillment by Amazon from the drop-down menu, as shown below:
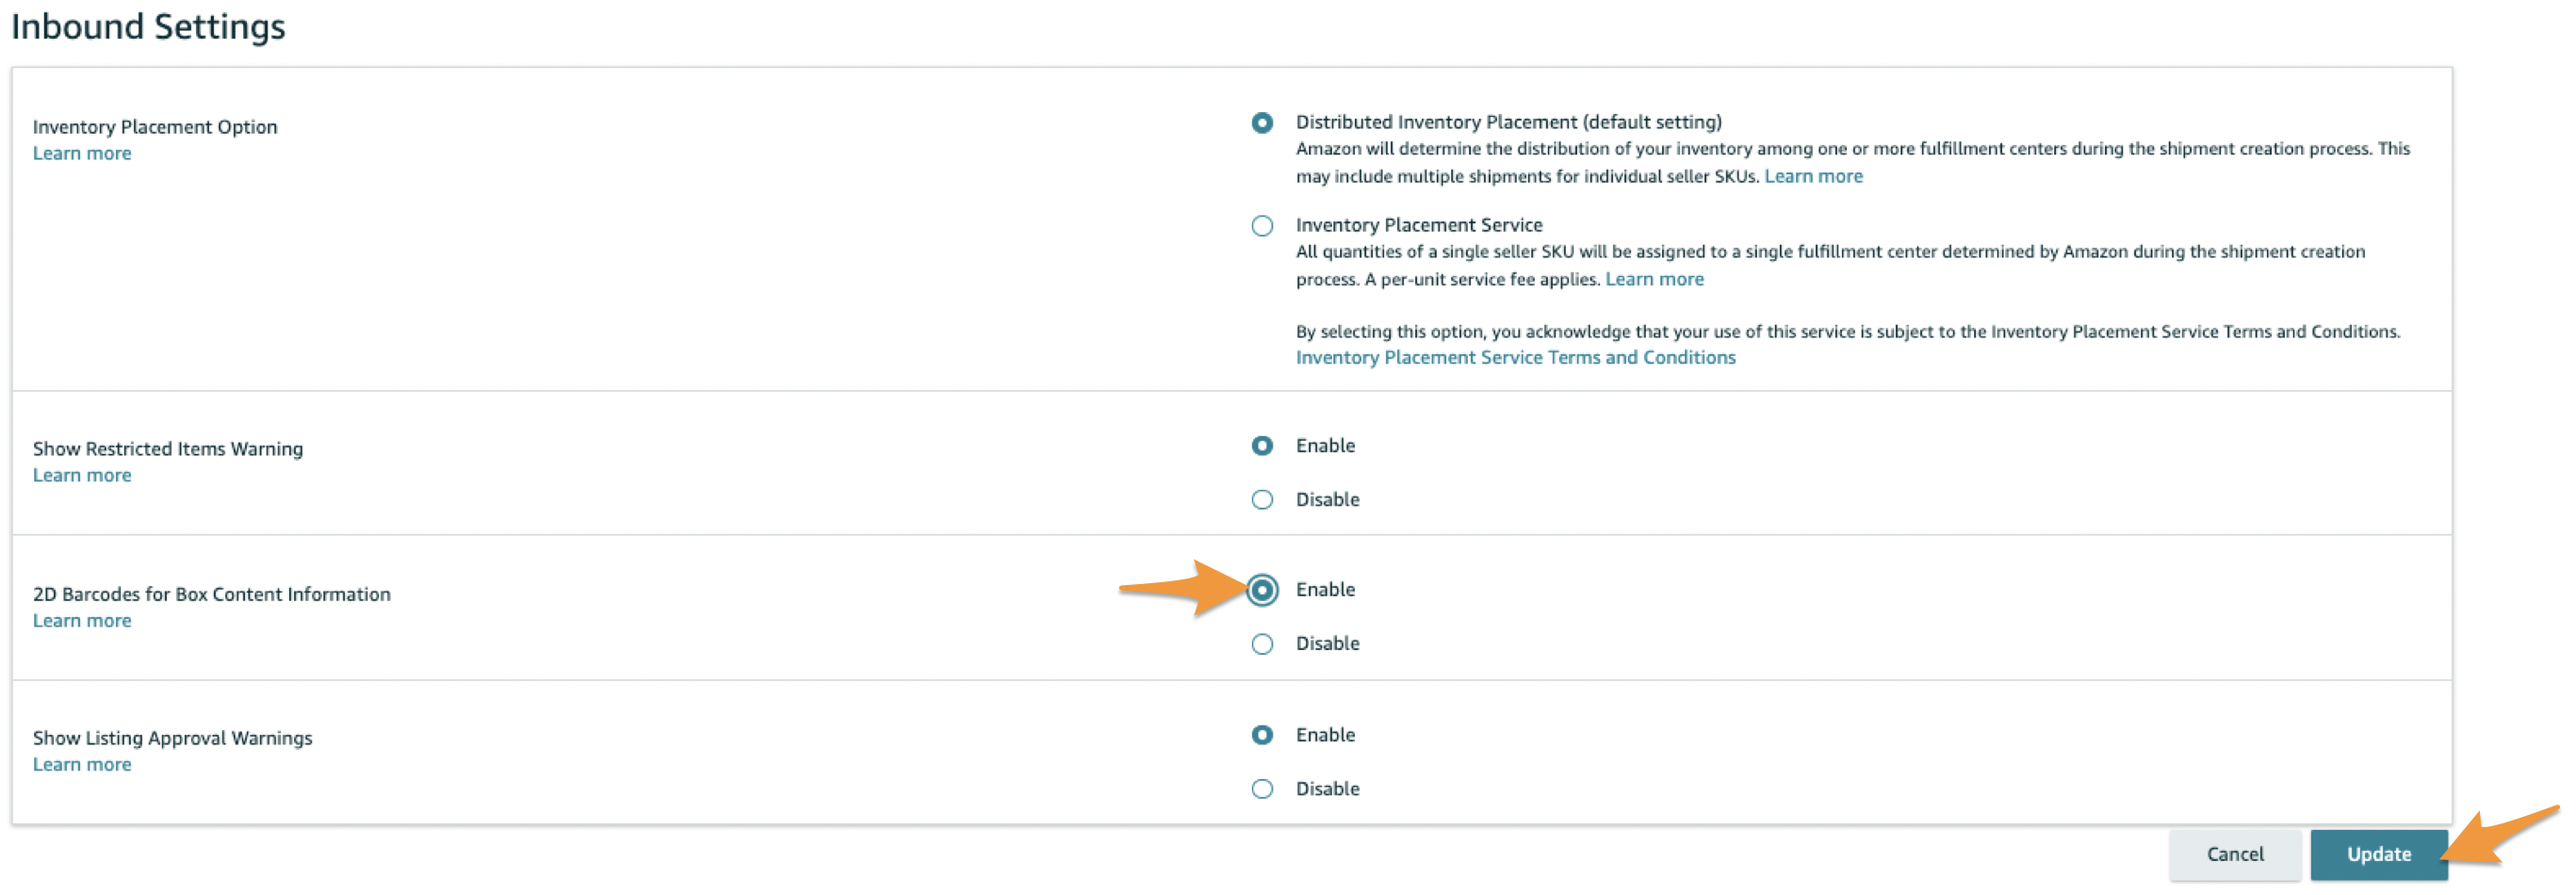
Locate the Inbound Shipping section and confirm that the option for 2D Barcodes for Box Content Information is Enabled.
If not, click the Edit button.

Select Enable in the 2D Barcodes for Box Content Information section, then click Update.
Turning on Box Content in Stratify
When creating a new batch on the List>List & Prep page, set the Provide Box Content option to On- Using 2D Barcodes.
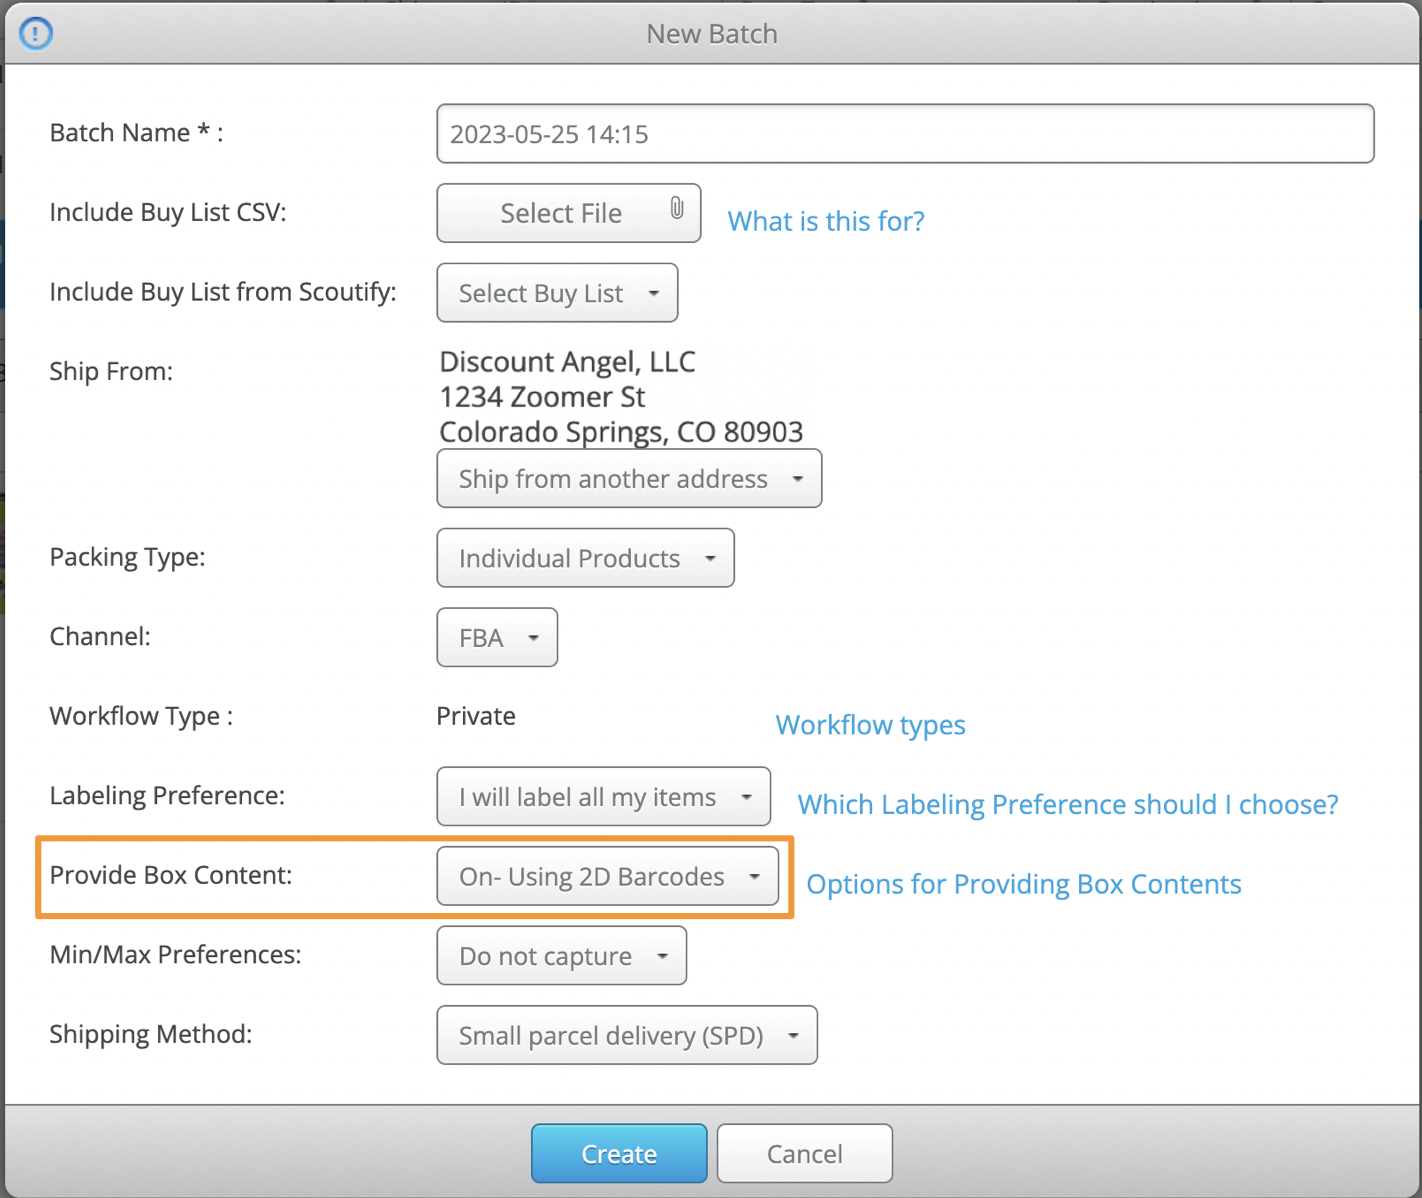
With this selection, you're all set to generate 2D barcodes for your boxes during the Box Content portion of the batch workflow.
Assigning Items to Boxes
Note: Amazon allows up to 100 items per box but only 700 characters per 2D Barcode label. Due to variables that affect the number of characters needed per item, we have set the limit to a maximum of 40 ASINs per box to prevent issues.
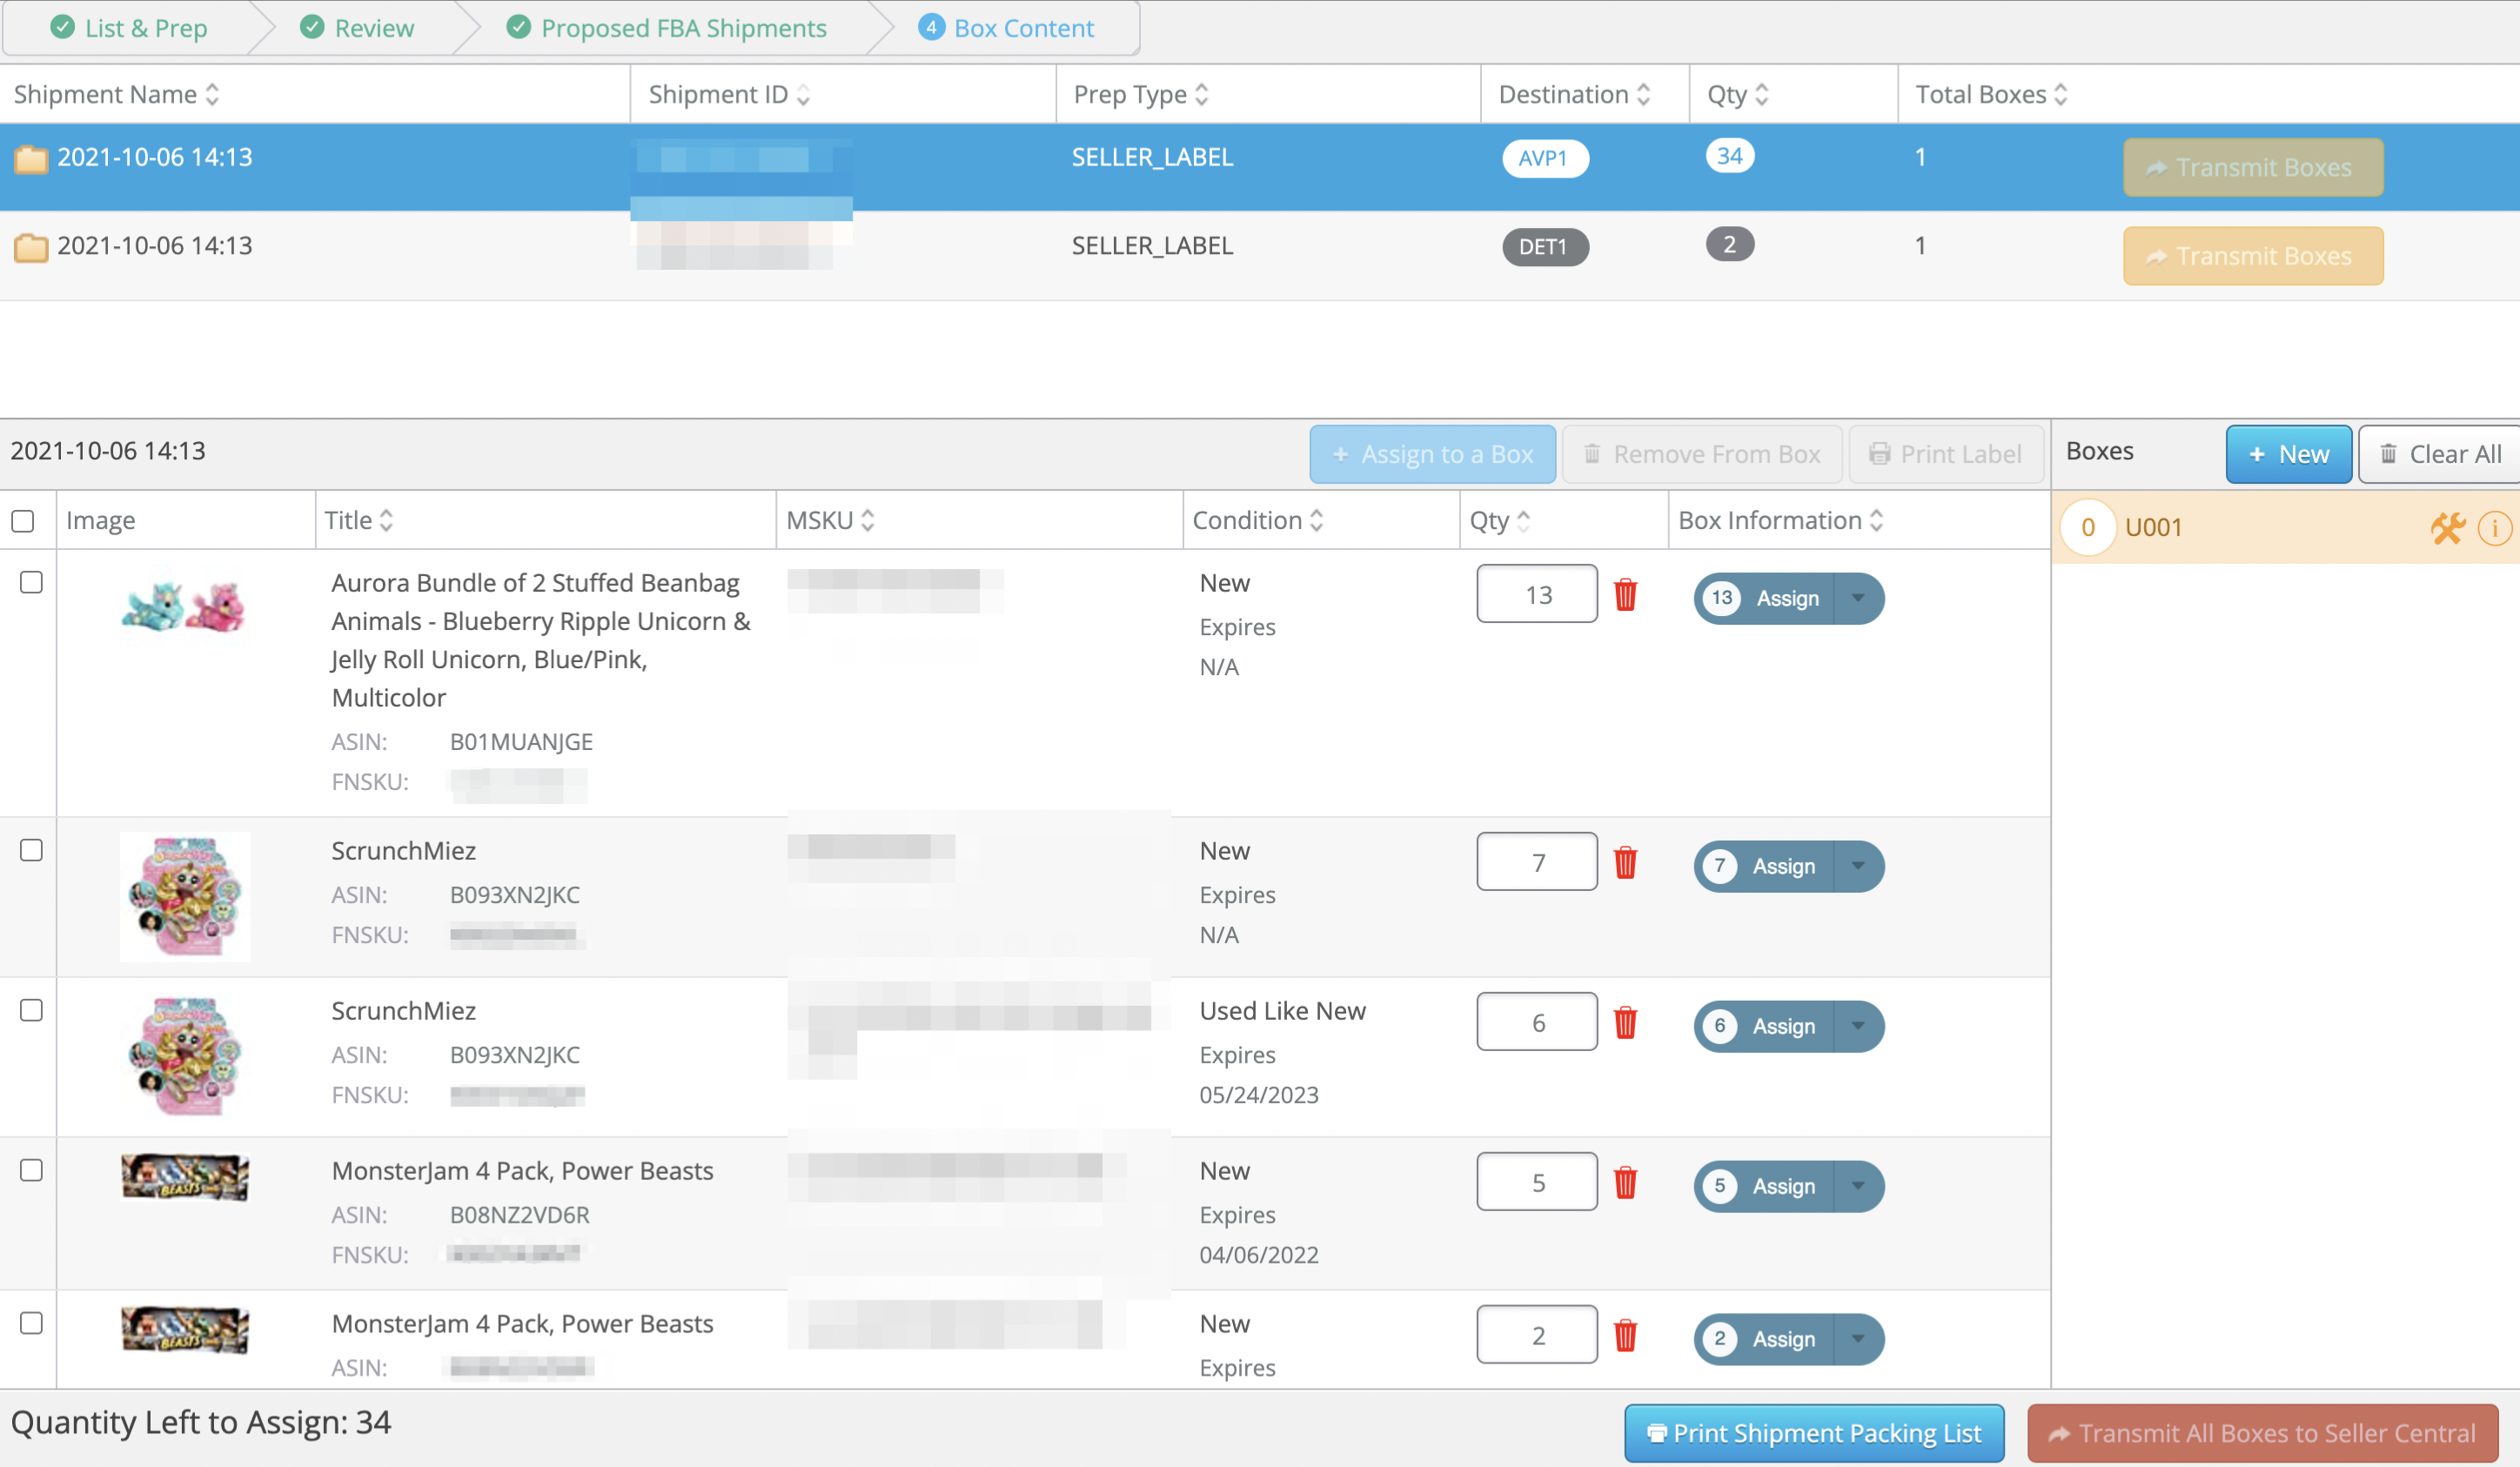
After you have created all your shipments on the Proposed FBA Shipping page, you will be brought to the Box Content page.
To begin, click the shipment you want to begin working on towards the top of the page. If the batch had multiple shipments, they will be listed individually.
This page has the following sortable columns:
Shipments Area
• Shipment Name
• Shipment ID
• Prep Type
• Destination
• Qty
• Total Boxes
Box Contents Area
• Title
• MSKU
• Condition
• Qty
• Box Information
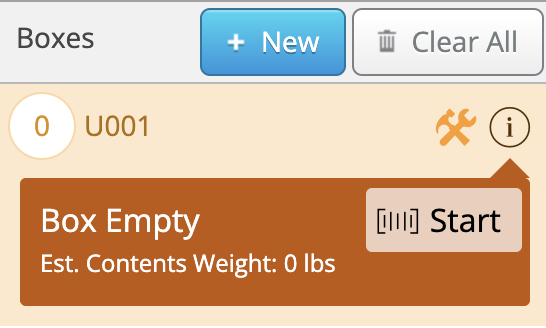
We automatically create the first box for you, as is shown in the panel to the right side of the screen. If you need additional boxes, click the + New button to create a new box.
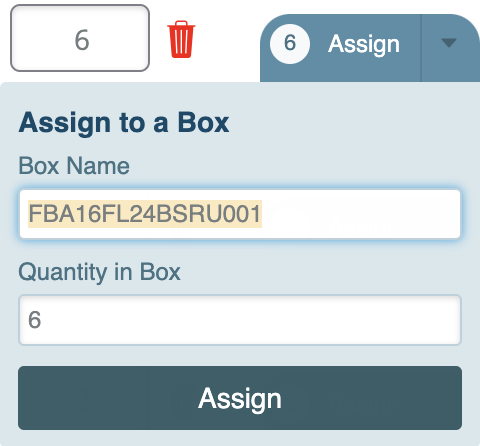
To assign an item to a box, locate it in the list and click the arrow next to Assign. Choose the box you’d like to put your items in, enter the quantity of units you’d like in the box, then click Assign.

A gray box means you have not assigned any quantities of that item to a box yet.
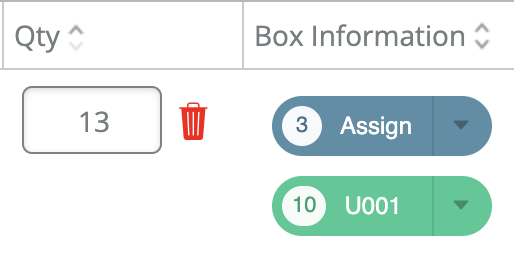
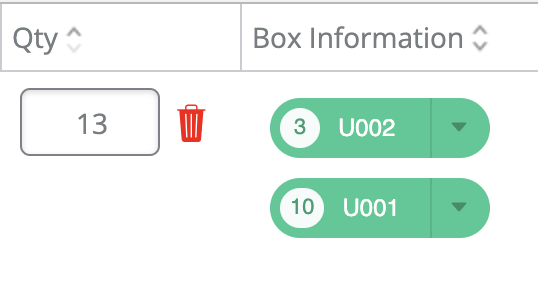
If you only assign a portion of the quantity of an item in your shipment to a box, you will notice the remaining quantity still has a gray Assign button next to it. This indicates that you have more of the item that has not yet been given a box designation.
You can see the total number of items left to assign in a shipment at the bottom left of the page.
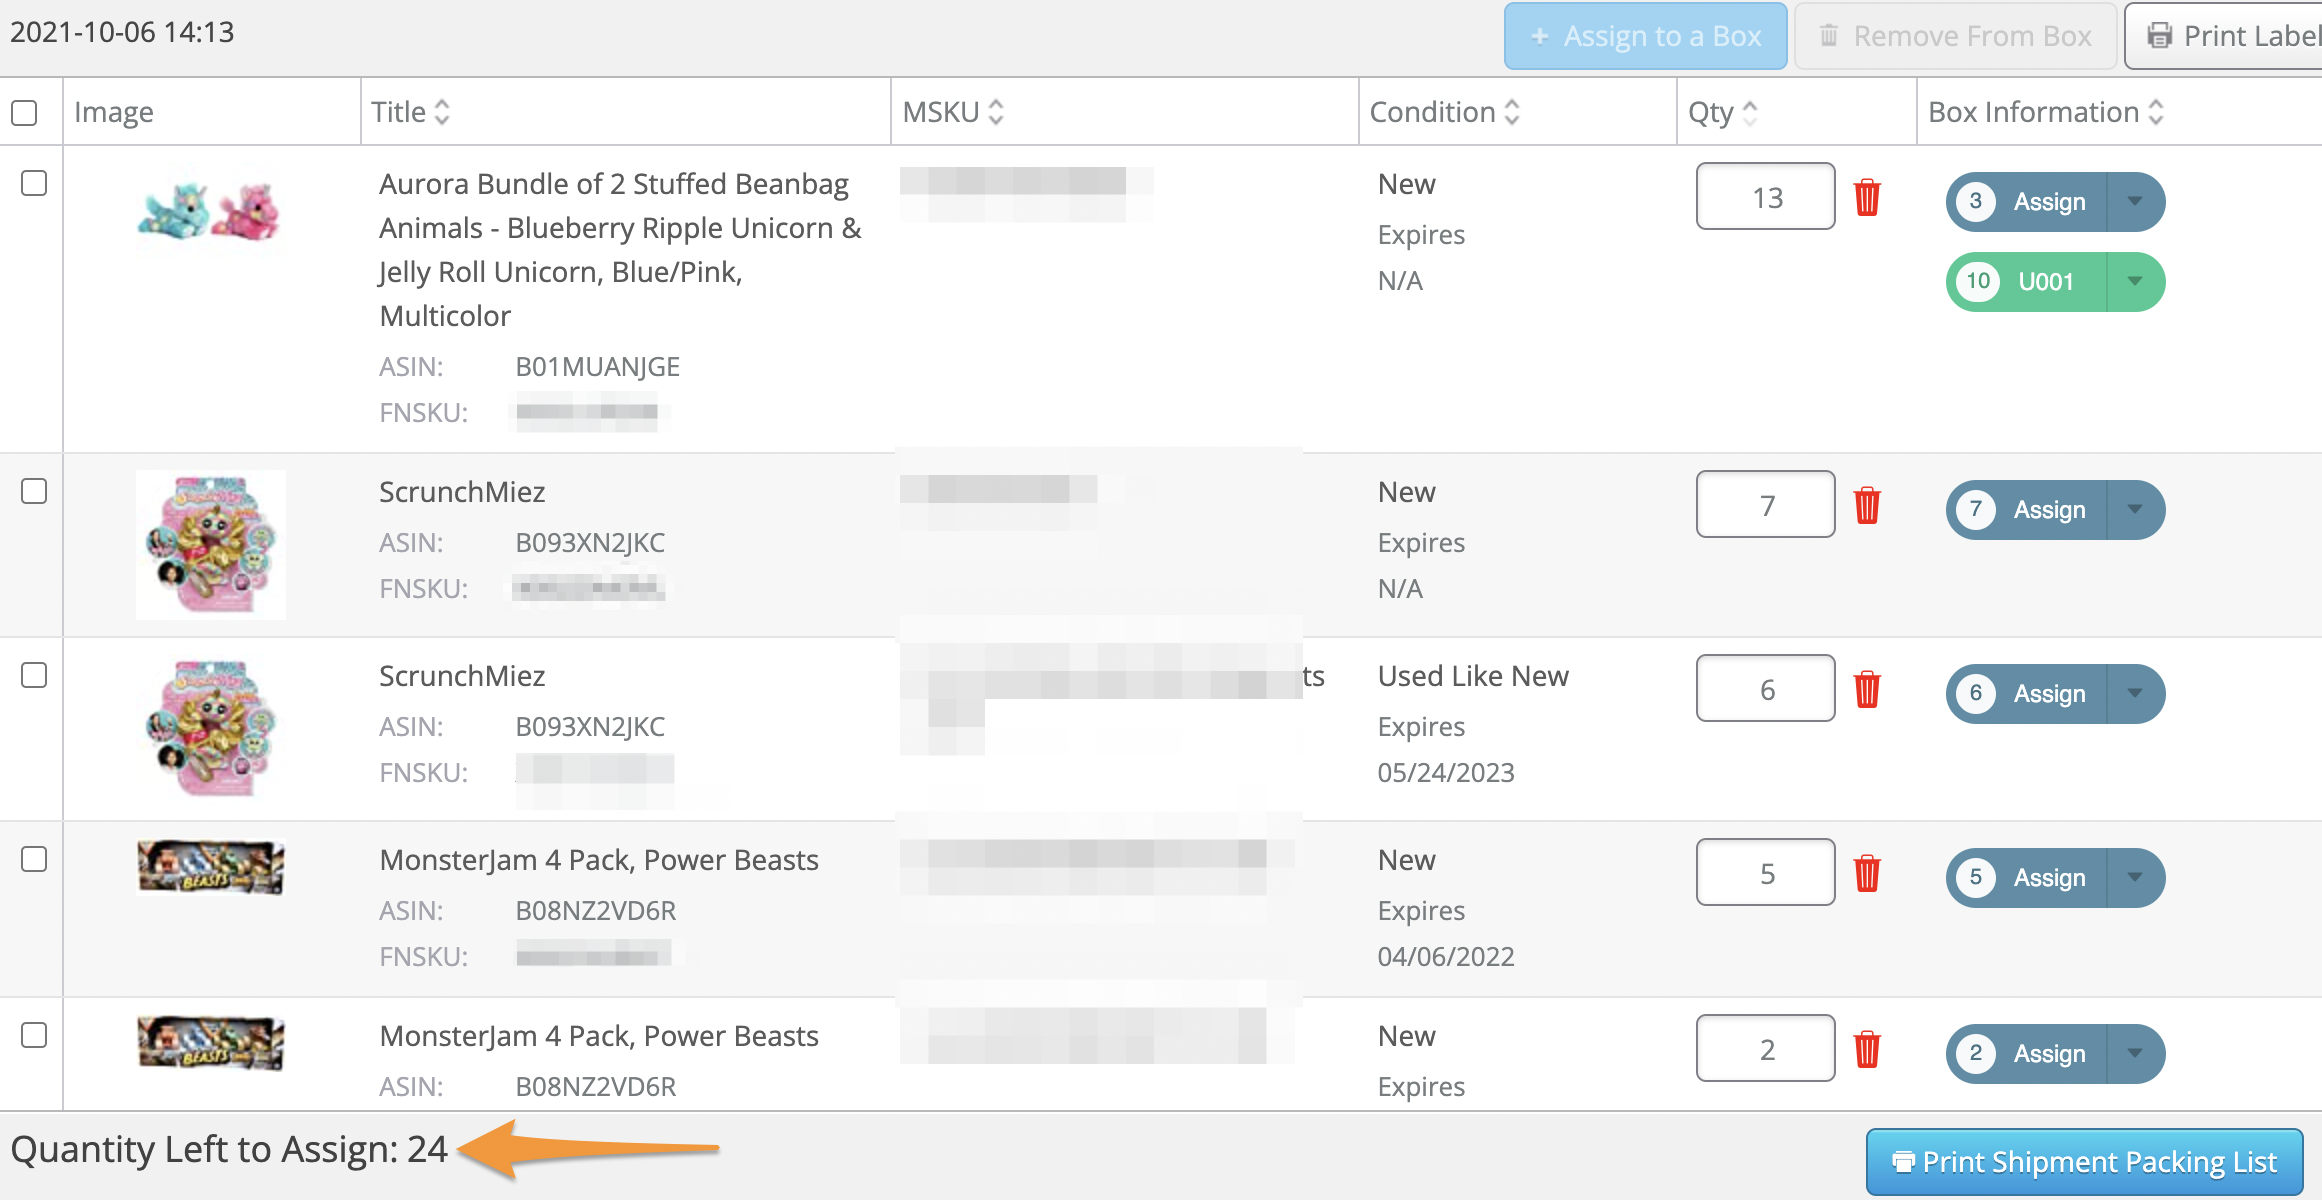
A green box for all quantities means that the entire amount of that MSKU going to that fulfillment center has been successfully assigned to a box.
Estimated Box Weight
If you need to make sure you don’t overfill your boxes and want to monitor the weight of the box as you add items, you have that option!
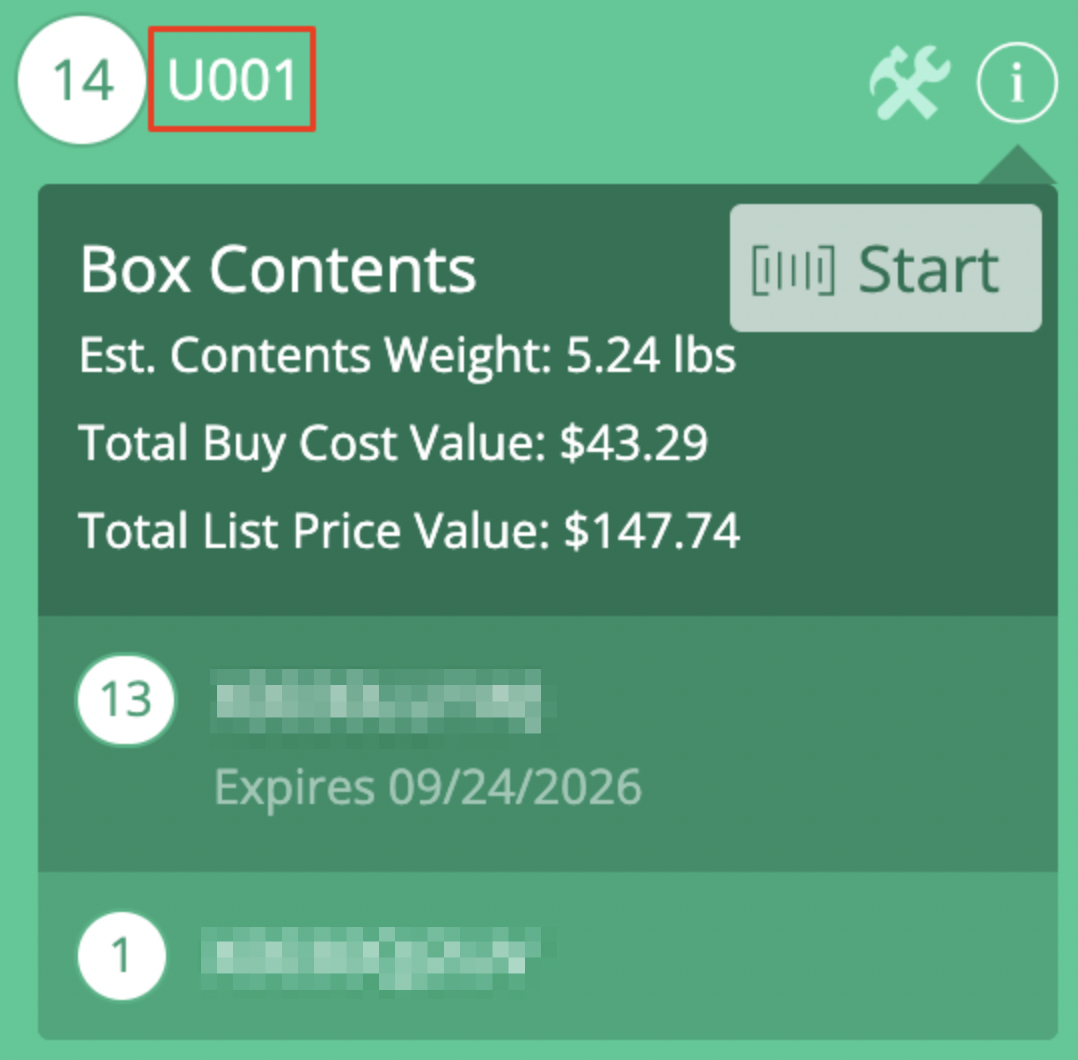
Before you assign box content for a particular box, you can click the small i to the right of the box name in the Box Contents Information window. This expands the window, providing your box content information for that particular box.
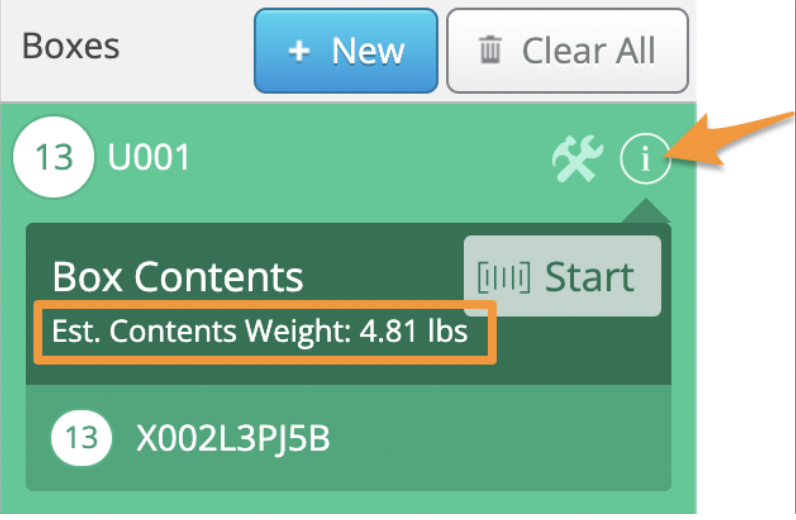
Once expanded, you can see the items and quantity of units for each assigned to the box (either by MSKU or FNSKU) and the estimated total weight as you add to the box.
The weight is based on the item package weight of the items in the box, estimated to the nearest hundredth of a pound.
Dollar Value
Having the Display Dollar Value for Box Contents enabled in your settings makes it so the cost/unit and list price values of the items assigned to your boxes are visible on the Box Content page and packing lists.
To see the Dollar Values, click the small i to the right of the box name in the Box Contents Information window.
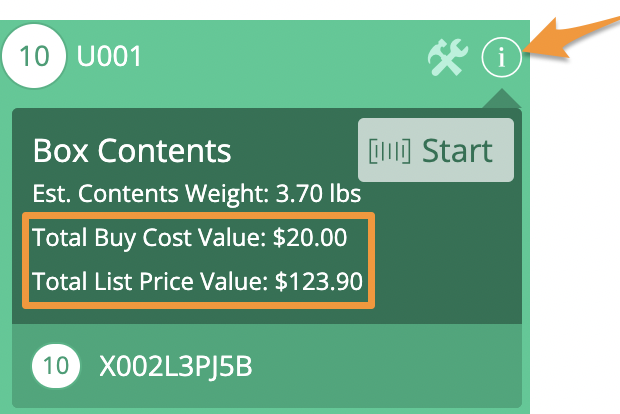
This setting can be managed anytime under Settings>List>Box Content Settings.
Action Items
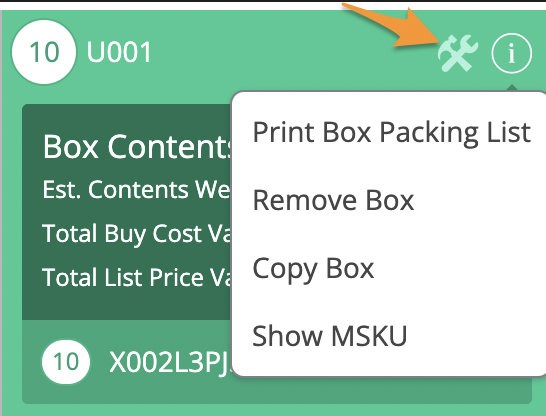
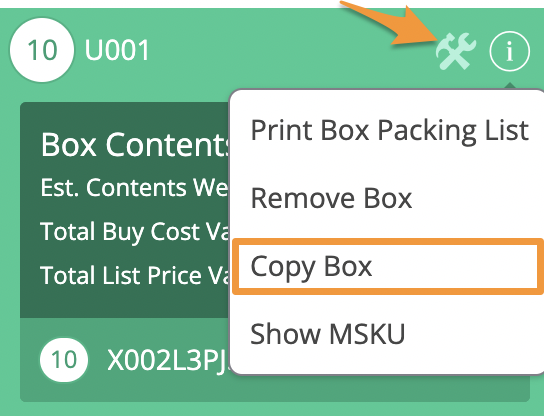
When you click the action button next to a box, a dropdown menu will appear with the following options:
• Print Box Packing List – this action allows to print a packing list for your box
• Remove Box- this action will remove the box
• Copy Box – this action allows you to copy an already assigned box
• Show FNSKU/Show MSKU – this action toggles the view for all items in boxes to either show as FNSKUs or MSKUs
Print Box Packing List
If you need to print a packing list for a specific box, click the Action icon next to the box name and select Print Box Packing List.
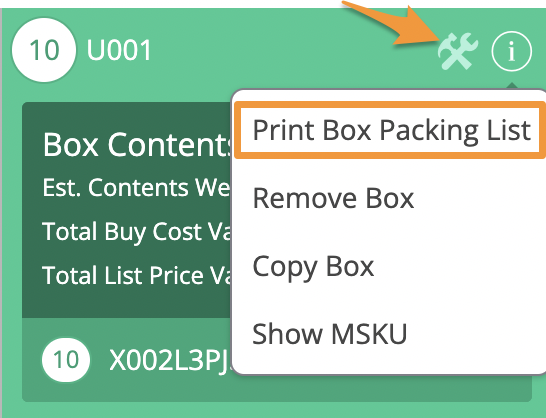
Select if you would like the list to include images of the items in the box or not, then a new tab will open and your browser’s printing functions will take over.
For more information on packing lists, please see- Box Content - Print a Packing List
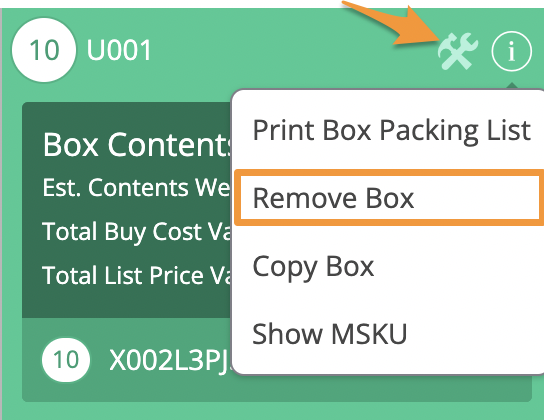
Removing a Box
If you need to remove a box, click the Action icon next to the box name and select Remove Box.
A pop-up will appear to make sure the box should be removed. To proceed with deleting the box, click Remove.
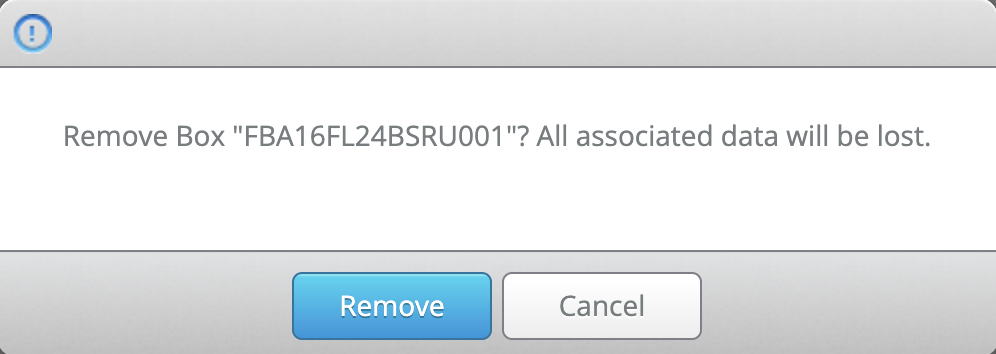
If the box contained any items, those items will need to be reassigned to a new box.
Note: Deleting boxes may cause the box numbers in Seller Central not to match up with the box numbers in Stratify for the shipment. For more information, please see Your Shipping Labels With Box Content
Create or Copy Boxes in Bulk
If you tend to have a large number of boxes per shipment, you can create them in bulk in a couple of different ways.
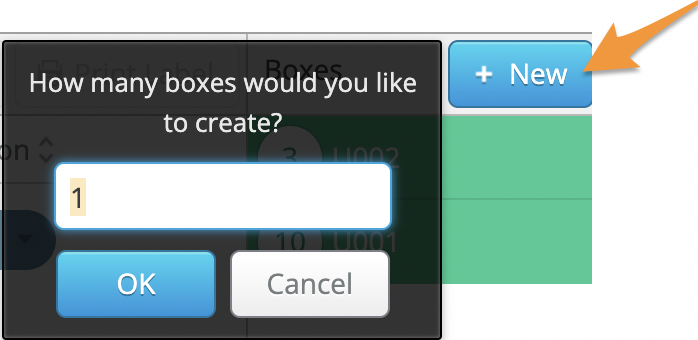
Bulk Creating New Boxes
You can bulk create new boxes by clicking on the blue + New button. A prompt will appear where you can enter the number of boxes you need and click OK.
Copying Existing Boxes
If you need to create multiple boxes with the same items, copying boxes may save you some time!
To copy a box, click the Action icon next to the box name and select Copy Box.
You will be asked how many copies of this box would you like to make.
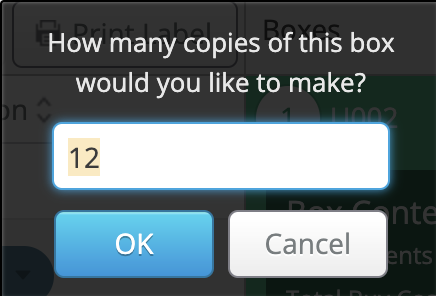
Note: The default value will be the maximum number of exact boxes that can be copied, but you can change the value manually if needed. The value must be greater than 0. If you attempt to change the value to something higher than the maximum number of exact boxes that can be copied, you will see a warning message.
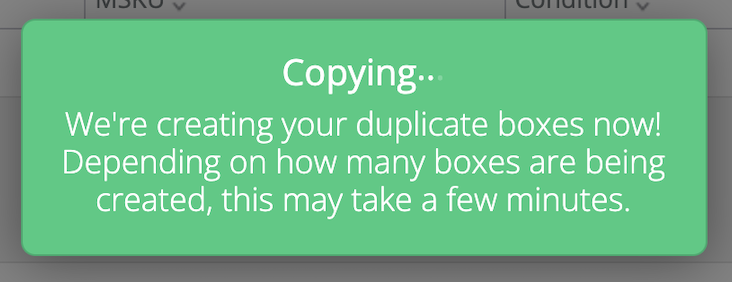
After clicking OK, you’ll see a message letting you know the boxes are being copied.
Toggling FNSKU/MSKU View
Generally, sellers have a preference on if they want to see MSKU or FNSKU when packing boxes.
To change this view, click the Action icon next to the box name and select Show FNSKU (or MSKU).
Note: If the current selection is Show FNSKU, you will see Show MSKU as the option to change the view. Alternatively, if the current selection is Show MSKU, you will see Show FNSKU as the option.

This action will toggle the view for ALL items in all boxes and the view will be remembered for future shipments.
Click the small i to the right of the box name to see the items assigned to the box listed by either FNSKU or MSKU depending on your selection.
Printing 2D Barcode Labels
After completing the box content information for your shipments, you can purchase shipping and complete them without ever leaving Stratify, or you can choose to complete them in Seller Central.
Complete Shipment in Stratify
Note: Currently, purchasing shipping and completing a shipment in Stratify can only be done for SPD shipments.
Note: Amazon allows up to 100 items per box but only 700 characters per 2D Barcode label. Due to variables that affect the number of characters needed per item, we have set the limit to a maximum of 40 ASINs per box to prevent issues.
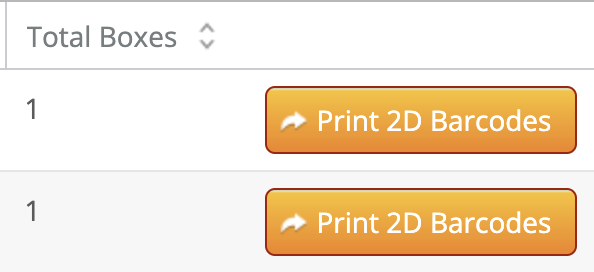
To complete a shipment in Stratify, click Print 2D Barcodes next to a shipment towards the top of the page.
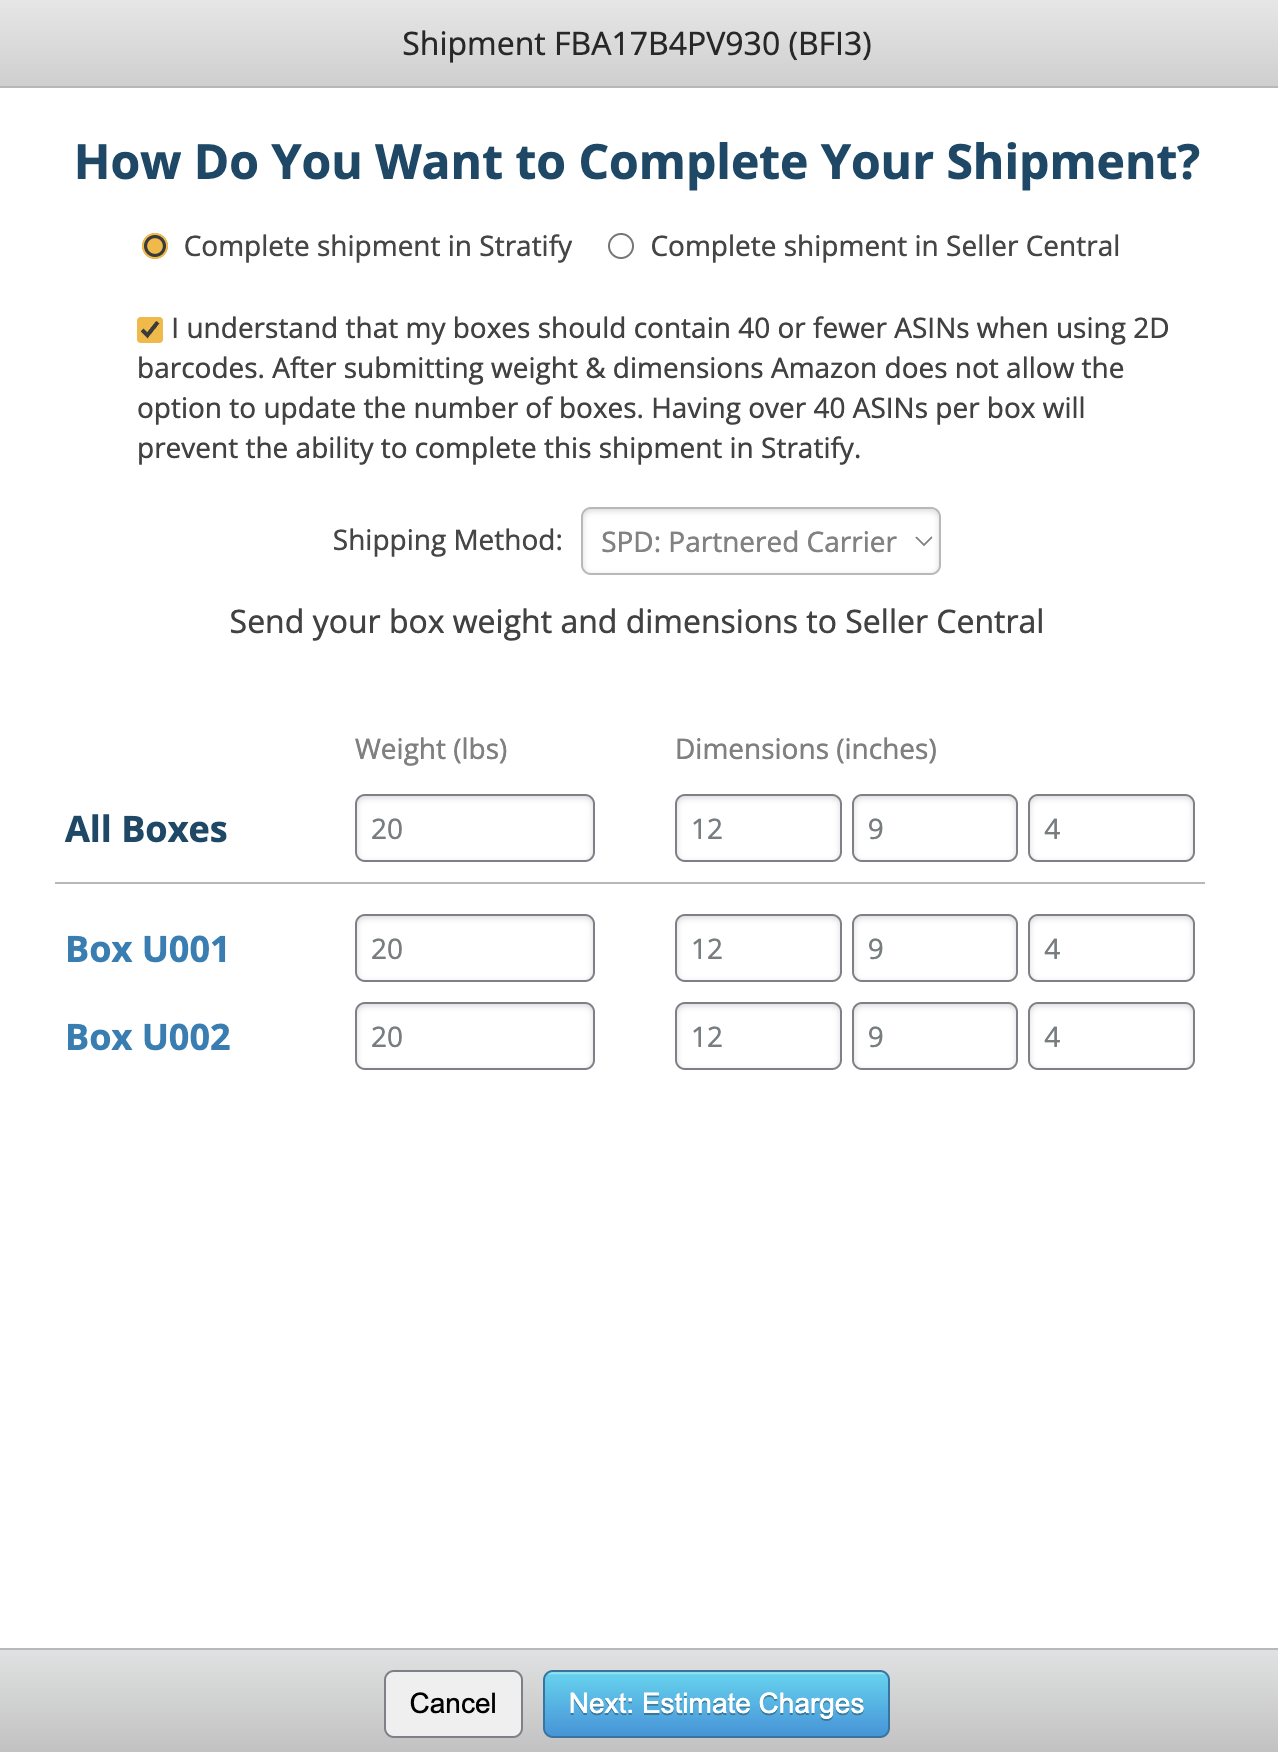
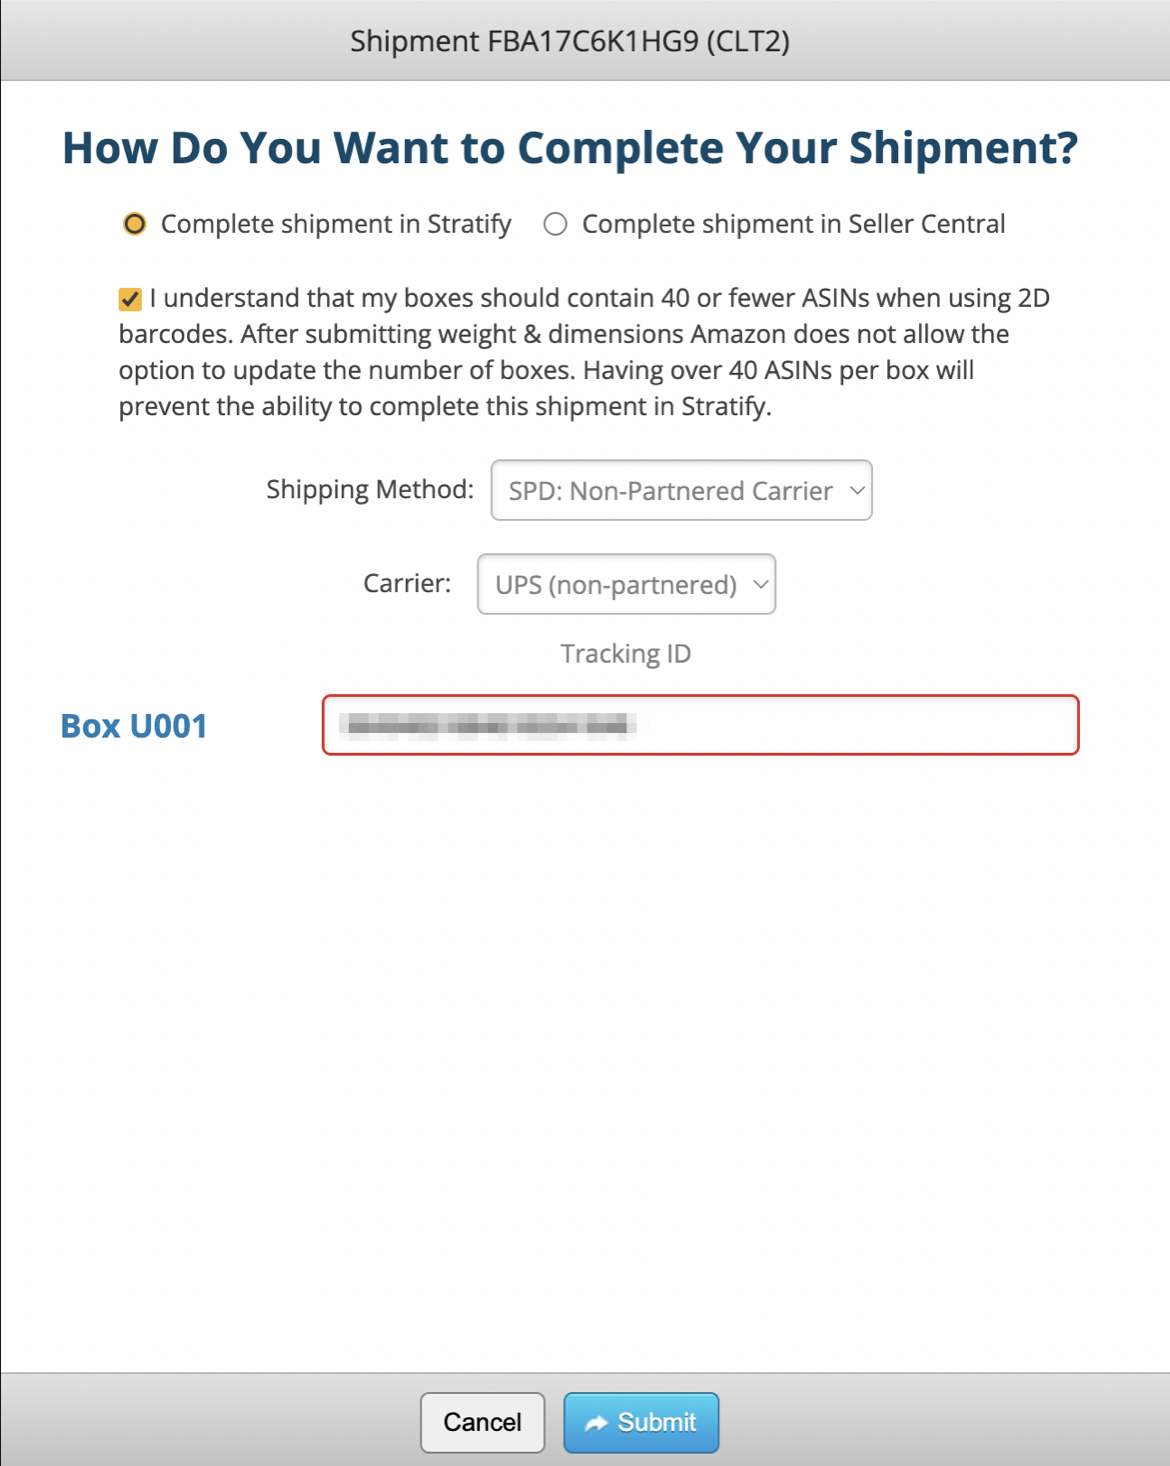
A window will appear asking if you'd like to Complete Shipment in Stratify or Complete Shipment in Seller Central. Click Complete shipment in Stratify.

Choose the Shipping Method, either SPD: Partnered Carrier or SPD: Non-Partnered Carrier.
SPD: Partnered Carrier
Note: When using this shipping method, the cost will be billed to your Amazon Seller account as an inbound transportation charge. For information on the Amazon Partnered Carrier program and how shipping costs are estimated, please refer to their documentation located here- Amazon Partnered Carrier options
You will see a message stating that your boxes should contain 40 or fewer ASINs in order to proceed. If you need to make adjustments to your boxes, click Cancel. Or, if you're ready to proceed, click the checkbox next to the message.
Next, enter the weight and dimensions of your boxes. You can enter them for each box individually or all at once by using the "All Boxes" section.
Once everything looks good, click Next: Estimate Charges to proceed.
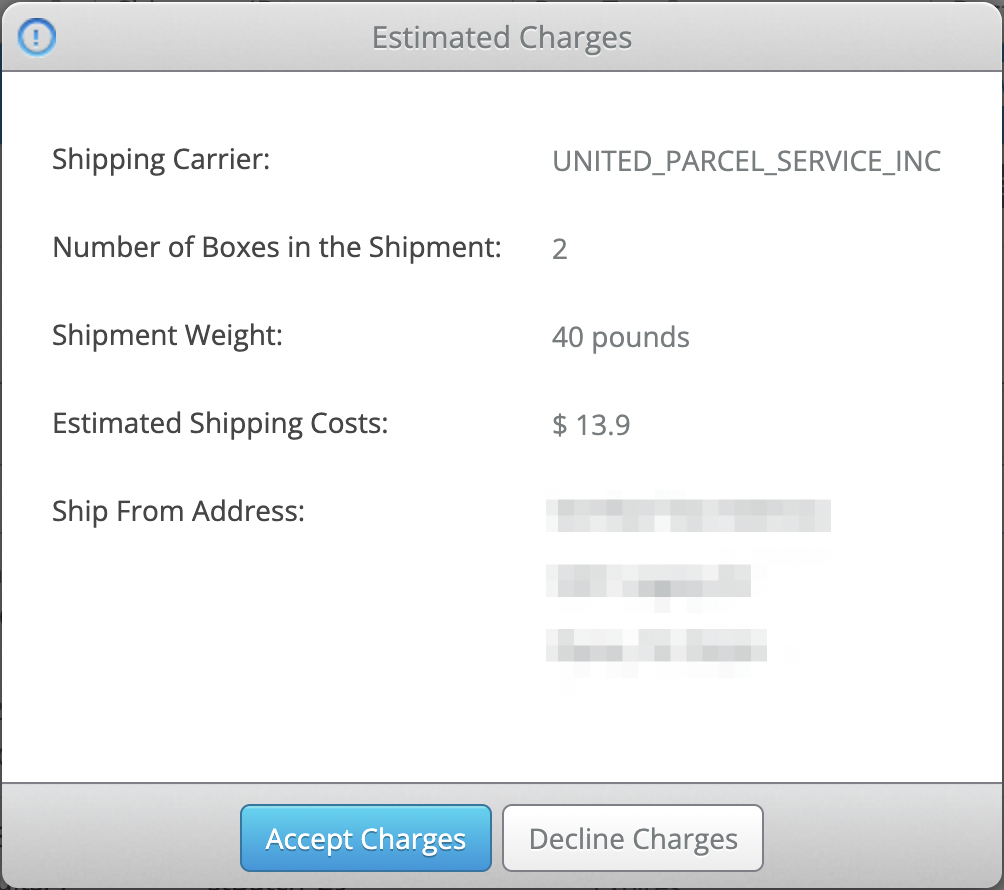
The Estimated Charges window will appear and display the carrier information, number of boxes, total shipment weight, estimated shipping costs, and the ship from address.
If everything looks correct, click Accept Charges to proceed.
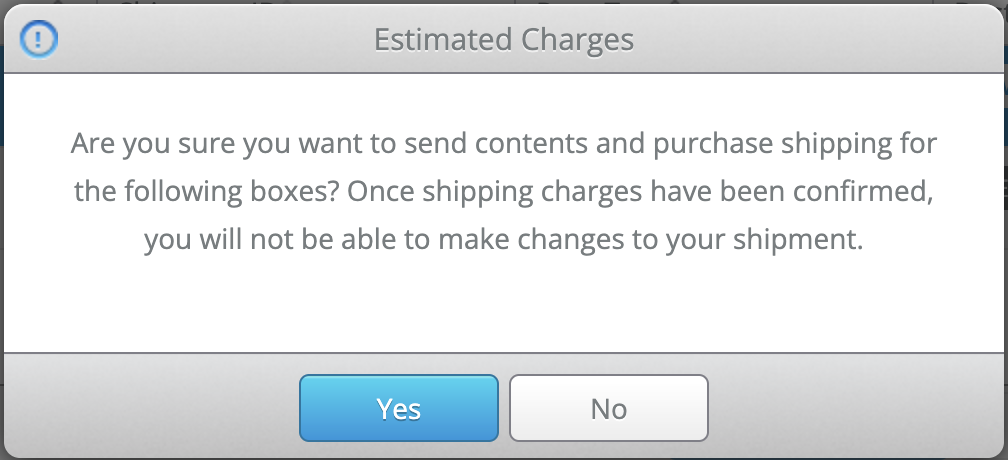
You will be asked to confirm that you'd like to proceed with purchasing shipping. Once done, you will not be able to make changes to the shipment without voiding the charges. (Charges can be voided within 24 hours of purchase.)
Click Yes to proceed. The cost will be billed to your Amazon Seller account as an inbound transportation charge.
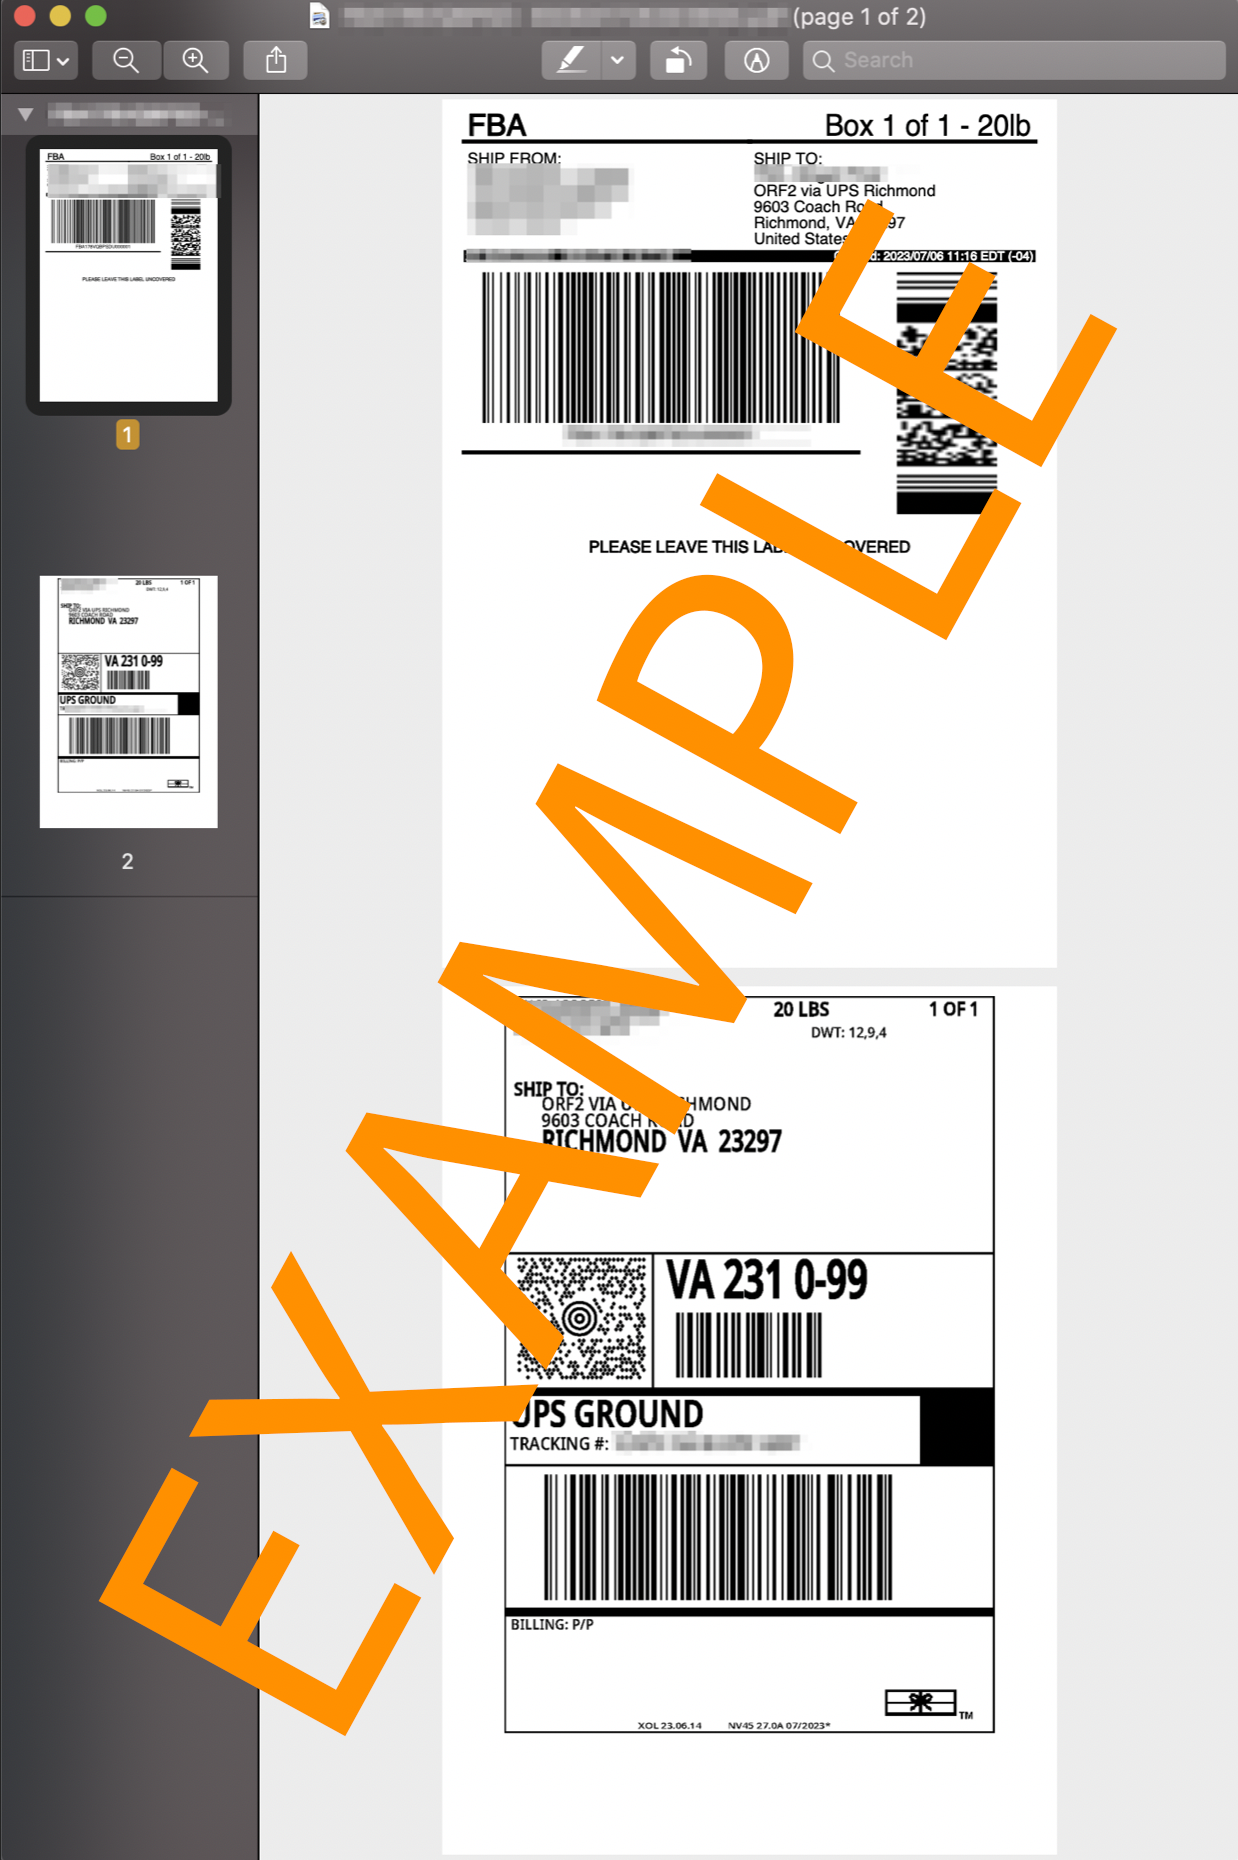
The shipping labels and box labels will automatically download as a .PDF to your computer's downloads folder. These labels can be printed in 4 x 6 or 8.5 x 11 sizes.
The 2D barcode labels will open in a new tab to be printed using your browser's printing functions.
Note: If your labels don't seem to be opening, try these steps- My 2D barcode labels or shipping labels aren't opening!
The shipment will change to "Ready for Carrier" status in the Working Shipments window in Stratify.
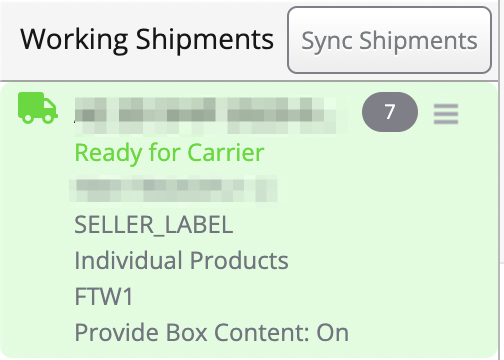
Note: Amazon marks shipments as "Shipped" with the first scan from the carrier. They will still show in the Working Shipments window in Stratify and as "Working" in Seller Central until that time.
Once the shipment is showing as "Shipped" in Seller Central, clicking the Sync Shipments button in Stratify will update the Working Shipments area and clear out the shipment.
That's it! Once you complete these steps for all the shipments in the batch, it will close automatically as this completes the workflow for it in Stratify.
SPD: Non-Partnered Carrier
You will see a message stating that your boxes should contain 40 or fewer ASINs in order to proceed. If you need to make adjustments to your boxes, click Cancel. Or, if you're ready to proceed, click the checkbox next to the message.
Choose your Carrier from the dropdown menu. The options are:
- UPS (non-partnered)
- DHL
- FedEx
- USPS
- Other
Next, enter the Tracking ID for each box in the shipment.
Note: Amazon currently allows a maximum of 50 characters to be entered for tracking IDs.
The 2D barcode labels will open in a new tab to be printed using your browser's printing functions.
The box labels will automatically download as a .PDF to your computer's downloads folder and can be printed in 4 x 6 or 8.5 x 11 sizes.
Note: If your labels don't seem to be opening, try these steps- My 2D barcode labels or shipping labels aren't opening!
The shipment will change to "Ready for Carrier" status in the Working Shipments window in Stratify.
Note: Amazon marks shipments as "Shipped" with the first scan from the carrier. They will still show in the Working Shipments window in Stratify and as "Working" in Seller Central until that time.
Once the shipment is showing as "Shipped" in Seller Central, clicking the Sync Shipments button in Stratify will update the Working Shipments area and clear out the shipment.
We recommend waiting until the boxes have shipped and Amazon changes the shipment status to "Shipped" before interacting with it in Seller Central. At that time, the tracking IDs entered in Stratify will be available for reference in Seller Central.
That's it! Once you complete these steps for all the shipments in the batch, it will close automatically as this completes the workflow for it in Stratify.
Complete Shipment in Seller Central
Click Print 2D Barcodes next to a shipment towards the top of the page.
Once clicked, a window will appear asking if you'd like to Complete Shipment in Stratify or Complete Shipment in Seller Central. Click Complete shipment in Seller Central, then click Submit All.
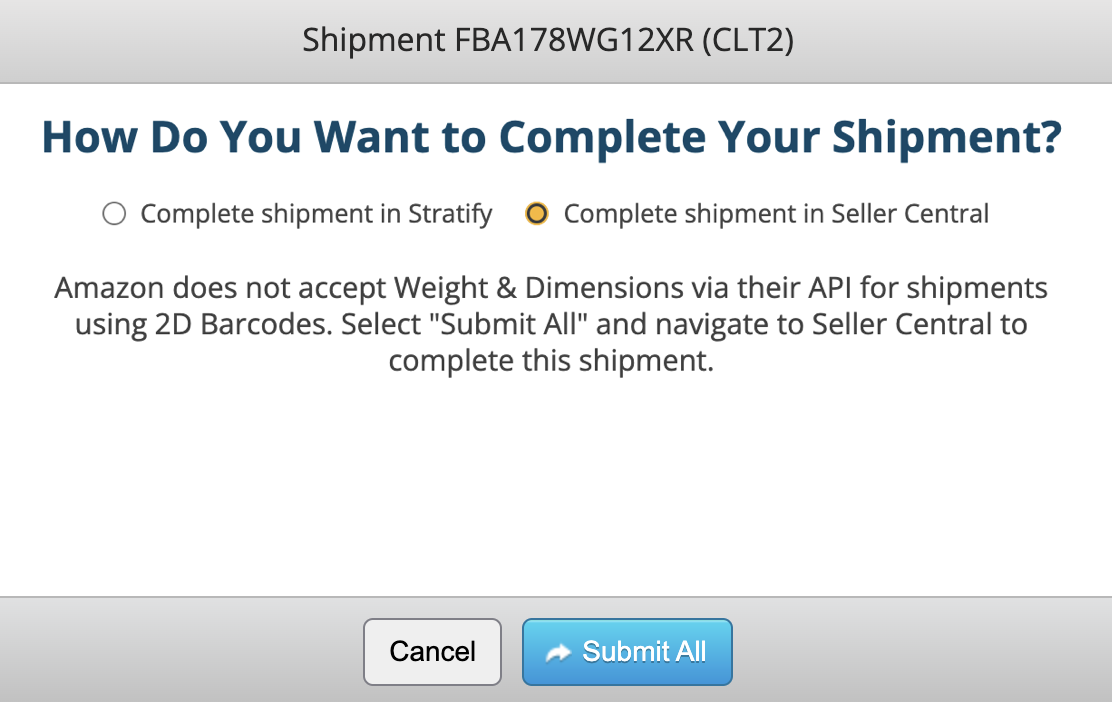
Note: When using 2D barcodes, the weight/dimensions for the boxes entered in Stratify will not carry over to Send to Amazon when selecting the complete shipments in Seller Central. Due to this, Stratify will not ask for these details to prevent you from entering them twice.
The 2D barcode labels will open in a new tab to be printed using your browser's printing functions.
Note: If your labels don't seem to be opening, try these steps- My 2D barcode labels or shipping labels aren't opening!
Once 2D Barcodes have been printed for each shipment, the batch will close, as this step completes the batch process in Stratify. From here, you can move over to Seller Central to enter the weight/dimensions for your boxes, purchase shipping labels, and complete your shipments.
Next Steps in Send to Amazon
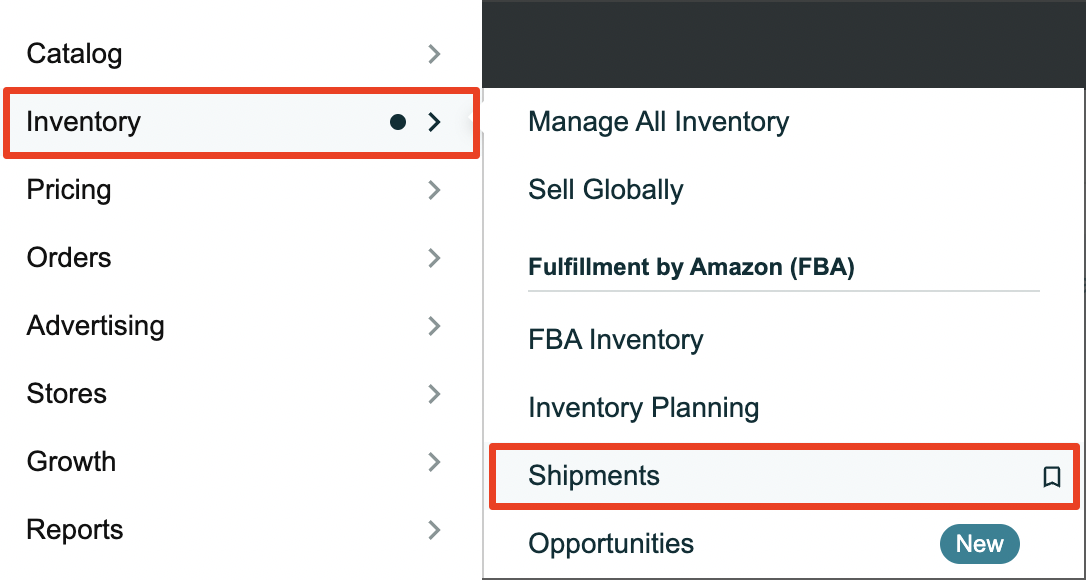
When you're ready to finish up your shipment in Seller Central, click Inventory from the navigation menu, then click Shipments.
Click the Work on Shipment button located to the right of the shipment you’d like to complete.

After clicking the Send to Amazon selection, Step 1 will show information for the MSKUs in the shipment along with their quantities and expiration dates (if entered while listing in Stratify).
Add any needed information and confirm that everything looks correct, then click the Pack units button to proceed.
Step 1-b is where you will select Multiple Boxes and Use 2D Barcodes for the box content information method.
Next, enter the weight/dimensions of your boxes and click Confirm 2D barcodes.
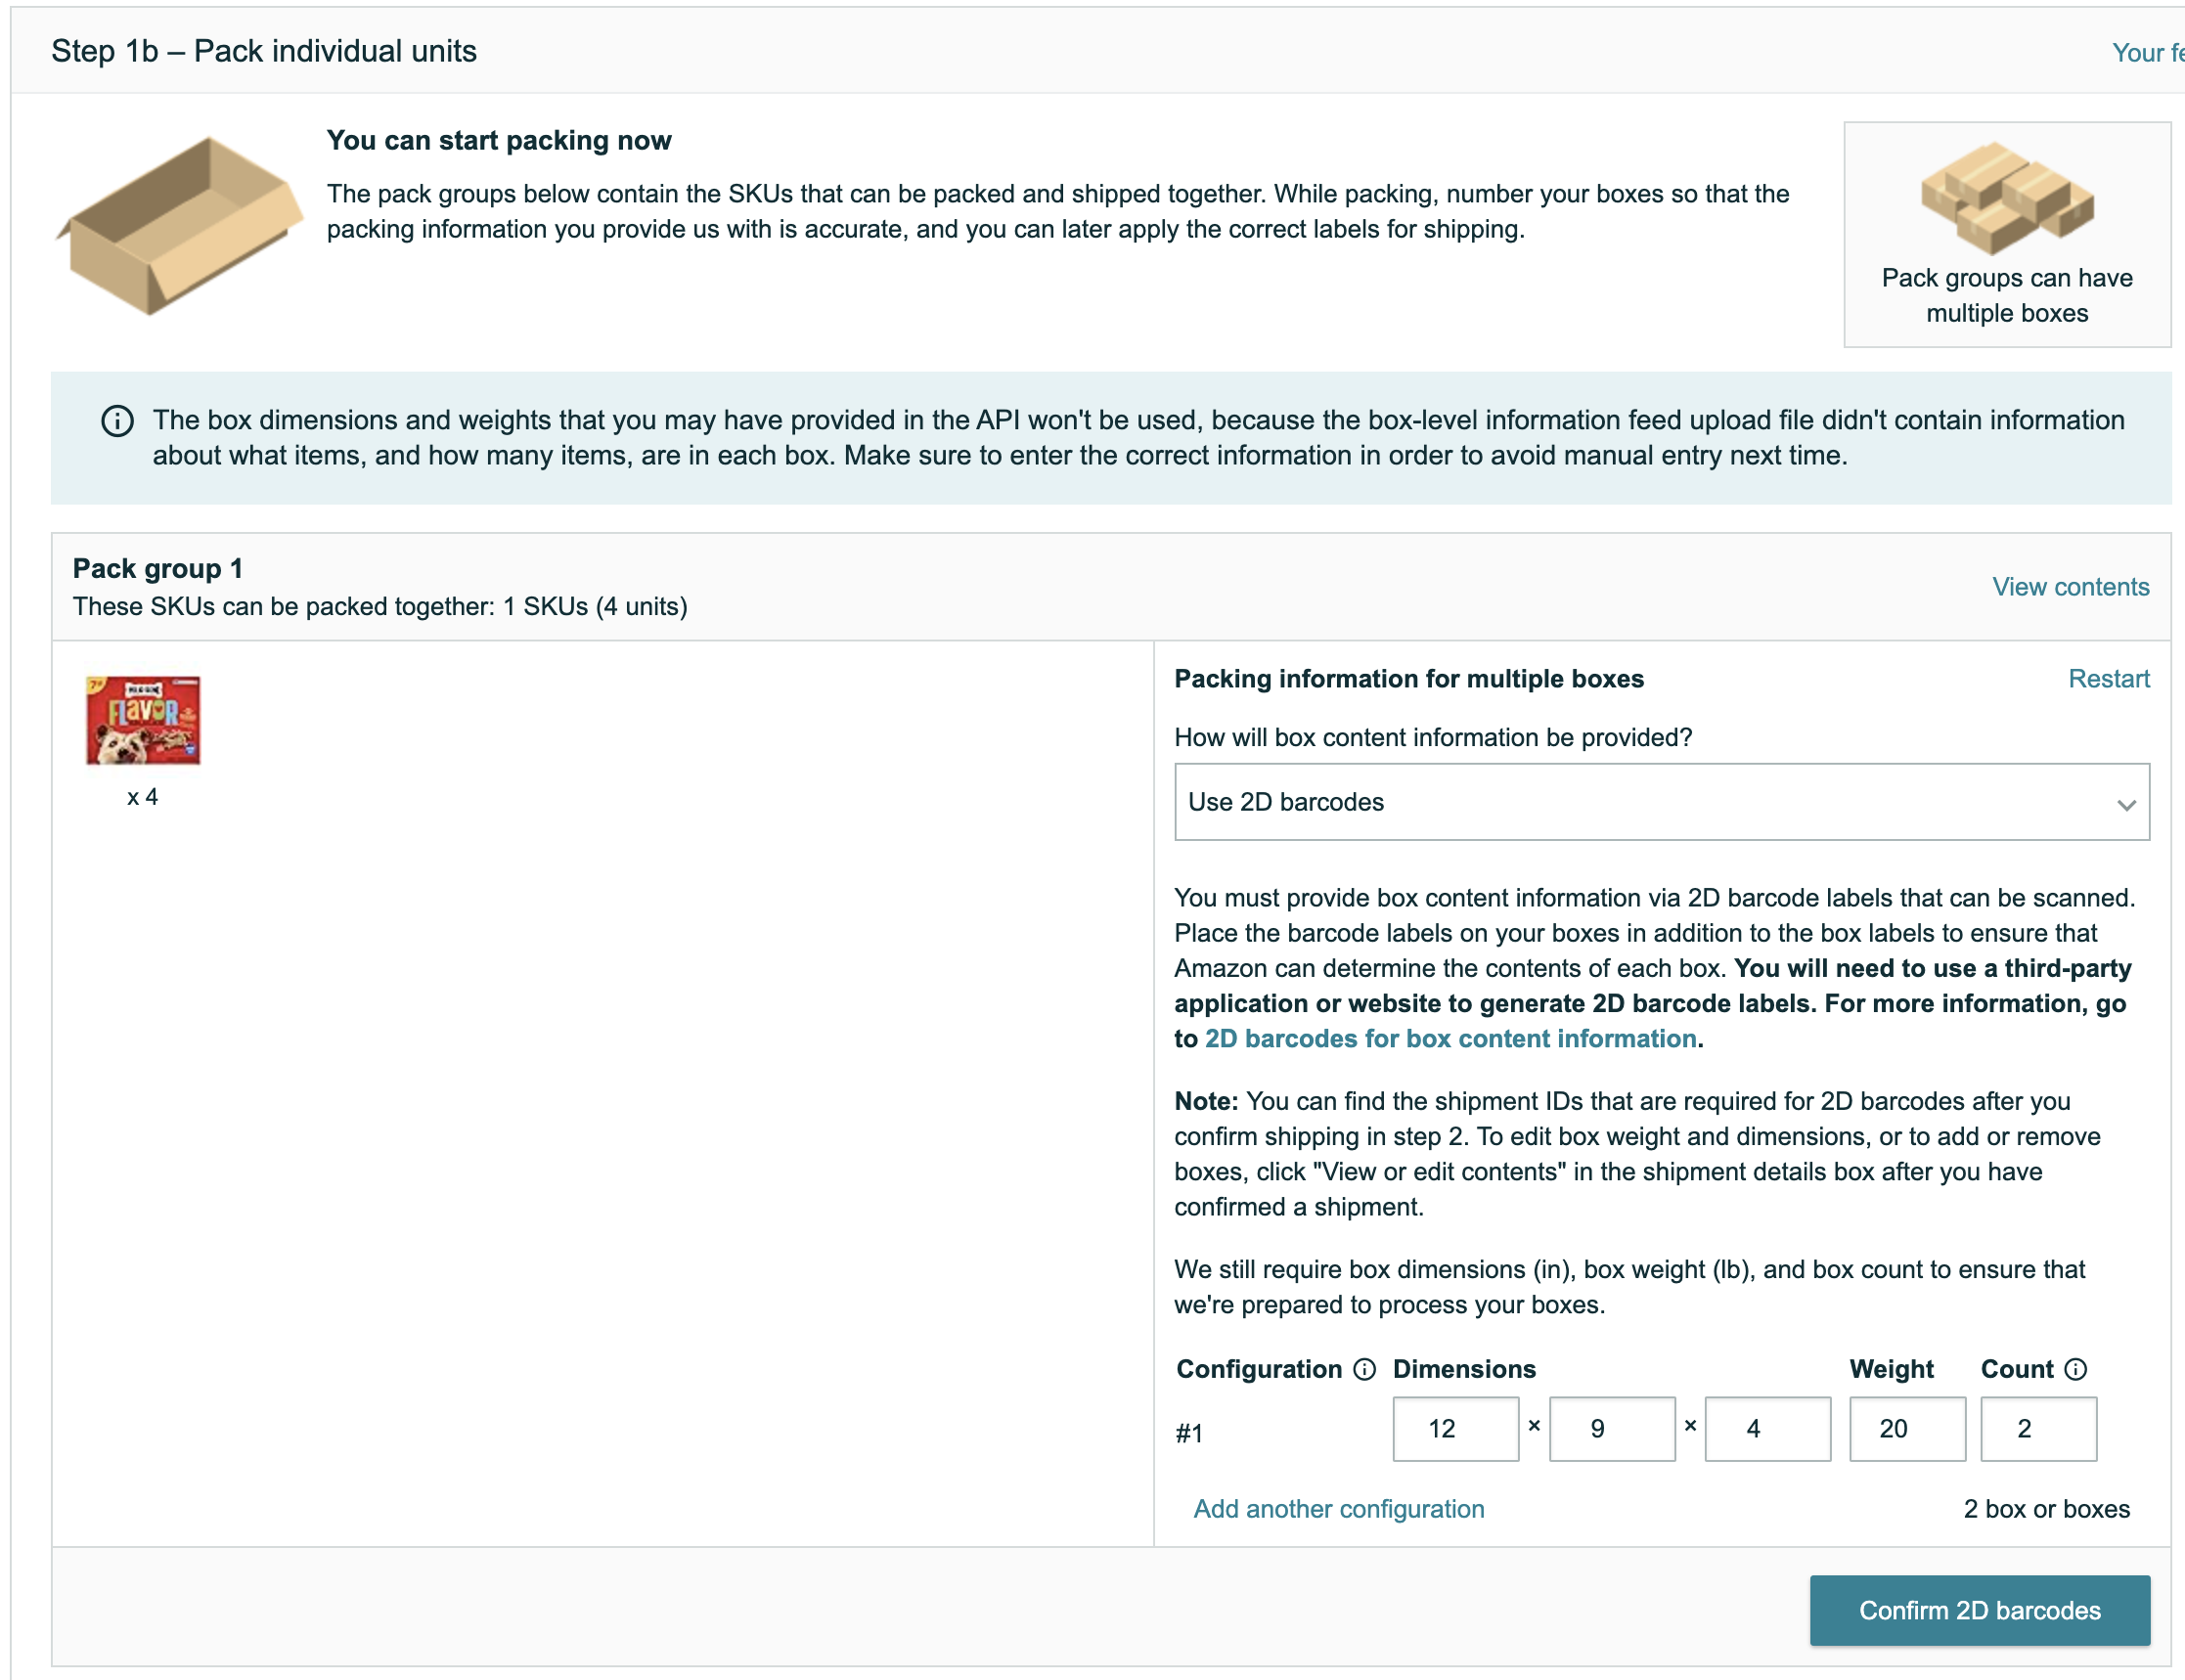
To move to the next step, click Confirm and Continue.
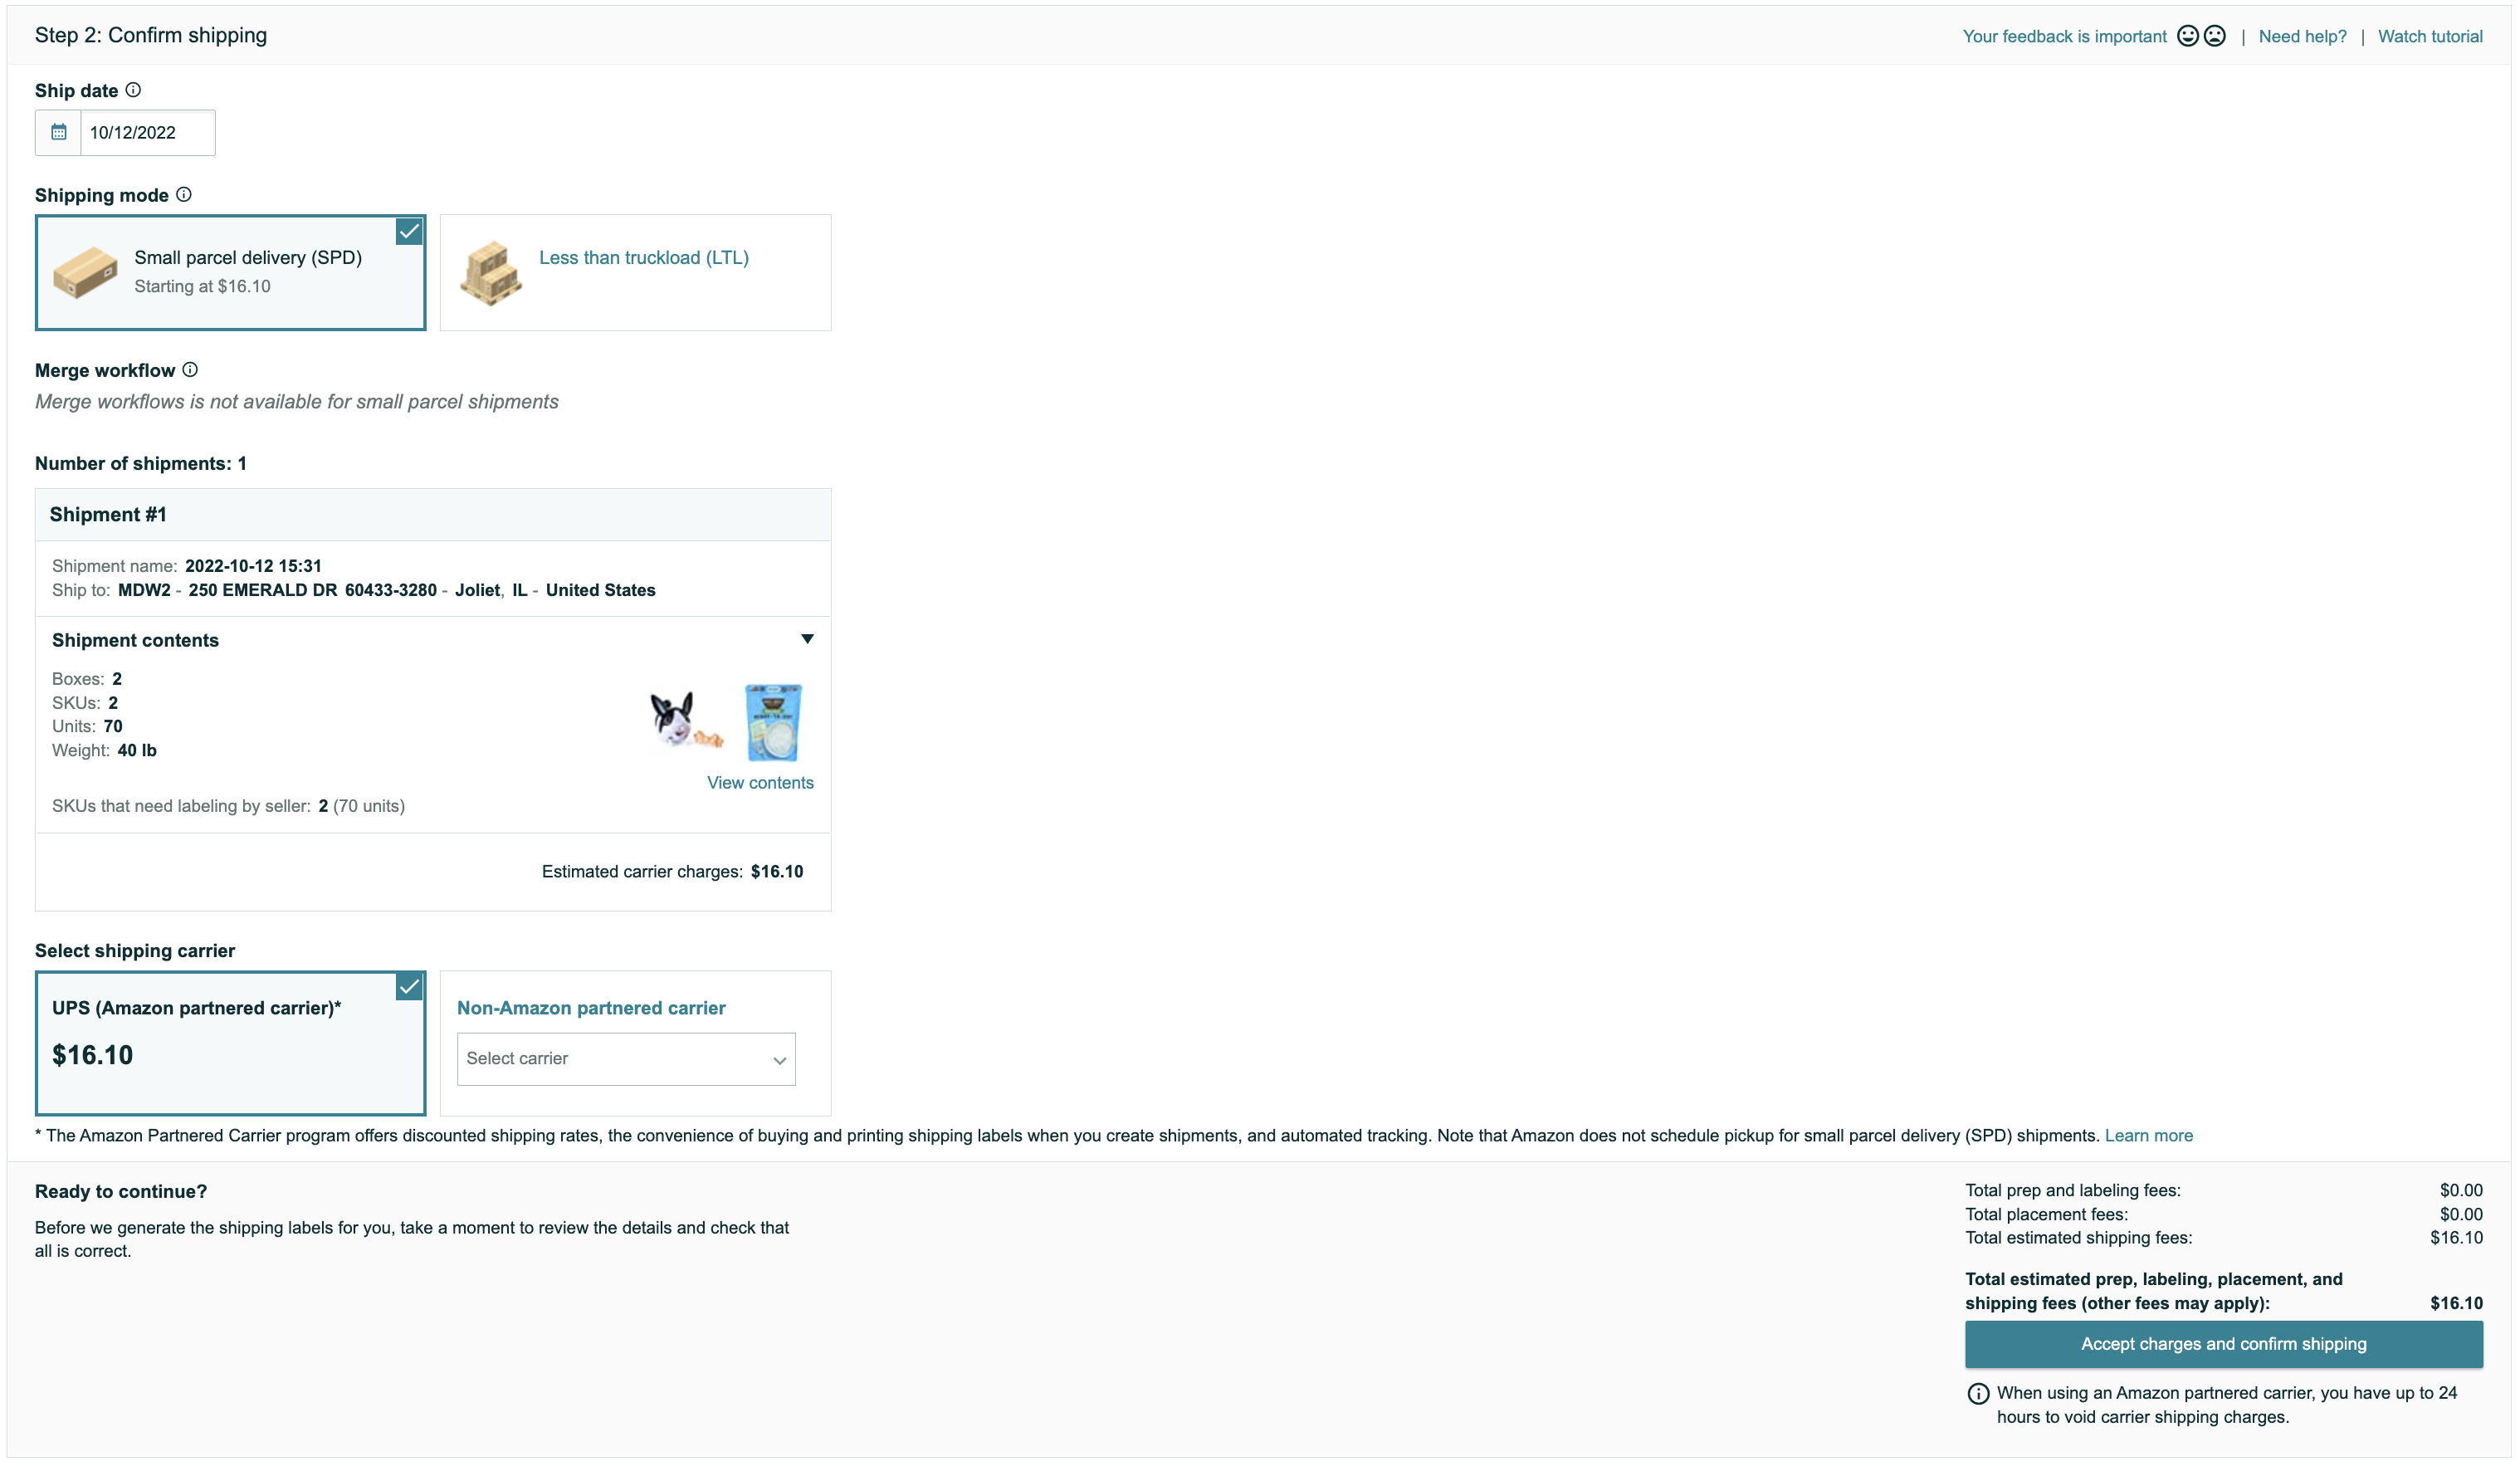
Step 2 is where you will be required to enter a Ship Date and select your Shipping mode (SPD or LTL). You're also able to review the shipment by clicking View Contents.
Select your shipping carrier and click Accept charges and confirm shipping to proceed.
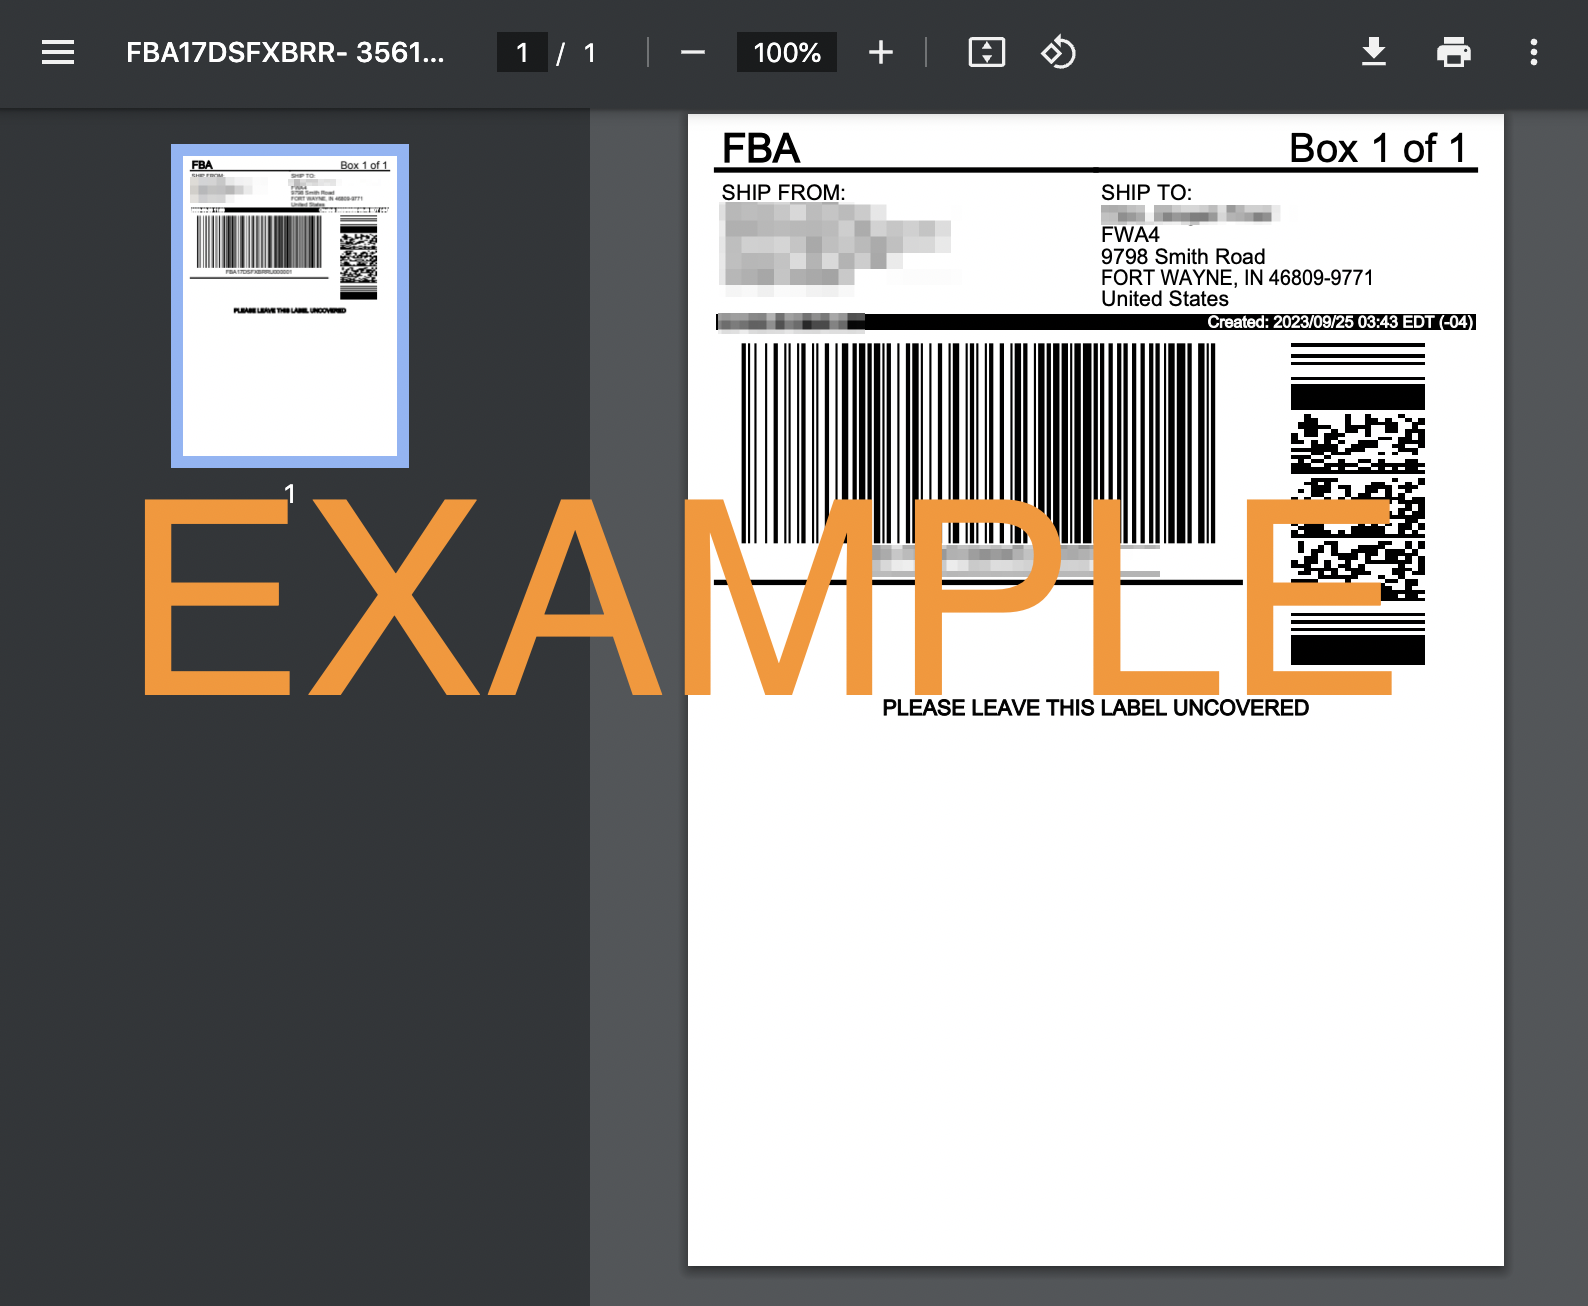
Step 3 is where you can review your shipment details and print shipping & box labels.

Keep in mind that if you provided box content through Stratify, you already know the order of the boxes and box names when applying your labels. The order you enter this information is very important because you want them to line up Stratify with Seller Central.
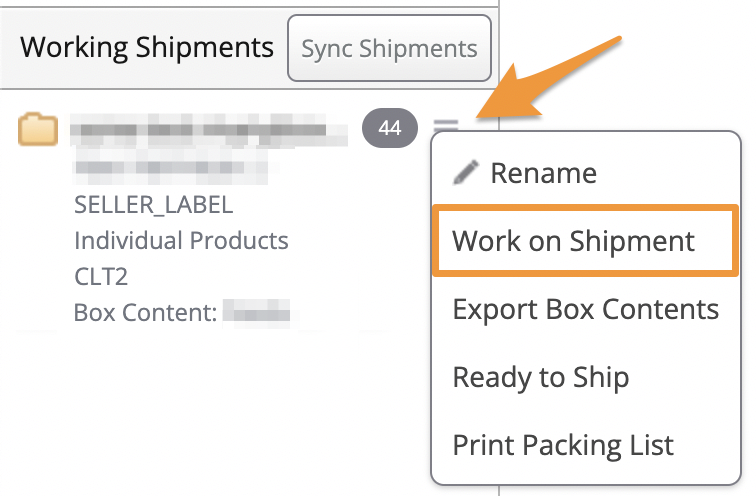
If you are unsure of your box names, etc., and need a reminder of the contents, visit Stratify>List>List & Prep and click the 3 horizontal lines next to the Working Shipment you are working on. Choose "Work on Shipment" from the menu and you can review the boxes and contents of those boxes.
Stratify's box names are created in numerical order, just like Amazon’s.
Example 1:
Box name U001 in Stratify = Box 1 in Seller Central when putting in dimensions = Box name ending in U001 on your shipping label
Box name U002 in Stratify = Box 2 in Seller Central when putting in dimensions = Box name ending in U002 on your shipping label
HOWEVER
If you skip a sequence in Stratify (say you had Box U001, U002, and U003… but then you deleted Box U002), the order will be a little off.
Example 2:
Box name U001 in Stratify = Box 1 in Seller Central when putting in dimensions = Box name ending in U001 on your shipping label
Box name U003 in Stratify = Box 2 in Seller Central when putting in dimensions = Box name ending in U002 on your shipping label
Assuming no box names were skipped in Statify like Example 1 above, the name on the 2nd page of your shipping label should correspond to the name of your box in Stratify:
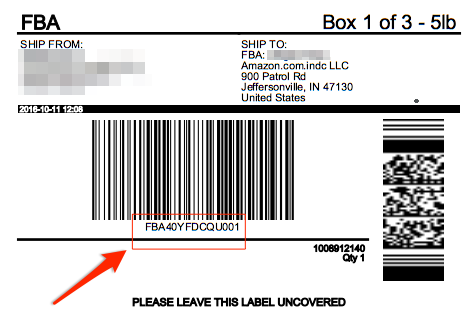
Note: If the box names on your shipping labels do not match Stratify, please see- Boxes Out of Order on Shipping Labels When Using Send to Amazon
Once you've printed your shipping labels, this completes the shipment workflow in Seller Central.
If you'd like, you can mark the shipment as "Ready to Ship" in Stratify. For more information, please see- Marking a Shipment as "Ready to Ship"
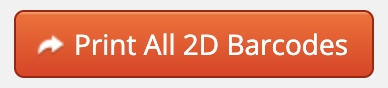
Print All 2D Barcodes in Bulk
To print 2D barcodes for all shipments at once, click the Print All 2D Barcodes button.
Print All 2D Barcodes - Complete Shipment in Stratify
Note: Currently, purchasing shipping and completing a shipment in Stratify can only be done for SPD shipments.
After clicking Print All 2D Barcodes, a window will appear asking if you'd like to Complete Shipment in Stratify or Complete Shipment in Seller Central. Click Complete shipment in Stratify.
Choose the Shipping Method, either SPD: Partnered Carrier or SPD: Non-Partnered Carrier.
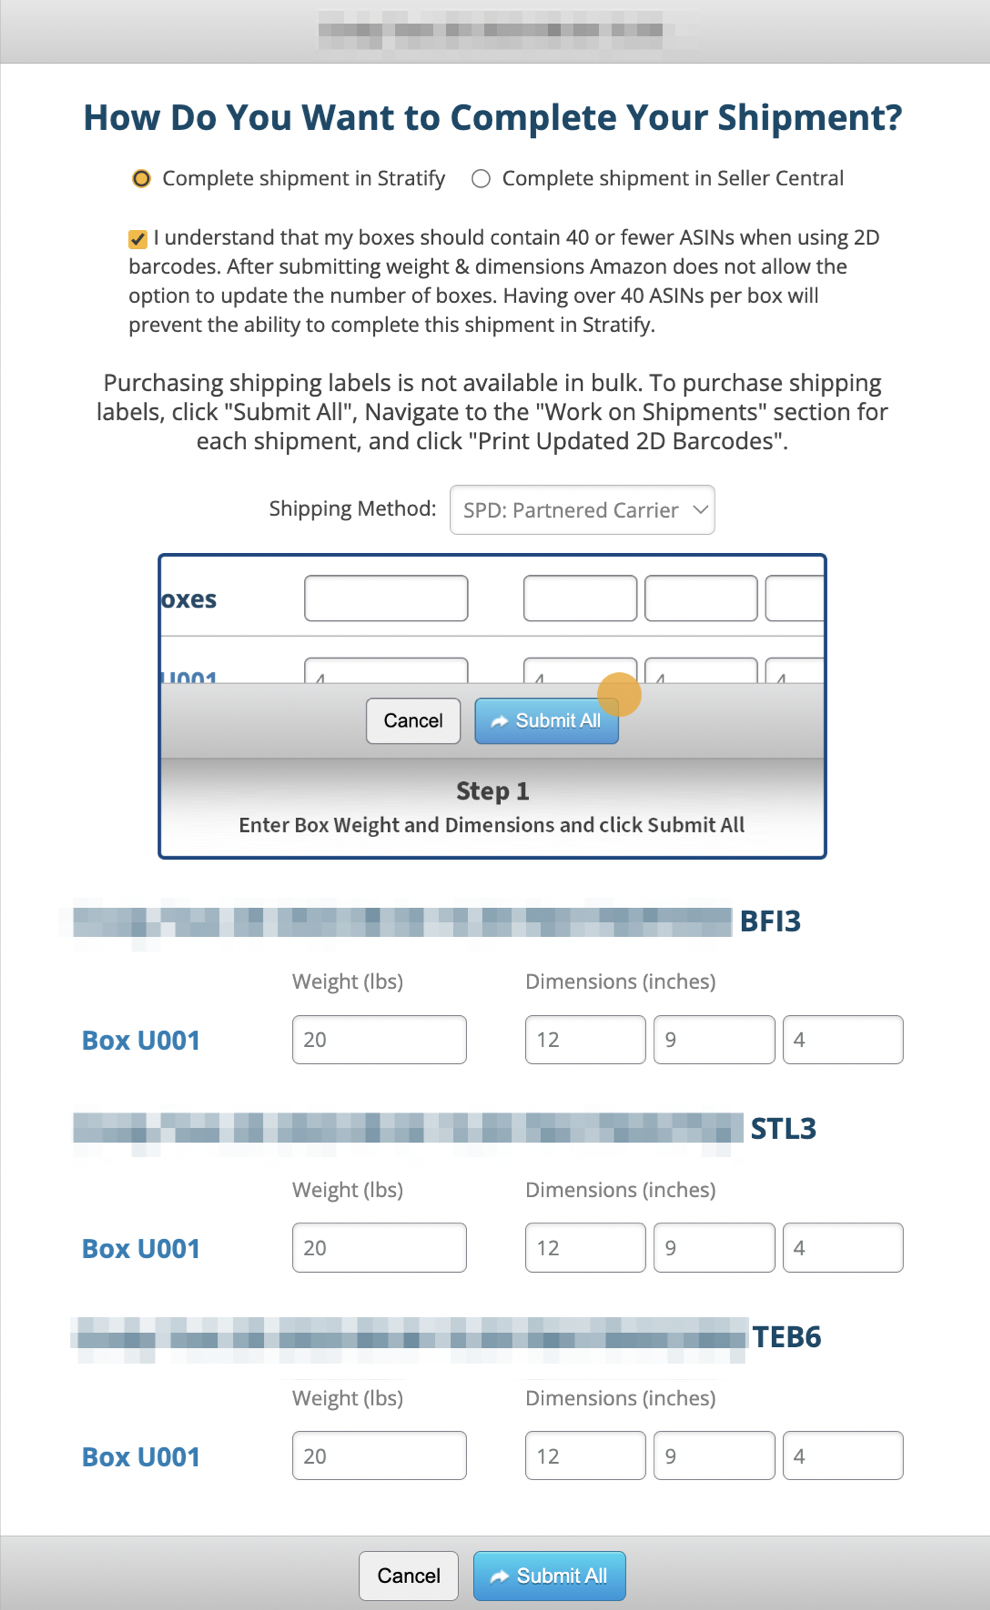
SPD: Partnered Carrier
Note: You cannot purchase shipping in bulk and will need to follow the steps below to navigate to the individual shipments after submitting feeds to purchase shipping.
You will see a message stating that your boxes should contain 40 or fewer ASINs in order to proceed. If you need to make adjustments to your boxes, click Cancel. Or, if you're ready to proceed, click the checkbox next to the message.
Next, enter the weight and dimensions of the boxes for all shipments created from the batch. By entering these details, they will be sent to Amazon along with your box content information.
You can enter them for each box individually or all at once by using the "All Boxes" section.
Click Submit All.
From the List>List & Prep page, locate the Working Shipments window, click the 3 horizontal lines to the right of the shipment and, select Work on Shipment.
Click the Print Updated 2D Barcodes button.

When the prompt appears, select Complete shipment in Stratify.
Then, click Next: Estimate Charges.
The Estimated Charges window will appear and display the carrier information, number of boxes, total shipment weight, estimated shipping costs, and the ship from address.
If everything looks correct, click Accept Charges to proceed.
You will be asked to confirm that you'd like to proceed with purchasing shipping. Once done, you will not be able to make changes to the shipment without voiding the charges. (Charges can be voided within 24 hours of purchase.)
Click Yes to proceed. The cost will be billed to your Amazon Seller account as an inbound transportation charge.
The shipping labels and box labels will automatically download as a .PDF to your computer's downloads folder. These labels can be printed in 4 x 6 or 8.5 x 11 sizes.
The 2D barcode labels will open in a new tab to be printed using your browser's printing functions.
Note: If your labels don't seem to be opening, try these steps- My 2D barcode labels or shipping labels aren't opening!
The shipment will change to "Ready for Carrier" status in the Working Shipments window in Stratify.
Note: Amazon marks shipments as "Shipped" with the first scan from the carrier. They will still show in the Working Shipments window in Stratify and as "Working" in Seller Central until that time.
Once the shipment is showing as "Shipped" in Seller Central, clicking the Sync Shipments button in Stratify will update the Working Shipments area and clear out the shipment.
That's it! Once you complete these steps for all the shipments in the batch, it will close automatically as this completes the workflow for it in Stratify.
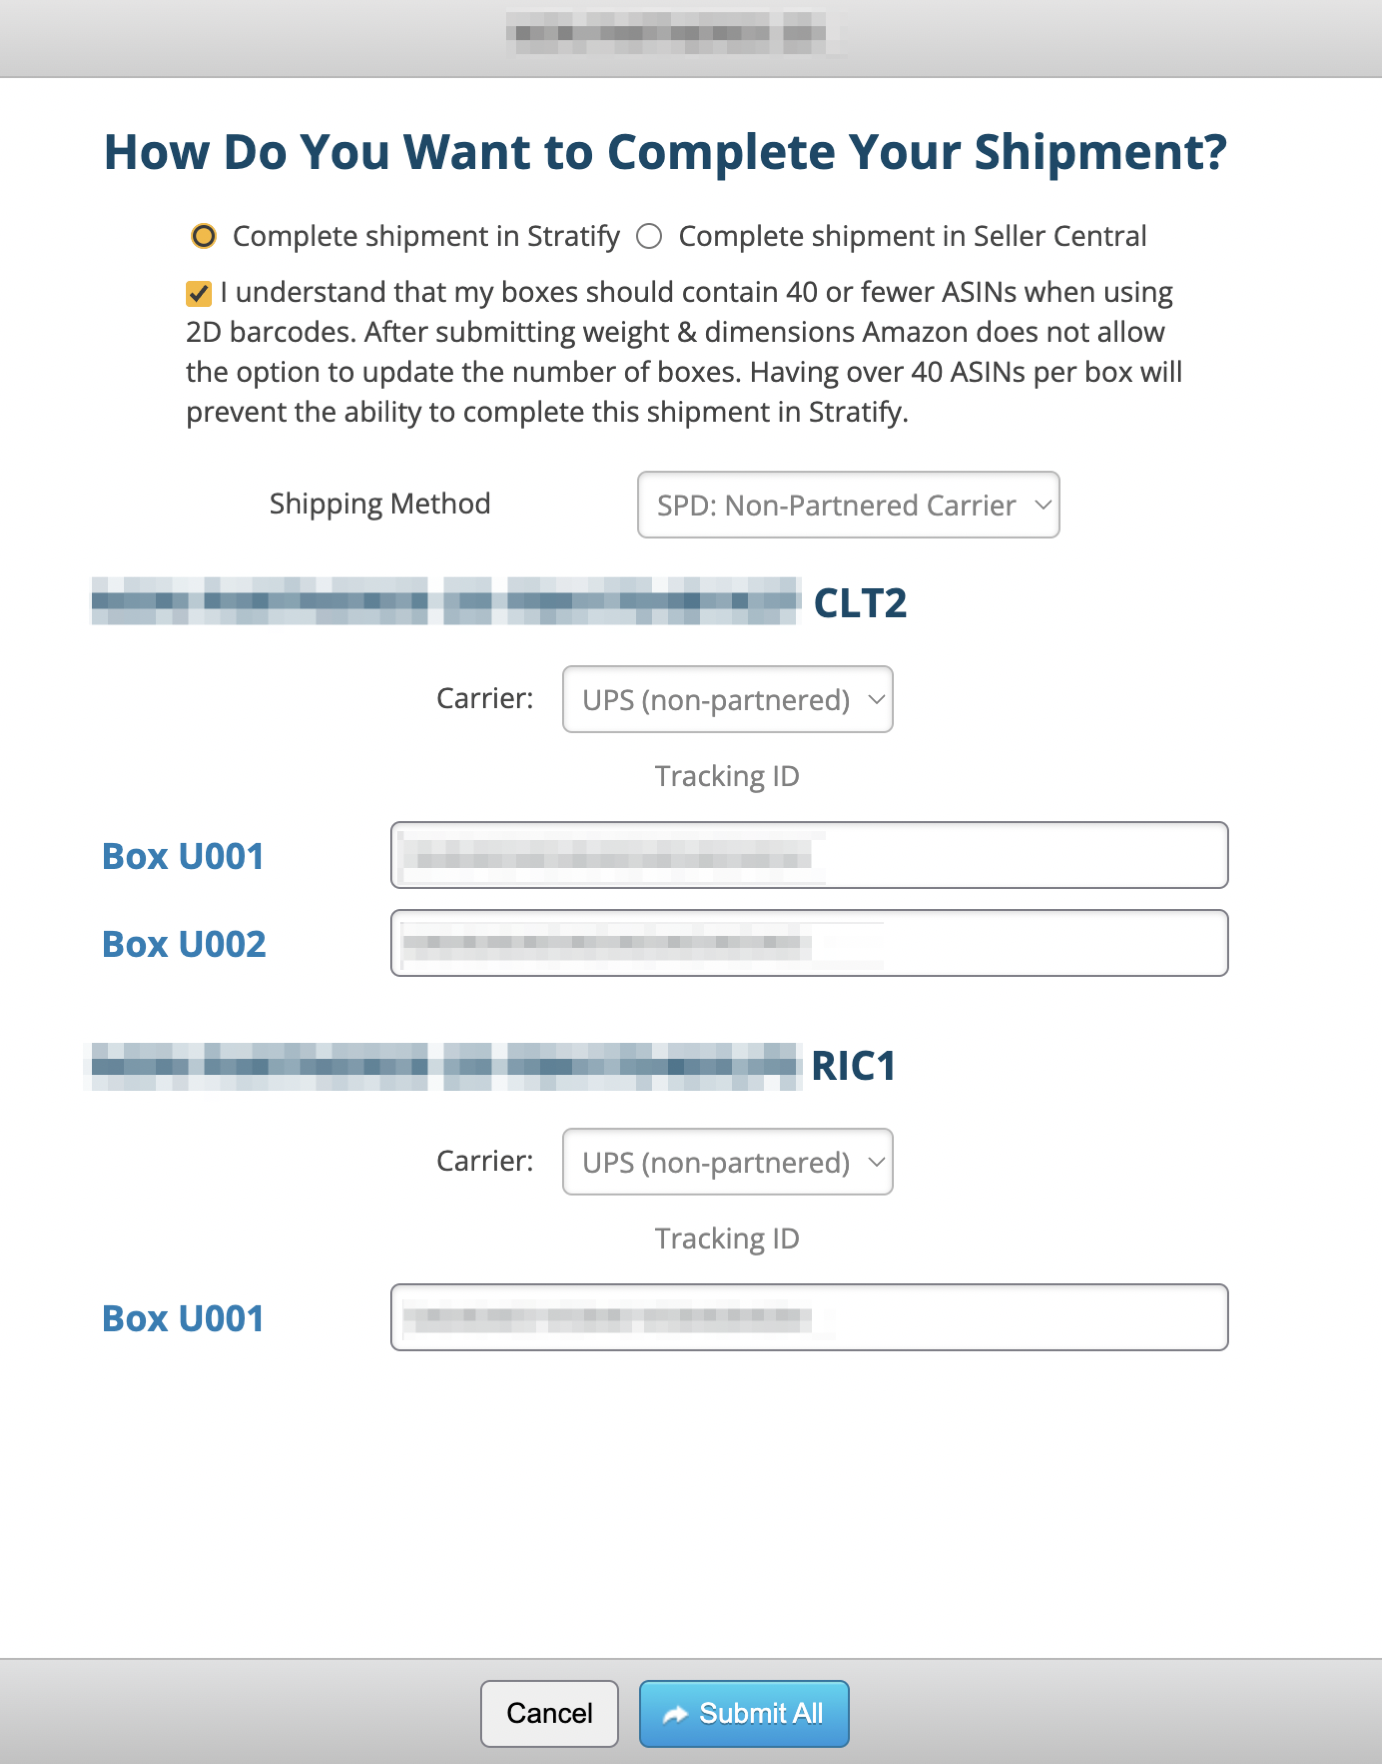
SPD: Non-Partnered Carrier
You will see a message stating that your boxes should contain 40 or fewer ASINs in order to proceed. If you need to make adjustments to your boxes, click Cancel. Or, if you're ready to proceed, click the checkbox next to the message.
Choose your Carrier from the dropdown menu for each shipment. The options are:
- UPS (non-partnered)
- DHL
- FedEx
- USPS
- Other
Next, enter the Tracking ID for the boxes in each shipment.
Note: Amazon currently allows a maximum of 50 characters to be entered for tracking IDs.
Click Submit All.
The 2D barcode labels will open in new tabs to be printed using your browser's printing functions.
The box labels will automatically download as a .PDF to your computer's downloads folder and can be printed in 4 x 6 or 8.5 x 11 sizes.
Note: If your labels don't seem to be opening, try these steps- My 2D barcode labels or shipping labels aren't opening!
The shipments will change to "Ready for Carrier" status in the Working Shipments window in Stratify.
Note: Amazon marks shipments as "Shipped" with the first scan from the carrier. They will still show in the Working Shipments window in Stratify and as "Working" in Seller Central until that time.
Once the shipment is showing as "Shipped" in Seller Central, clicking the Sync Shipments button in Stratify will update the Working Shipments area and clear out the shipment.
We recommend waiting until the boxes have shipped and Amazon changes the shipment status to "Shipped" before interacting with it in Seller Central. At that time, the tracking IDs entered in Stratify will be available for reference in Seller Central.
Once 2D Barcodes have been printed, the batch will close, as this step completes the batch process in Stratify.
Print All 2D Barcodes - Complete Shipment in Seller Central
After clicking Print All 2D Barcodes, a window will appear asking if you'd like to Complete Shipment in Stratify or Complete Shipment in Seller Central.
Click Complete shipment in Seller Central, then click Submit All.
Note: When using 2D barcodes, the weight/dimensions for the boxes entered in Stratify will not carry over to Send to Amazon when selecting the complete shipments in Seller Central. Due to this, Stratify will not ask for these details to prevent you from entering them twice.
The 2D barcode labels will open in a new tab to be printed using your browser's printing functions.
Note: If your labels don't seem to be opening, try these steps- My 2D barcode labels or shipping labels aren't opening!
Once 2D Barcodes have been printed for each shipment, the batch will close, as this step completes the batch process in Stratify. From here, you can move over to Seller Central to enter the weight/dimensions for your boxes, purchase shipping labels, and complete your shipments.
For next steps, please see- Next Steps in Send to Amazon