After you send your product feeds to Amazon and choose to create FBA shipments in a Private workflow, you will be brought to the Proposed FBA Shipments page.
Proposed FBA Shipment Page Overview
Completing the Batch/Providing Box Content
Proposed FBA Shipment Page Overview
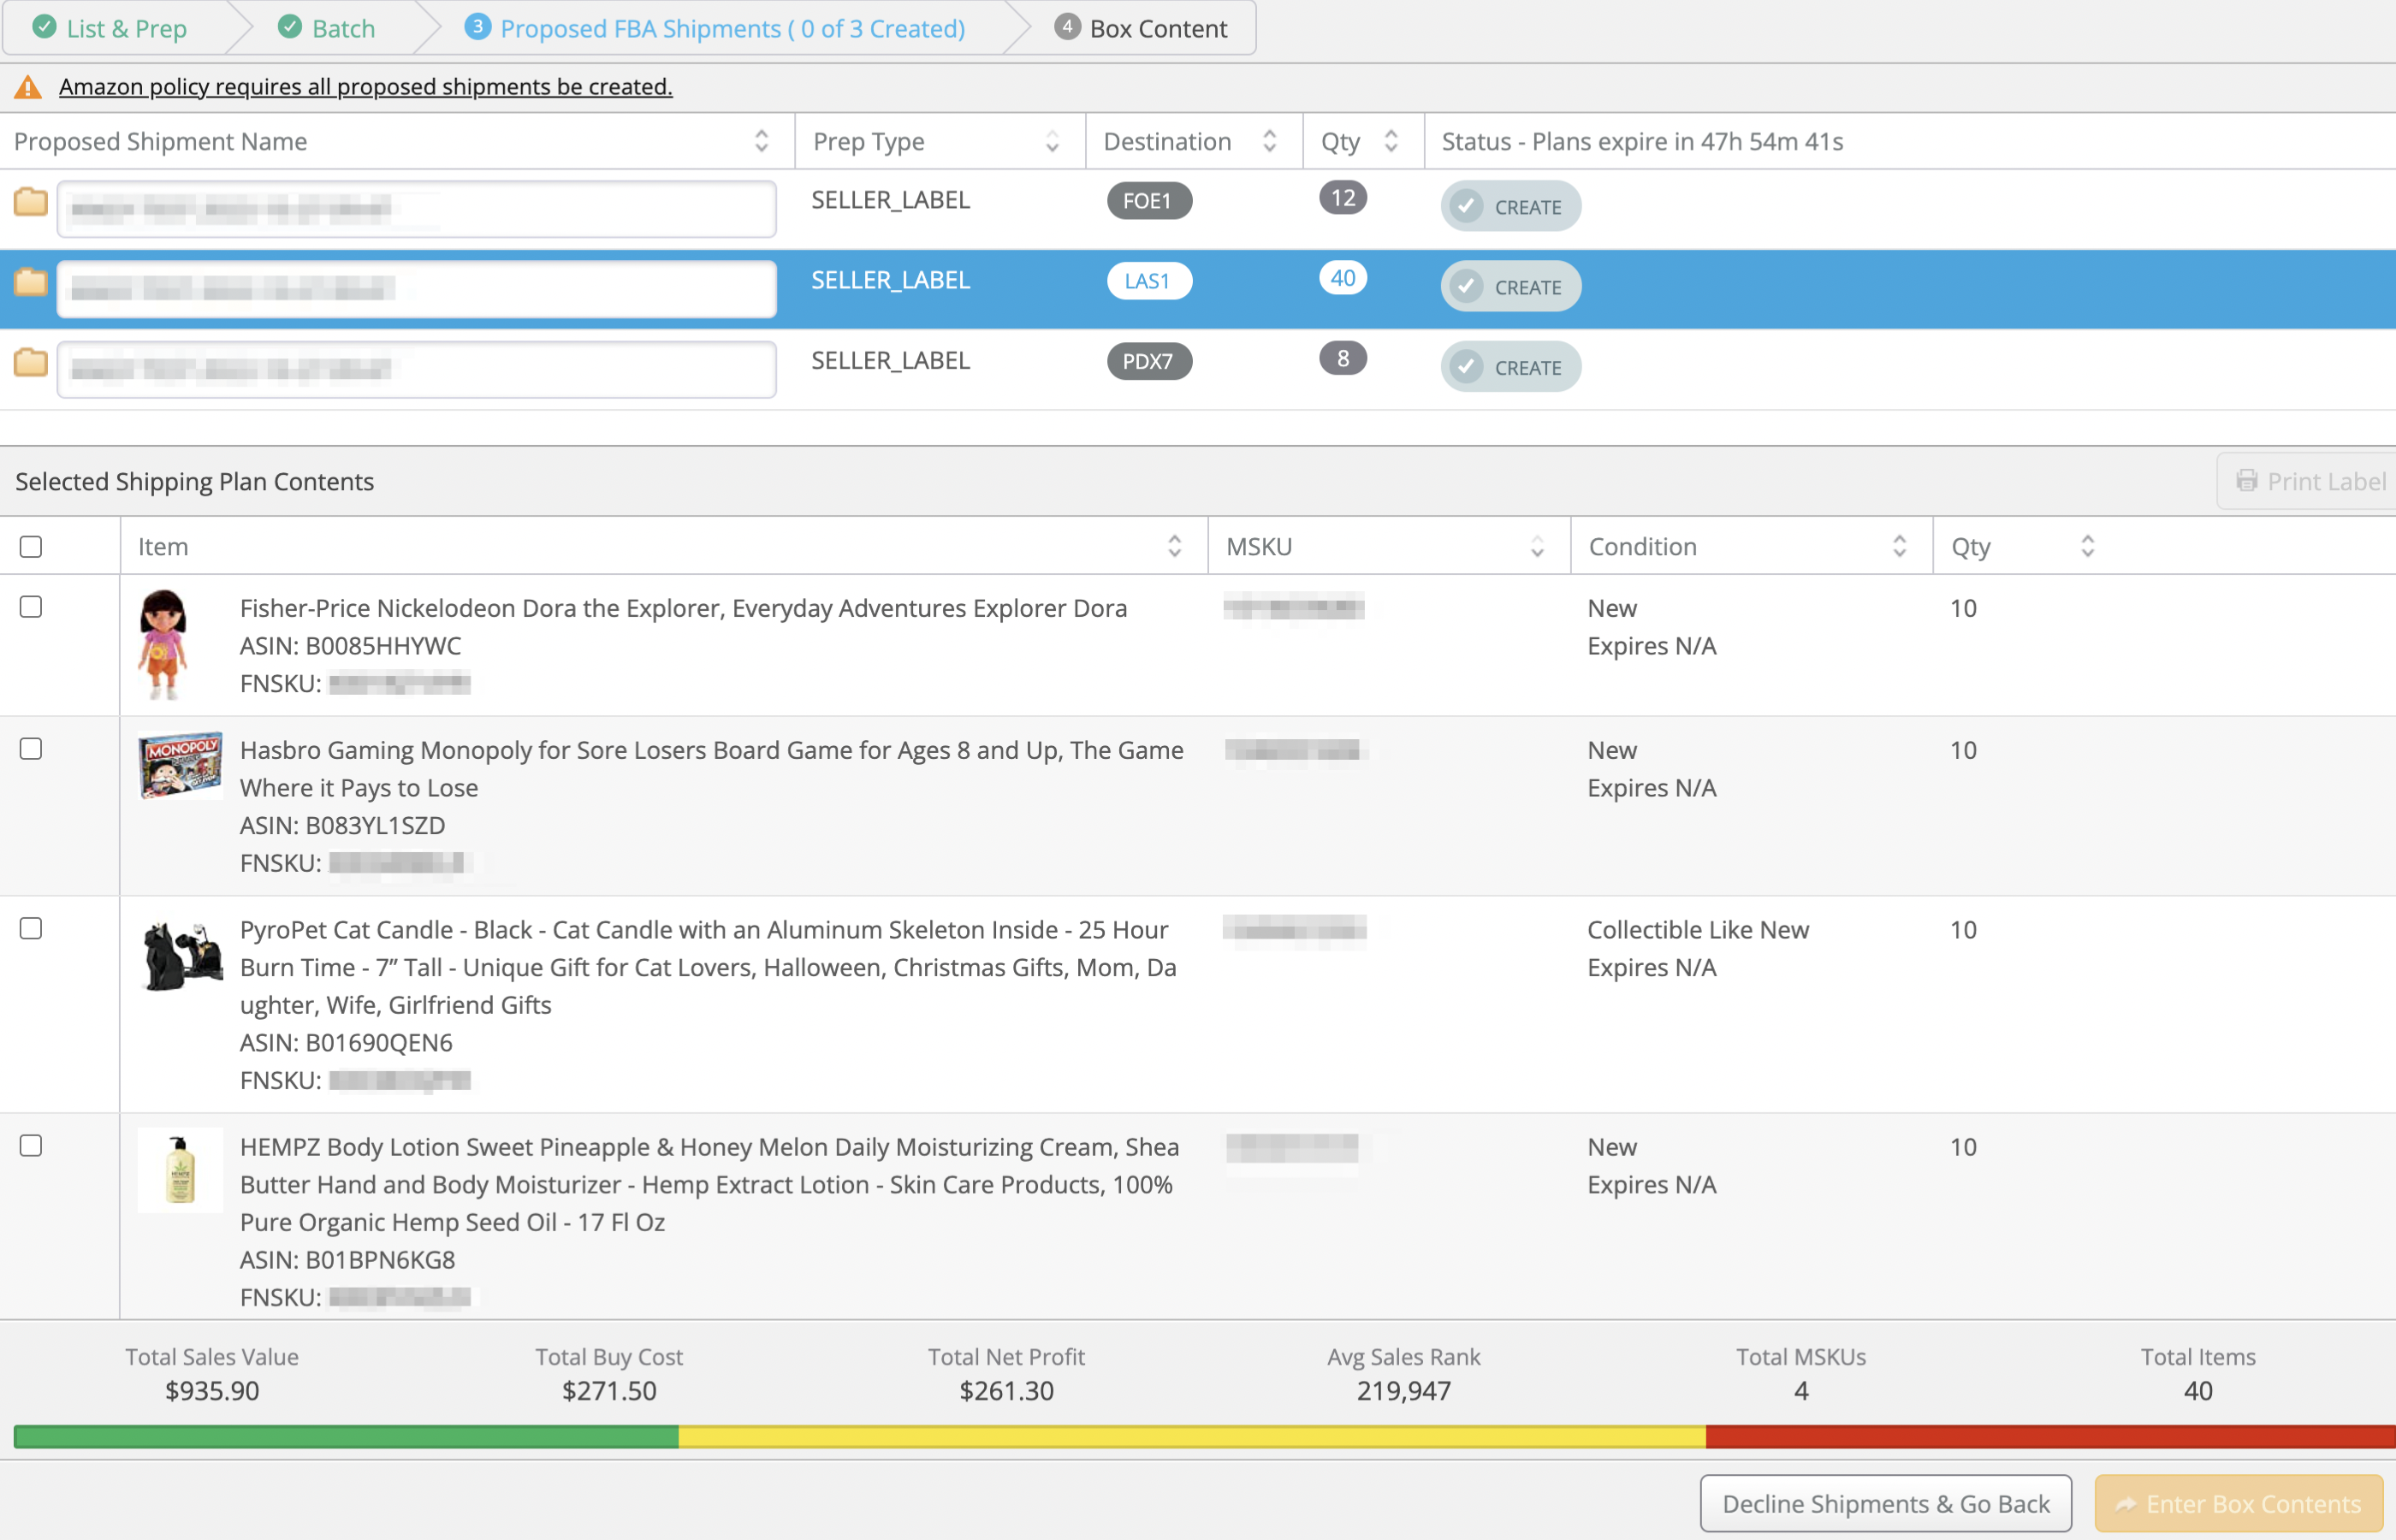
On this page, you can review Amazon's final destinations for the items in the batch and create your FBA shipments.
Towards the top of the page, you will see the name, prep type destination, and quantity of items for each proposed shipment. You can click on the Proposed Shipment Name field to change the shipment name if you'd like to. The Prep Type shown reflects the label type for each shipment (SELLER_LABEL, NO_LABEL, or AMAZON_LABEL.)
The proposed shipment destinations are determined by Amazon and are subject to expiration after 48 hours, in which they will re-evaluate the destinations. There is a countdown to when the plans expire on this page, so be sure to create your shipment(s) before the time runs out.
![]()
Clicking on a proposed shipment will display its contents toward the bottom of the page.
Label Printing
To print labels for the items in the shipments, click the checkbox next to each item you need to print a label for, then click the Print Label button at the top right.

When the prompt appears asking how many labels you need, you can enter a number if you need more or fewer labels than the quantity of the item in the shipment if needed. Then, click Print.
Creating Shipments
To create a shipment, click the Create button next to it. It will then prompt you if you are sure you'd like to create the shipment:

To proceed, click Yes, Create then the shipment will be created and will appear in the Working Shipments window. You can also click Cancel if you're not ready to create it yet.
If you have multiple shipments for a batch, you'll see how many you have left to create towards the top of the page.

If the Box Content Setting for the shipment was set to Off, you will see the option to Complete Shipment in Stratify after each created shipment. This option allows you to purchase shipping labels in Stratify but bypasses any opportunities to provide box-level content for the shipment. This will result in a manual processing fee.
Declining Shipments
If you get to the Proposed FBA page with a batch and decide you do not want to create the shipments, you have the option to decline them. This will take you back to the List & Prep page with the batch where you remove or add more items before attempting to create shipments again if needed.
To decline from creating the shipment(s) click the Decline Shipments & Go Back button at the bottom of the page.

Note: The option will not be available once you create any of the proposed shipments. This is due to Amazon's policy against only creating portions of your shipping plans. For more information, please refer to their help article on this topic.
Choosing this Decline Shipments & Go Back option will also delete the replenishment rows created automatically for the items in the batch (which are created when the feeds are sent). This helps avoid duplicate replenishment rows being created for each MSKU in order to keep your accounting data as accurate as possible.
Editing Quantity of Items
Once you have created a proposed shipment, the quantity field for each item in the shipment becomes editable.

Note: You are not able to edit the quantity of items while a shipment is still in a proposed state.
You must also still abide by the 5% or 6 unit rule from Amazon that limits how much you can change quantity. (You will see a pop-up warning you of this if you attempt to make changes outside of these limits.)
Changing Quantities
To edit the quantity of an item, click in the Qty field next to it to enter the number, then either tap the Tab or Enter/Return key on your keyboard or click outside of the field to apply the change.
The change in quantity will be reflected in Stratify as well as Seller Central for the shipment.
If you have the option to automatically print labels on quantity edit turned on in your Print Settings, any adjustments made to increase the quantity will also automatically print the same quantity of labels for that item.
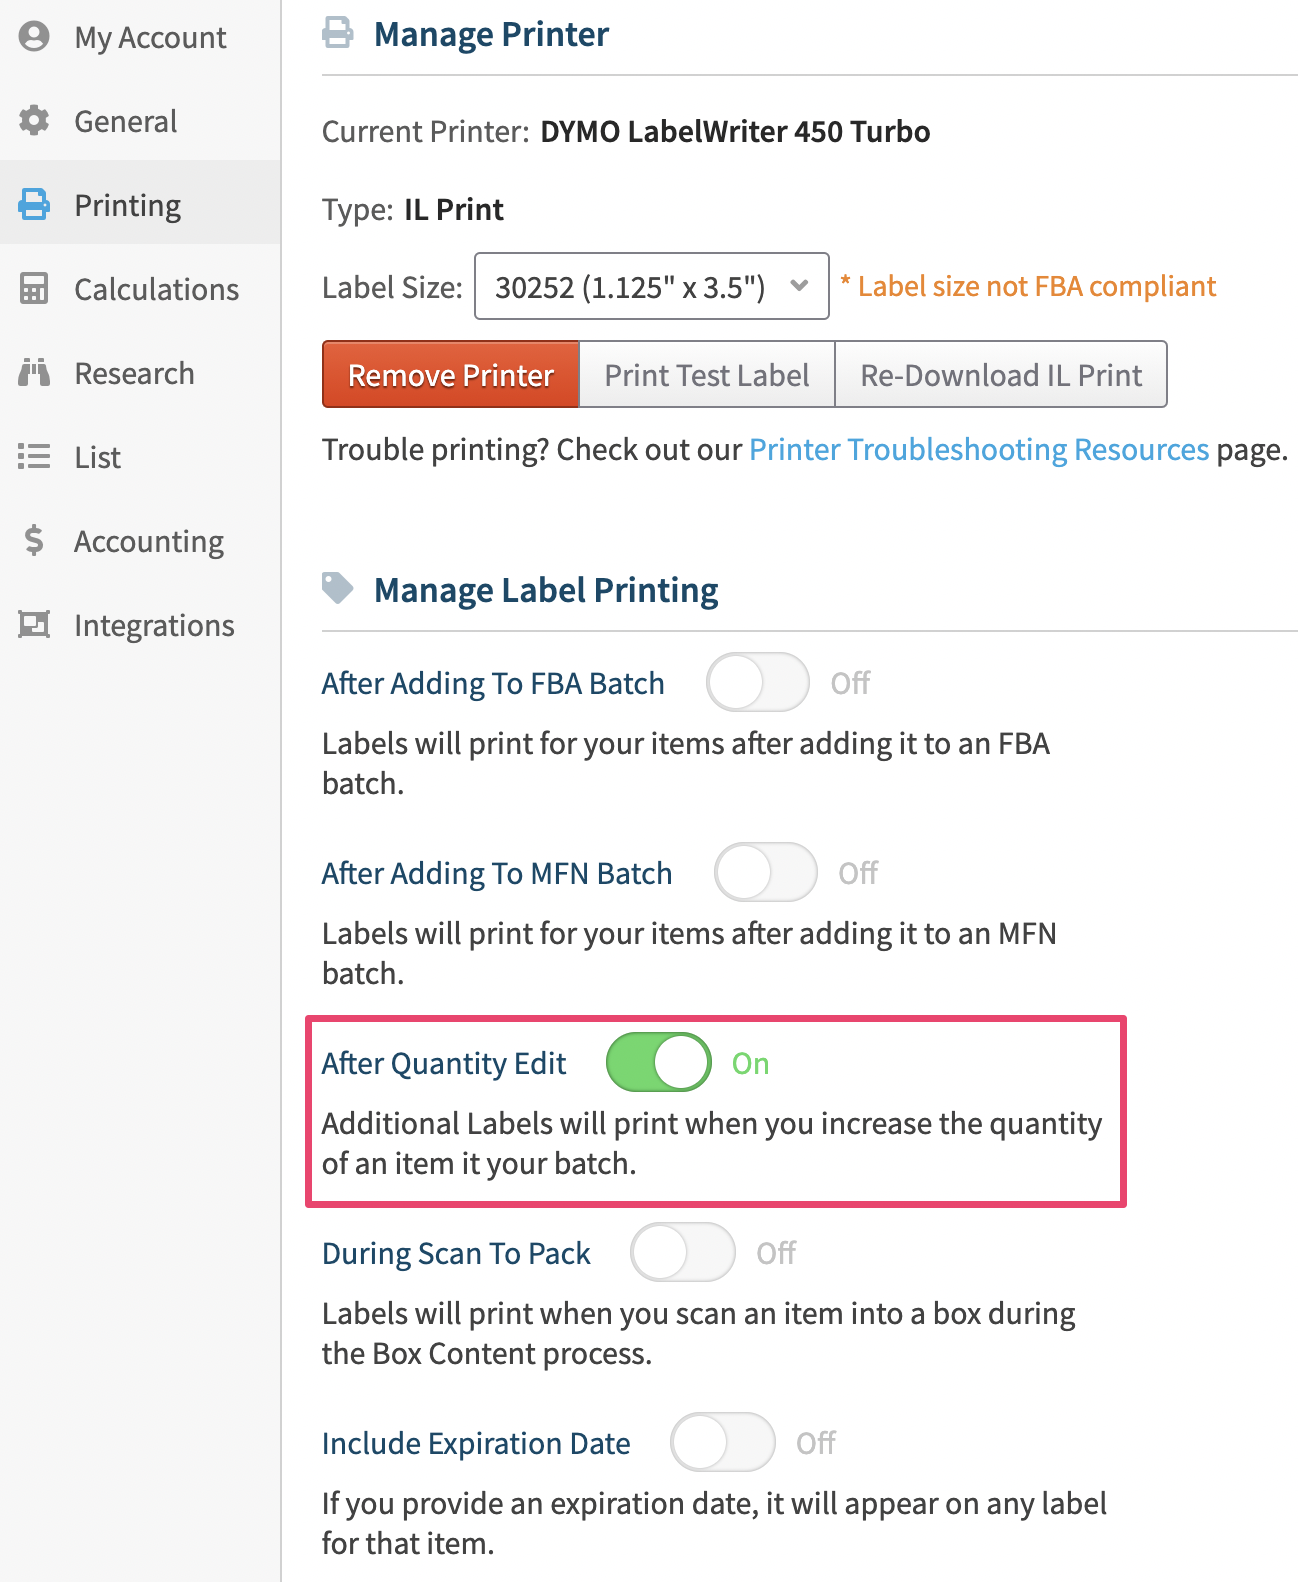
For more information on this and other print options, please see Print Settings
Deleting Items
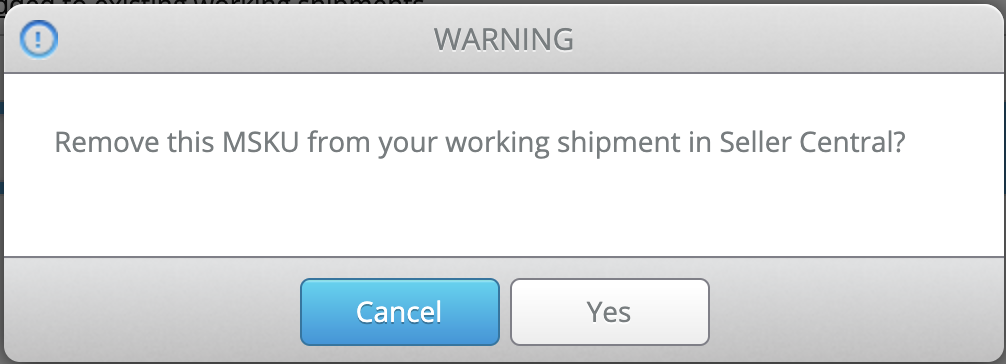
To delete an item from the shipment completely, click the trashcan icon next to it, or change the number in the Qty field to zero.

You will be asked to confirm this change. To proceed, click Yes and the item will be removed in Stratify as well as Seller Central for the shipment.
For more information on editing the quantity of items in a shipment, please see Editing Quantity of an Item in a Working Shipment
Completing the Batch/Providing Box Content
Once you've created all the proposed shipments for a batch, the next steps will vary depending on the Box Content setting for it.
Box Content Turned Off
You can choose whether you'd like to complete them and purchase shipping labels for them in Stratify or in Seller Central.
If you'd like to purchase your shipping labels in Stratify, click Complete Shipment in Stratify next to the shipment.
This option allows you to purchase shipping labels in Stratify but bypasses any opportunities to provide box-level content for the shipment. This will result in a manual processing fee.
For steps in this process, please see- Completing Shipments with Box Content Turned Off
Once all of the shipments for the batch have been completed in Stratify, the batch will close automatically, as this completes the workflow for it.
If you'd prefer to complete the shipments in Seller Central, click the Complete & Close Batch button at the bottom of the page.

This will close your batch as it completes the workflow in Stratify. From here, you can move to your Shipping Queue in Seller Central to finish the shipments and provide box-level content before purchasing shipping labels.
Box Content Turned On
After creating all of the proposed shipments, click the Enter Box Contents button at the bottom of the page.
This will bring you to the Box Content page with the shipments where you can assign the items in them to boxes and send that information over to Amazon. For steps to complete this portion of the workflow, refer to the following articles depending on the Box Content Setting for the batch: