Looking for a quick start? Here are some step-by-step instructions on how to list in a Private batch.
Creating and Adding to a Batch
Sending Batch Details and Creating Shipments
Assigning Box Content Information
Creating and Adding to a Batch
Navigate to List > List & Prep page.
1. Click + New Batch.

2. Choose your batch options. A full explanation of each option can be found here.
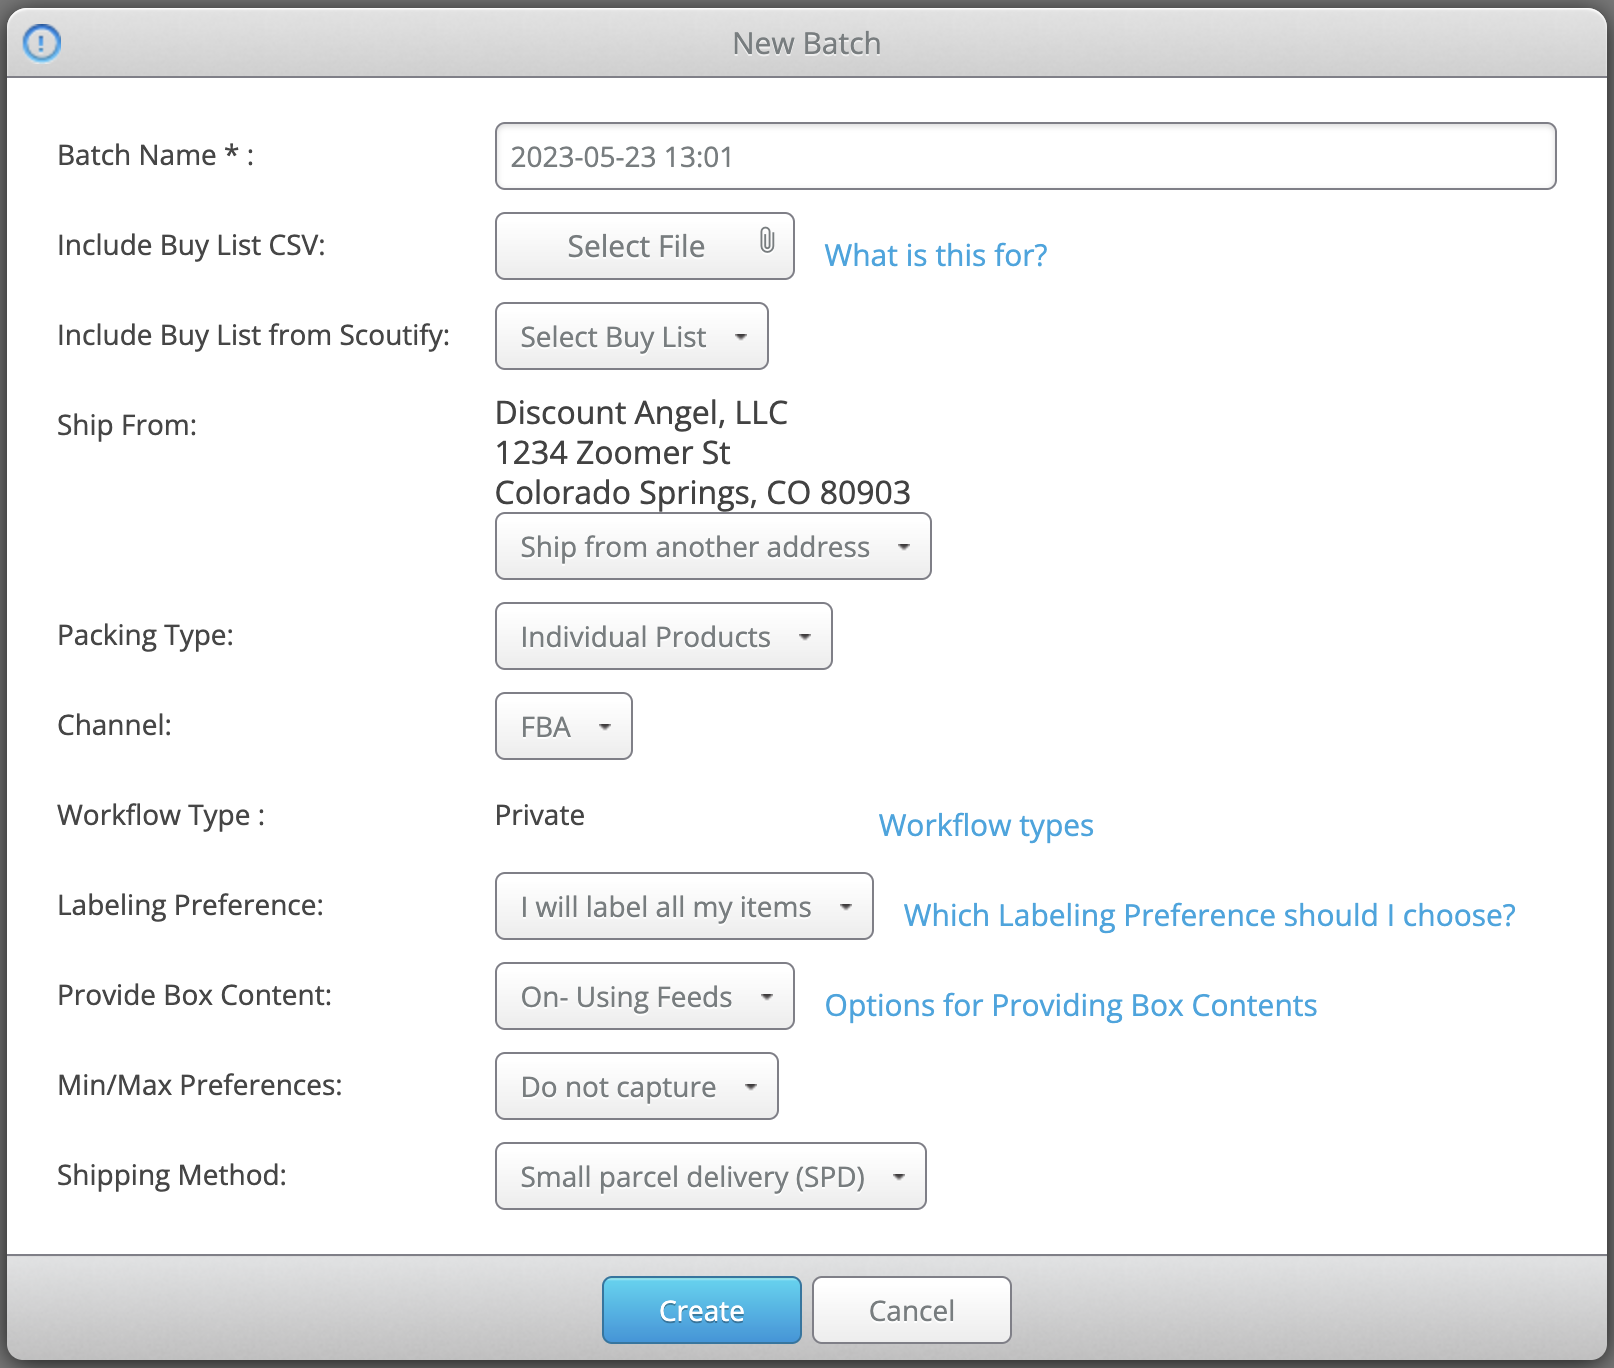
3. Click Create.

4. Your batch will display on the left-hand side of the page, underneath Open Batches. Now is the time to create a Custom MSKU if needed.
5. With your cursor in the search bar, scan a UPC or type in an item's ASIN, ISBN, title, UPC, keyword, or FNSKU of a previous MSKU to search for an item. You'll have the choice to search your Unlisted Inventory as well.

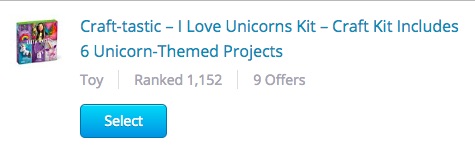
6. Choose Select once you locate your item. If the item is already in your Inventory, you will have the option to replenish an existing MSKU.
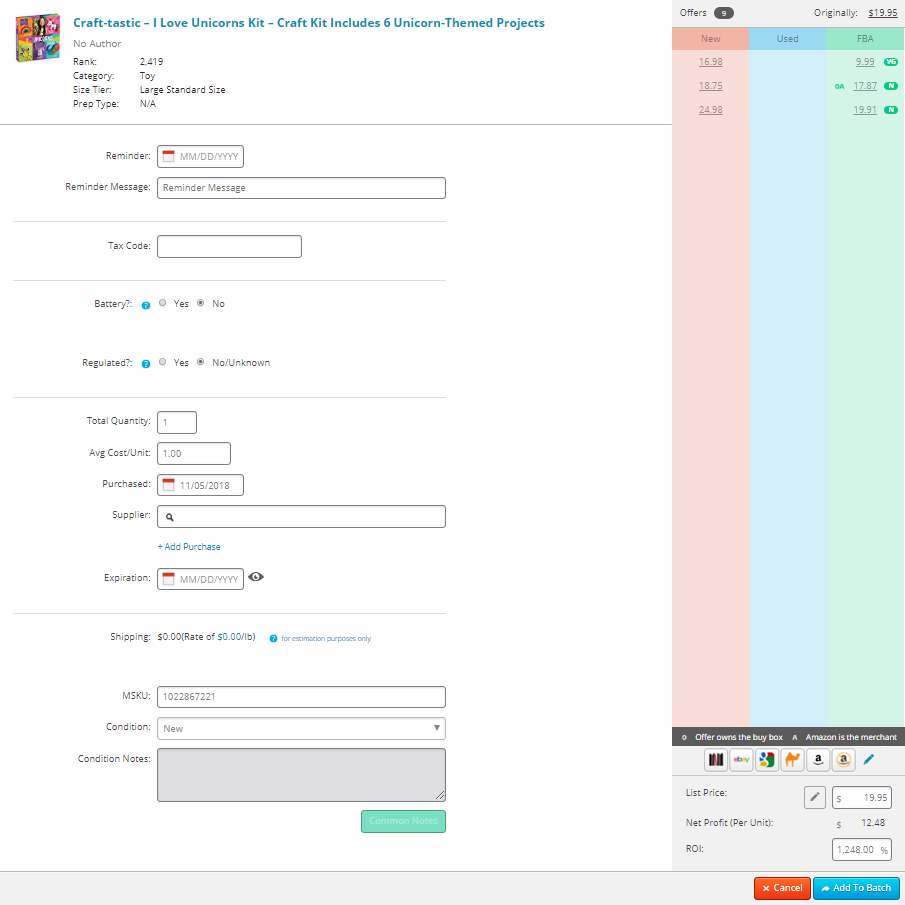
7. Fill in your item details and click Add to Batch. For details on what to add, see here.
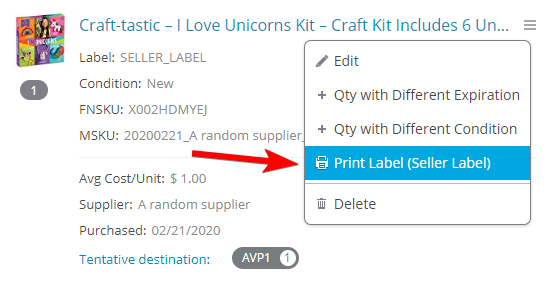
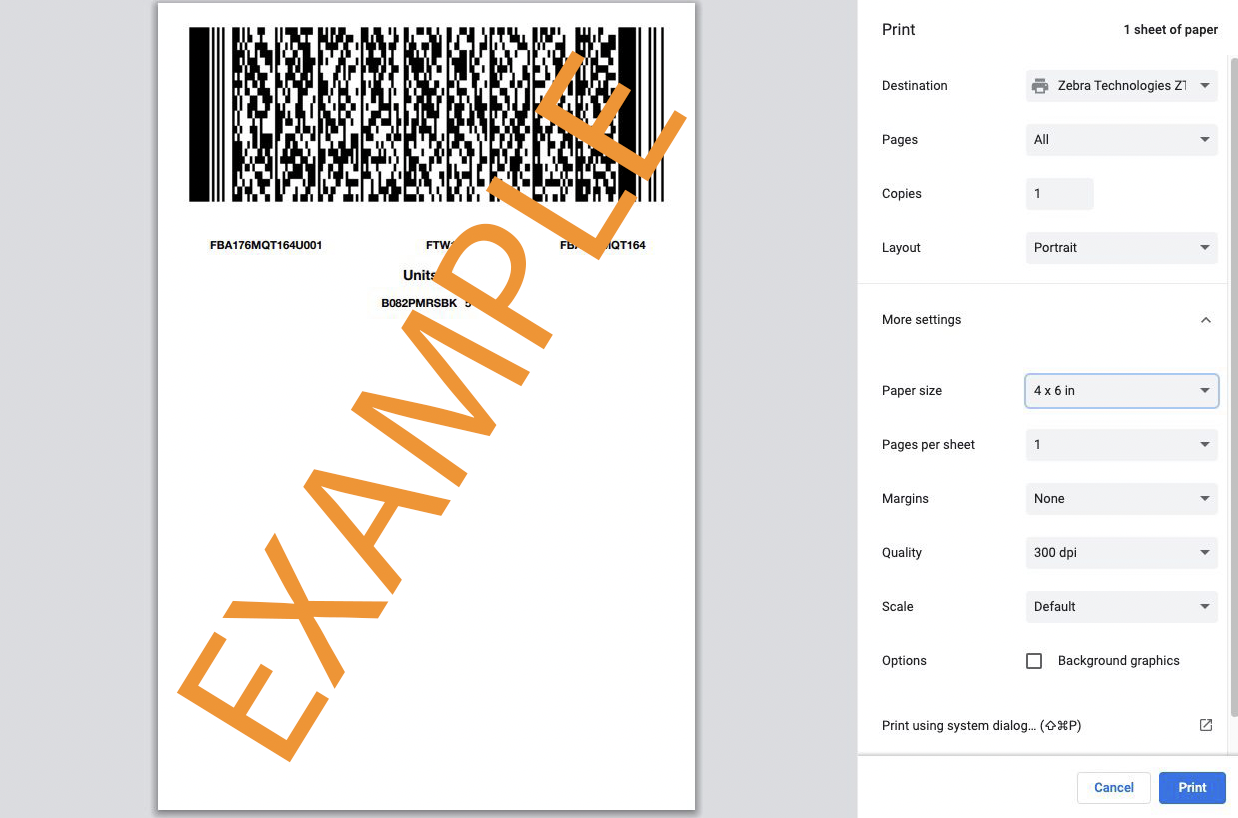
8. Print Labels if needed.
Sending Batch Details and Creating Shipments
9. After adding all items, click Review Batch.

10. Take a moment to review your batch details. Click Submit.

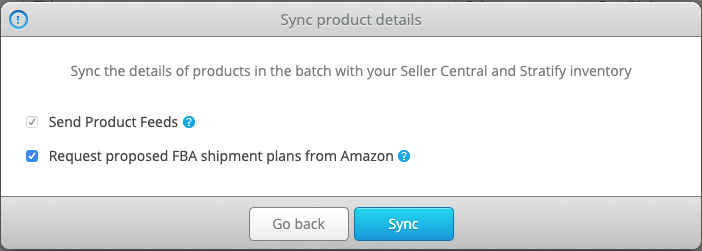
11. Leaving Request proposed FBA shipment plans checked, click Sync.
12. Review Proposed Shipments. Choose to Create all Proposed Shipments.


13. Continue onto the next batch step:
If Box Content is OFF - choose Complete and Close Batch.

If you'd like to purchase shipping through Stratify instead, please see- Completing Shipments with Box Content Turned Off
If Box Content is ON - choose Enter Box Contents.

Assigning Box Content Information
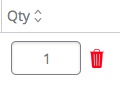
If you need to edit quantities, you can do so now.
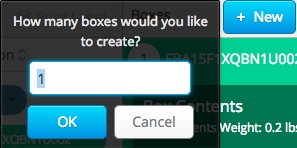
14. You start with box one. Add a new box by clicking + New. Enter the number of additional boxes needed.
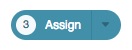
15. Click the drop-down Assign arrow next to an item.
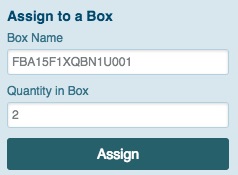
16. Enter the quantity to assign to box one. Click Assign.
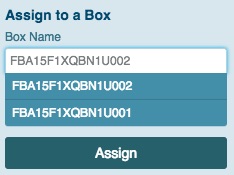
17. Repeat assigning steps, and click a box name for additional box options. Select a box and click Assign.
For steps on scanning to boxes, click here.
For info on more Private Workflow box content features, click here.
18. After assigning all items, continue to the next batch step:
If Box Content is ON USING FEEDS - click Transmit Box Contents next to the assigned shipment.

If Box Content is ON USING 2D BARCODES - click Print 2D Barcodes next to the assigned shipment.

Purchasing Shipping
Purchasing shipping and completing a shipment in Stratify can only be done for SPD shipments.
19. When the prompt appears, select Complete shipment in Stratify.

20. Select SPD: Partnered Carrier as your Shipping Method.
If purchasing shipping through a non-Amazon-partnered carrier, choose SPD: Non-Partnered Carrier to enter the tracking IDs.
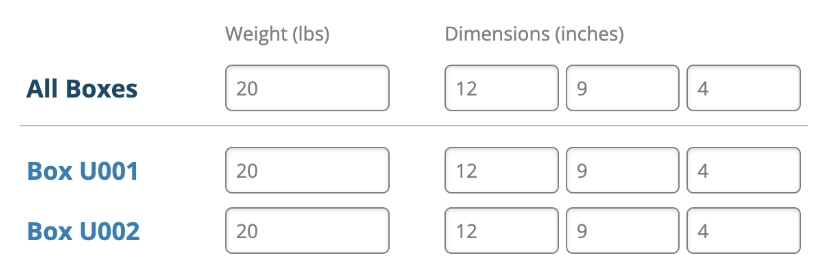
21. Enter box weight and dimensions.
If Box Content is ON USING FEEDS - wait for your feeds to process successfully before moving to the next step.
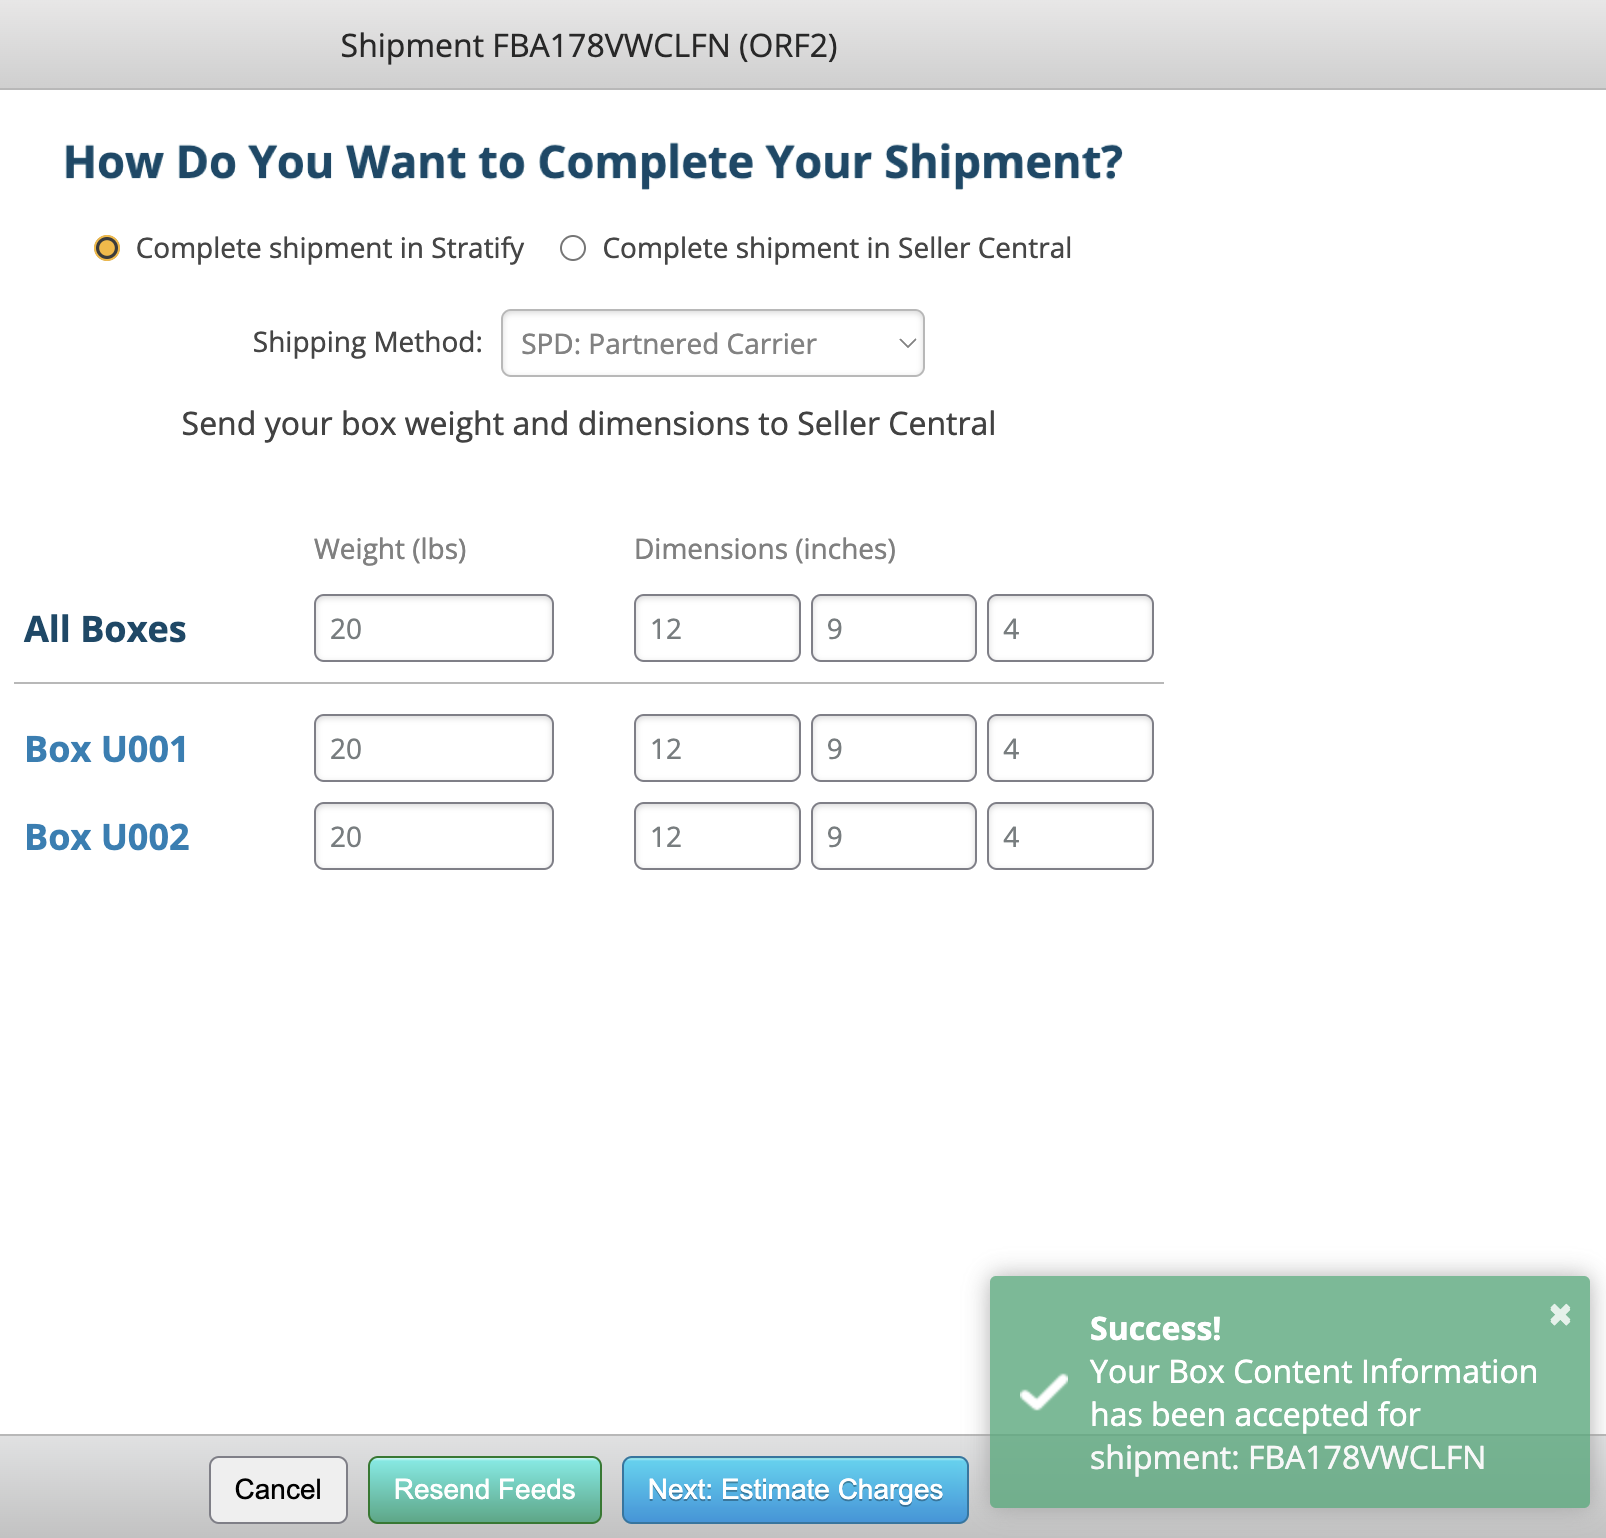
If you receive an error message, troubleshoot here.
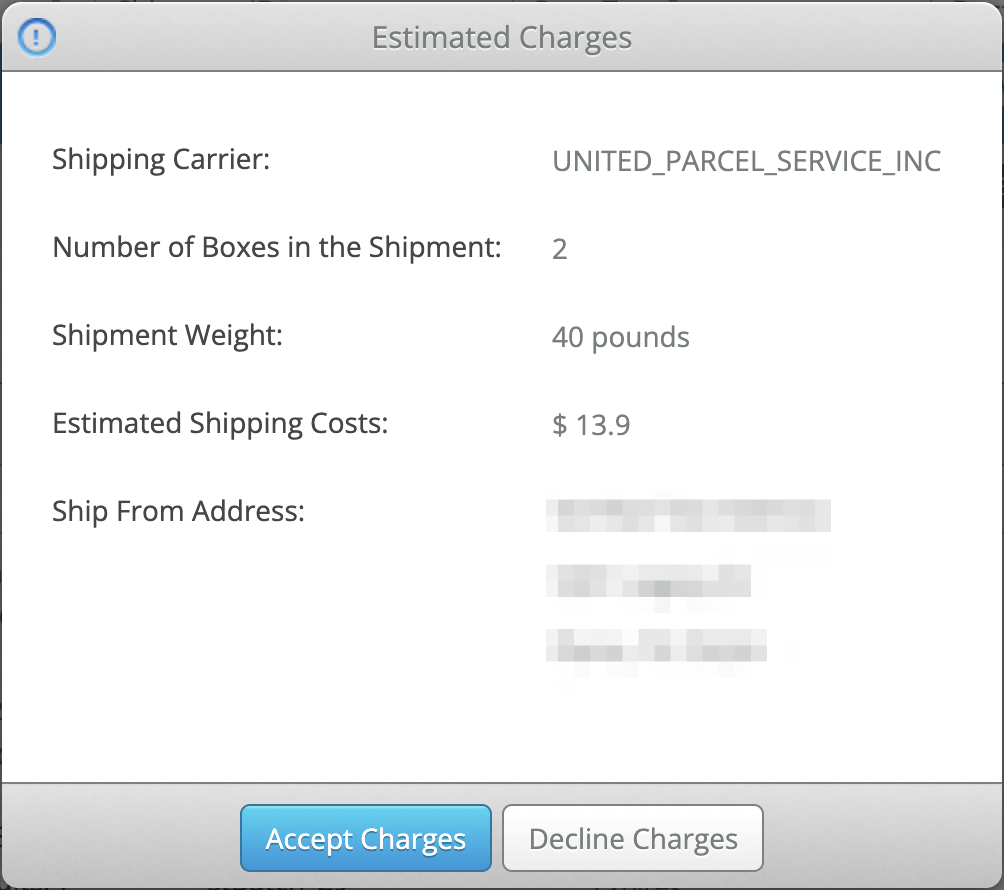
22. Click Next: Estimate Charges.
23. When the prompt appears, click Accept Charges.
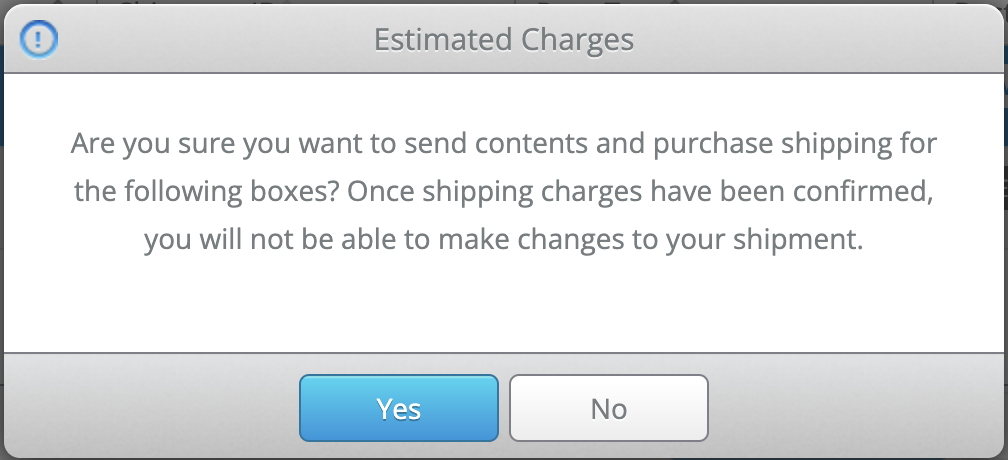
24. At the next prompt, click Yes to confirm the charges.
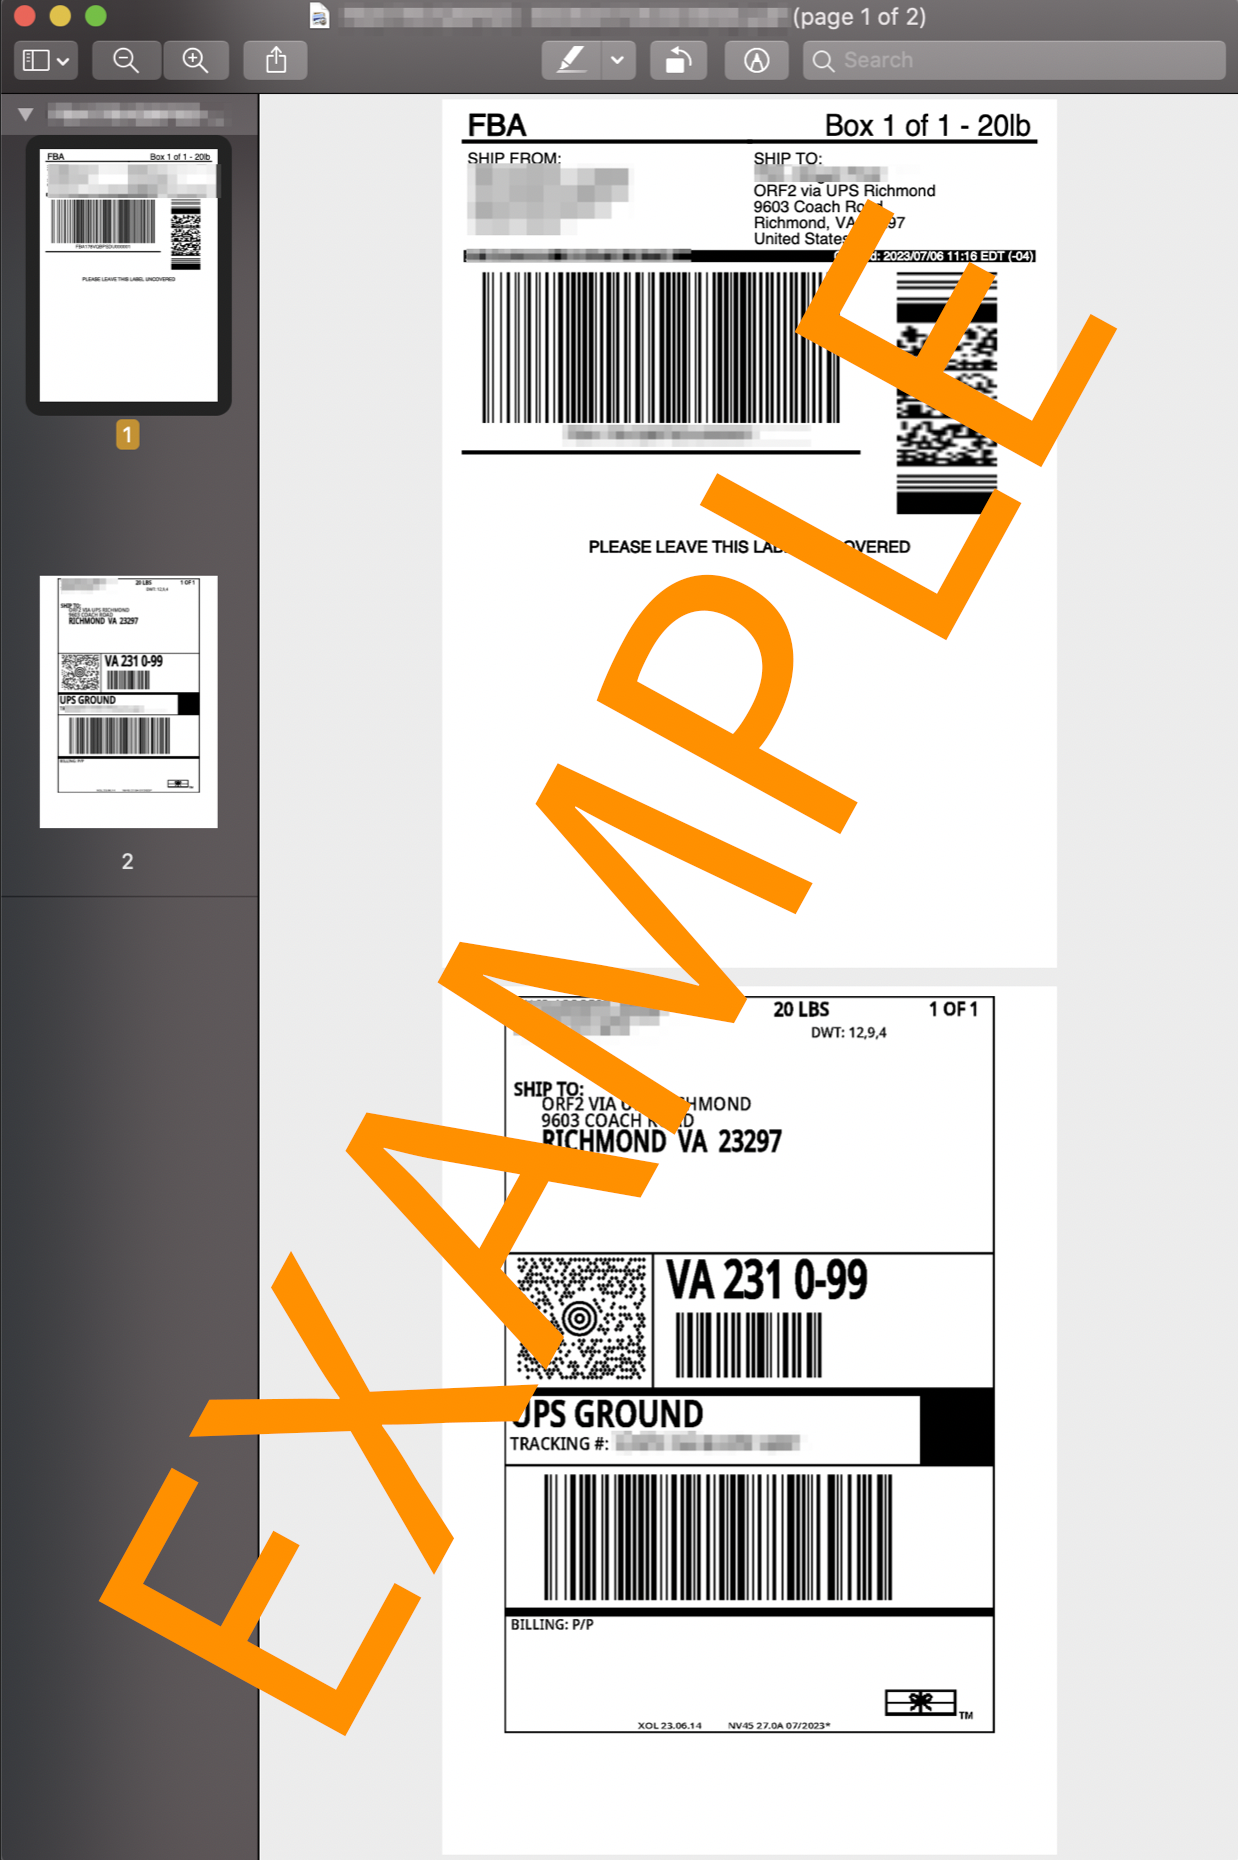
25. Print your shipping labels, which will download as a .PDF to your computer.
If Box Content is ON USING 2D BARCODES - The 2D barcode labels will open in a new tab to be printed.
If labels don't open, troubleshoot here.
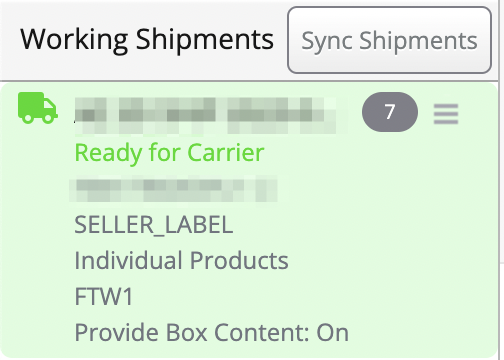
26. Verify that the shipment status changed to Ready for Carrier in the Working Shipments window in Stratify.